Our guide on how to use the Silhouette Portrait by Susan Niner Janes is great for beginners who are just getting to know this great machine.
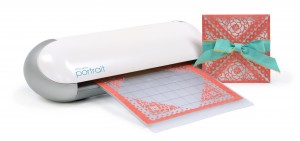
The Silhouette Portrait is a smaller, lighter version of the CAMEO electric cutting tool. Like a home printer, it plugs into your PC or Mac with a simple USB cable. Instead of printing, it uses a small blade to cut paper, cardstock, vinyl, fabric and more. For papercrafters, this machine gives you the creative freedom to design your very own creations on the computer then cut them out – with impressively professional results. Each machine comes with the user-friendly Silhouette Studio program to help you design your own creations, or you can purchase pre-made designs from the Silhouette Store. As well as being affordable, this machine also takes up no more space than a printer.
Susan has designed some lovely projects for issue 84 of PaperCrafter magazine. To download the Studio files you need to recreate these projects. click here: PaperCrafter magazine Silhouette Portrait templates
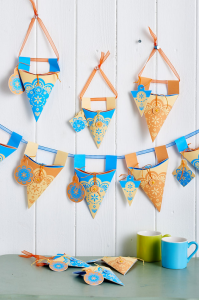
Doily storage bunting made with the Silhouette Portrait by Susan Niner Janes for PaperCrafter magazine
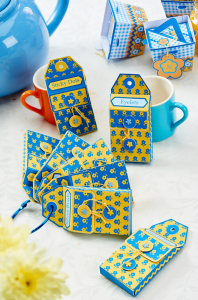
Keyring Storage Pockets made with the Silhouette Portrait by Susan Niner Janes for PaperCrafter magazine
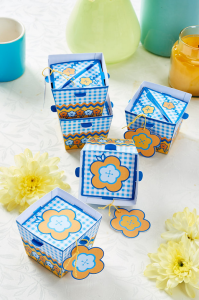
Button Flower Gift Boxes made with the Silhouette Portrait by Susan Niner Janes for PaperCrafter magazine
If you are new to Silhouette, here are some quick-start basics to help you create our projects. Find the full instructions for the makes in issue 84, on sale from 3rd July 2015.
How to use the Silhouette Portrait
1. Open up the Silhouette Studio program. Select the portrait page orientation (third icon from the right on the top toolbar).
2. Open up the provided files in The Silhouette Studio program. Make sure the registration marks are turned on (second icon to the right on the top toolbar).
3. Print the design on A4 photocopier card (printer icon on the left-hand side of the top toolbar).
4. Stick the printed design onto the Silhouette cutting mat – the little black square belongs in the top lefthand corner.
5. Open the lid of the machine. Check the blade to see that it is on the correct setting (2 or 3 is good for 160gsm card).
6. Turn on your Silhouette Machine (button on lower right). Make sure the sign in the lighted window says Load Cutting Mat (the top option). (If it doesn’t say Load Cutting Mat, use the directional arrow to change the selection).
7. Align the mat with the raised line at the left of the machine. Press the Enter button to feed the mat into the machine.
8. In the Silhouette Studio program, click on the picture of the Silhouette machine (on the left top, to the right of the printer icon). Follow the instructions in the ‘Send to Silhouette’ window. The machine will read the registration marks and cut out the shapes as directed.
9. When the cut is finished, press the button on the right-hand control panel of the machine to unload the mat.
We hope this handy guide has helped you learn how to use the Silhouette Portrait. Don’t own a Silhouette Portrait but want to try these projects? No problem - find printable PDFs of all the templates here: PaperCrafter mag Susan Niner Janes templates
10 Peel the cut-outs off the mat. Turn off the cut window in the Silhouette Studio program and then the Silhouette machine itself.


