


Card making Die cutting How to Mother’s Day cards Mother’s Day crafts Papercraft Stamping Techniques Digi Stamps
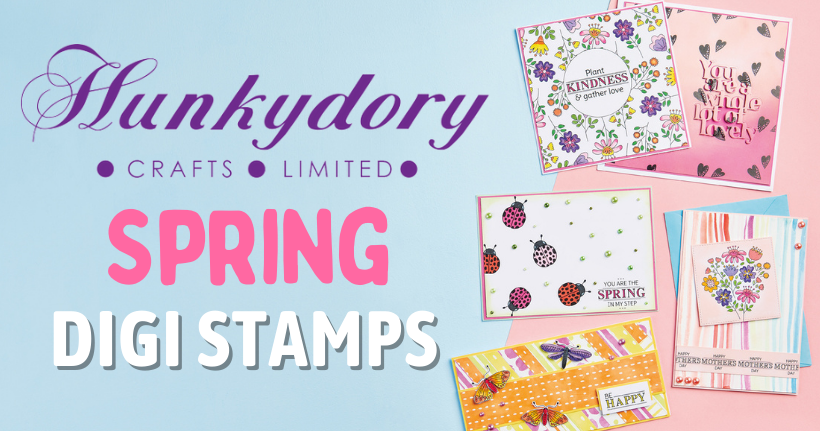
Expect garden motifs and uplifting sentiments in your spring printable pack
Please login to download. Sign in here
Thanks to our pals at Hunkydory, you can add 11 new digi stamps to your stash, ready for a new season ahead… hurry up, spring! Think whimsical motifs, sweet sentiments and background prints to make your cardmaking a breeze. What’s more, designer Rebekah Monks from Hunkydory’s creative team joins us with five beautiful card projects – find the full tutorials below. Have a go!
Download and print them
1 Press ‘Click here to download now’ then log in – or register if you don’t currently have an account with us.
2 Click ‘Download now’ and you’ll see the download processing at the bottom of your screen.
3 Open the folder, then right-click on the file and select ‘Print’.
Statement sentiments
Want to draw more attention to your sentiments? There’s three to choose from in your digi stamp pack and plenty of ways to play around with them. Repeat stamp to create a sentiment strip as demonstrated on Rebekah’s Mother’s Day card. Colour in the block letters, mount onto coloured card, lift and add dimension with 3D foam pads or why not frame your sentiment within a shape like Rebekah’s ‘Kindness’ greeting?
Shade & fade
Rebekah has used brush markers to colour in her digi stamps for a soft and delicate look. Take a look at her ‘Kindness’ and Mother’s Day cards and you’ll notice she has applied subtle shading to the floral motifs. To do this successfully, simply apply heavier pressure where you want the pigment to be darker and lay off the pressure for the lighter areas. This will give you a diffused and blended look, similar to that of watercolour paints.
Ways with water brushes
To tie the background in with her softly coloured digi stamps, Rebekah has used a water brush to create a patterned background for her Mother’s Day card. Simply choose a mix of colours and draw lines of various widths by picking up the ink with a water brush… no ruler required! The overall look is very artsy and doesn’t require precision – in fact, the more inexact, the better! Again, the effect is very similar to watercolours, just without the mess.

YOU WILL NEED:
Hunkydory Spring digi stamps
Dies: Hunkydory Duo Stiched Squares, Moonstone Sentiments Whole Lot of Lovely
Paper pad, Duo Designs Doodle Dots & Sketched Stripes
Prism ink pads, various colours
Prism brush markers, various colours
Cardstock: white, pink, green, yellow
Tools: ink blending, water brushes, glass mat
Pearls
Printer
Adhesives: glue, 3D foam pads
Die-cutting machine
Inked Stripes
1. Cover a white blank with pink cardstock. Cut white card slightly smaller, press multiple coloured ink pads onto a glass mat and draw vertical stripes onto the panel using a water brush to pick up the pigment.
2. Print off the floral bouquet digi stamp and die cut using a stitch-edged square. Colour in with brush markers, and sponge around the motif using a pink ink pad. Adhere to the card front at an angle with 3D foam pads.
3. Create a border strip using the ‘Happy Mother’s Day’ digi stamp, blend pink ink over the top and secure along the bottom of the card. Embellish with pearls.
Ladybird Trail
1. Cover a white blank with green, then mount pink card on top. On your computer, create a panel slightly smaller than the pink layer, and arrange multiple ladybirds on the left-hand side in a random trailing pattern, followed by a sentiment bottom-right.
2. Print onto white cardstock and colour in the ladybirds and sentiment using brush markers. Blend green ink around the edges. Layer onto the card front and embellish with pearls.
Floral Background
1. Mount pink card onto a white blank. On your computer, create a smaller panel and fill with the floral background digi stamp with a sentiment circle in the centre.
2. Print onto white, then layer onto the card front. Colour in the flowers and sentiment using brush markers.
Butterfly Trio
1. Cover a white blank with yellow card. Snip individual strips from patterned papers and fix onto the card front at a diagonal angle, ensuring to leave a narrow edge.
2. Run a strip of yellow card along the middle followed by orange patterned paper. Print and colour in three butterflies using brush markers, trim and fix to the card using 3D foam pads.
3. Print a sentiment onto white, then layer onto yellow card, offsetting the two. Colour in the letters using a yellow brush marker. Finish with pearls.
Spotlight sentiment
1. Mount pink card onto a white blank. Print a background of hearts onto white, slightly smaller than the pink panel.
2. Blend light and dark pink ink pads onto the panel and die cut a sentiment from the background. Attach the die-cut sentiment back onto the panel using 3D foam pads.
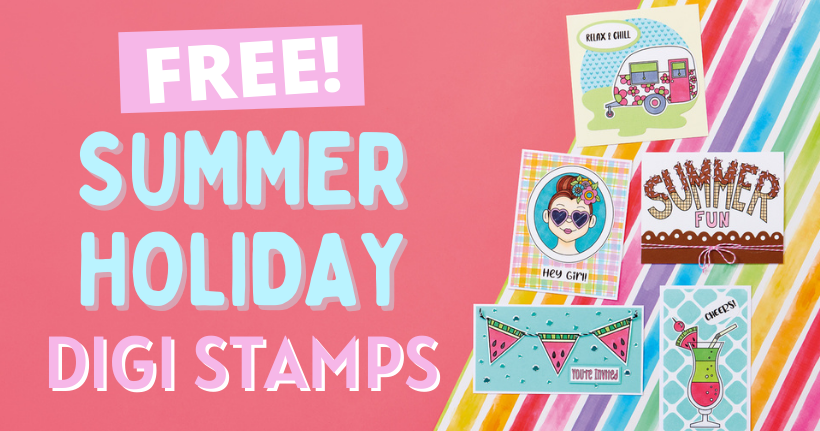
Download our free digi stamps and get your summer crafting off to a sizzling start. Colette Smith has drawn up 12 exclusive designs just for you – expect classic summer holiday…
Download our printable, grab your favourite pens or paints, then start colouring! This printable is perfect for crafters young and old, and you can go as simple or as extravagant…

To download our templates, simply click ‘Download Now!’ and it will open in your browser. Why not send us a picture of your project once you’re done? For your chance to be…
Home decor Home decorations Papercraft Papercrafter Party makes Templates

There’s nothing quite so relaxing, or quite so fun, as settling down with a good colouring page. It’s even better if that colouring page happens to include Wallace & Gromit. This duo…


