


Birthday crafting Home decor Home decorations How to Papercraft Party makes Video tutorial
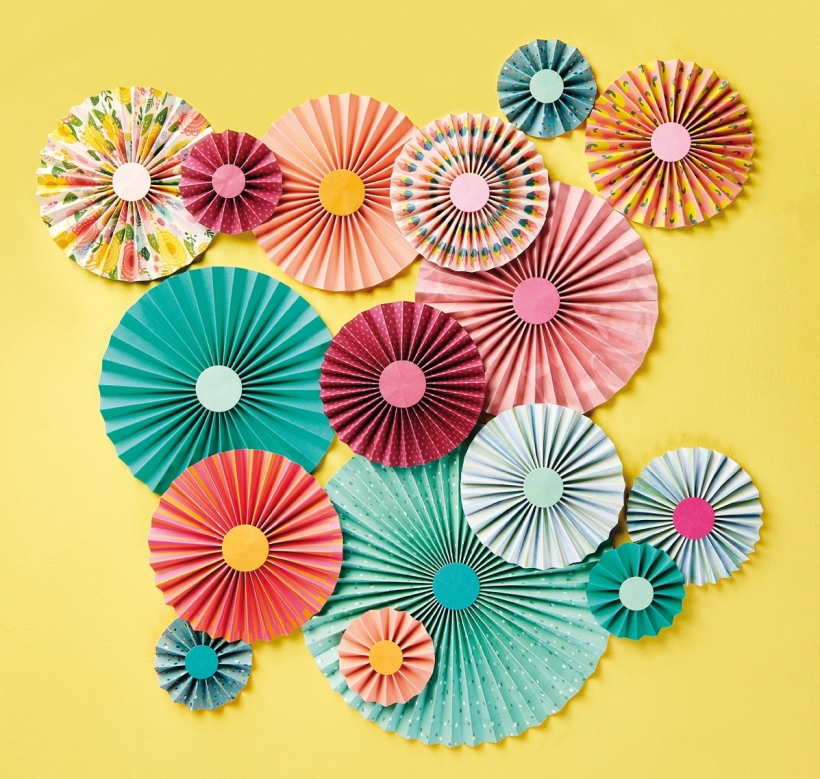
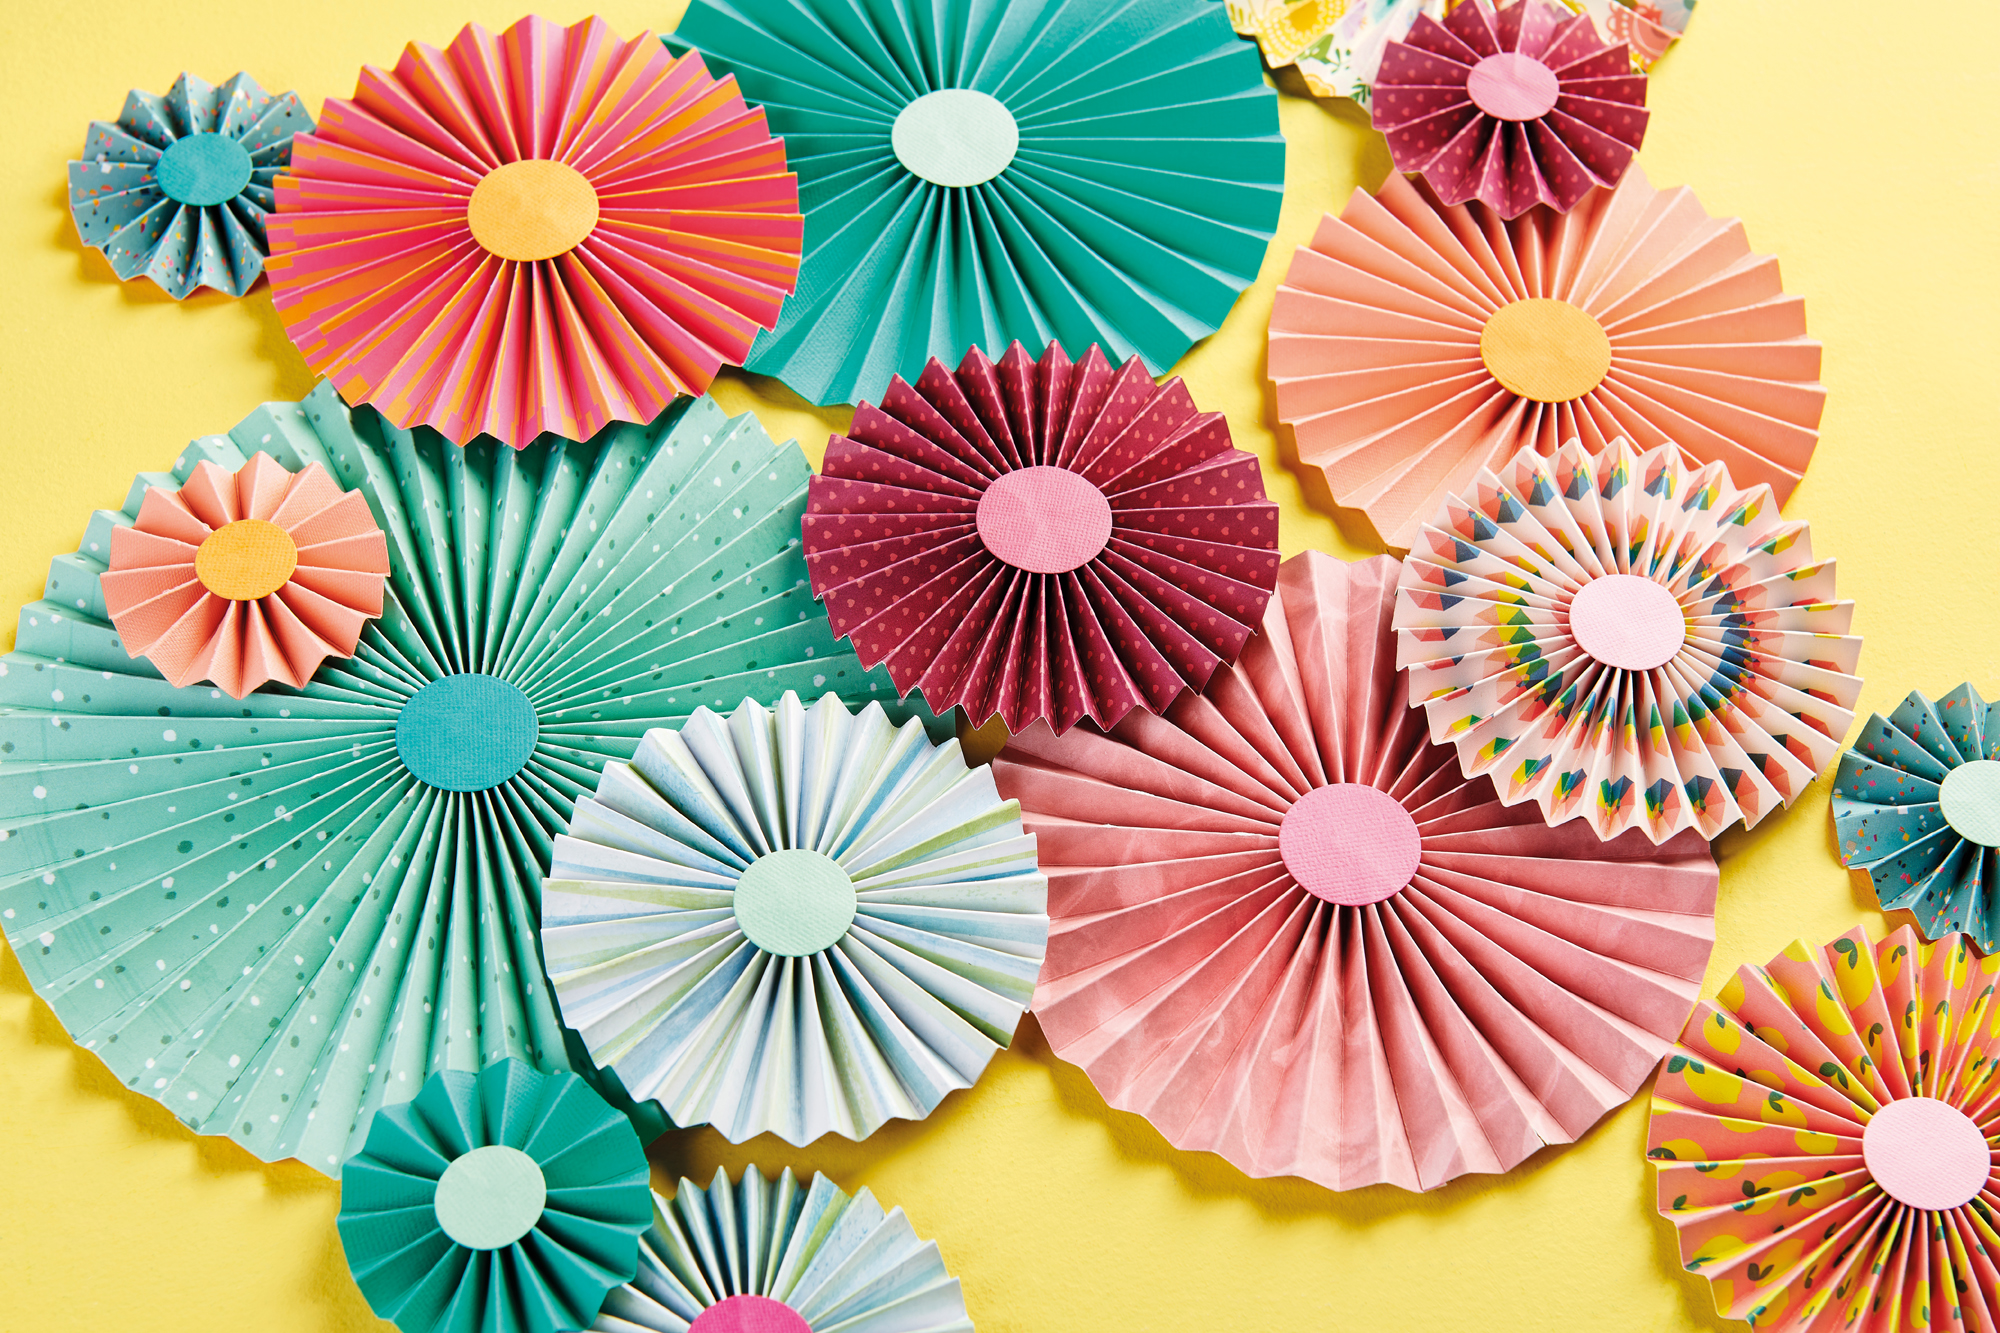
Looking for cheap and effective art to decorate your home or a wedding venue? These easy concertina folded rosettes are the answer!
In need of a stunning home décor make? Call Corinne Bradd! These spectacular rosettes show off everything our in-house designer is about. Like a lot of Corinne’s projects, they use basic materials to avoid you spending a fortune at the craft store. They’re also simple to make and absolutely bursting with colour. If we ever want to bring some vibrancy into our life, we know we can count on Corinne.
Dig out your stash of patterned and coloured papers, mix and match prints, score, fold and glue to make stunning paper rosettes in multiple sizes. There’s just one simple rule – your paper strip must be at least four times longer than the diameter of the rosette you wish to create. For example, a 20cm wide circle needs an 80cm long strip. This is easily sorted by simply glueing multiple strips end to end.
You Will Need:
Dies, circles
Lightweight cardstock: patterned, plain
Scoring tool
Adhesives: masking tape, PVA glue
Paper Rosettes
1. Cut a long strip of patterned paper and score across the width at 5mm intervals. Carefully concertina fold along the score lines, keeping the folds crisp and even. Use PVA glue to join more strips to each other if you want something longer.
2. Curl each long strip into a tube and join with PVA. Leave to dry fully before gently pressing the top of the tube inwards and down to create a rosette. Push the rosette in from the edges to ensure the central hole is small. Fix a couple of pieces of masking tape across the rosette to hold it in place, then flip over.
3. Brush PVA glue on the inside of the central hole, working the adhesive well into the folds. Place more tape across the rosette and leave flat until fully dry. Cut small circles of coordinating cardstock for each side of the rosette. Remove the tape and glue the card discs over the central hole on both sides.

You will need:
Templates or SVG files
Stencil, Inkylicious Sunbeam 6”
Ink pad, Ranger Distress Oxide Salvaged Patina
Cardstock, various colours
Gems, clear
Faber Castell Polychromos coloured pencils
Pens: shimmer pen, black fineliner, white gel pen
Hampton Art Action…
Card making How to Papercraft Papercrafter Techniques Projects

YOU WILL NEED:
Craft essentials
FREE PaperCrafter patterned papers
Dies: circle, scalloped circle
METHOD
1 Create a 13cm x 17cm white blank then cover the front with orange card. Cut tennis racket paper, 12cm…
Card making Decoupage Die cutting How to Papercraft Papercrafter Card Making

You will need:
Templates
Coloured paper or thin cardstock, various colours
Wooden skewers or thin garden canes
Tools: scoring board, scoring tool, clips, small hole punch
Glue
Concertina Fold & Bind Method
1. Take a sheet of landscape…
Home decor Home decorations How to Papercraft Papercrafter Techniques Video tutorial Projects Make it Today

Stencils: Altenew Doily Frame, Watercolor Bouquet; My Favorite Things Basic Shapes Triangles
Stamps: Avery Elle Simple Sentiments, Simply Said Hugs
Die, Altenew Mega You
Ink pads: Ranger Distress…
Card making Die cutting How to Papercraft Papercrafter Techniques Card Making Die cutting Projects


