


Christmas crafts Die cutting Home decor Home decorations How to Papercraft Papercrafter Techniques Projects
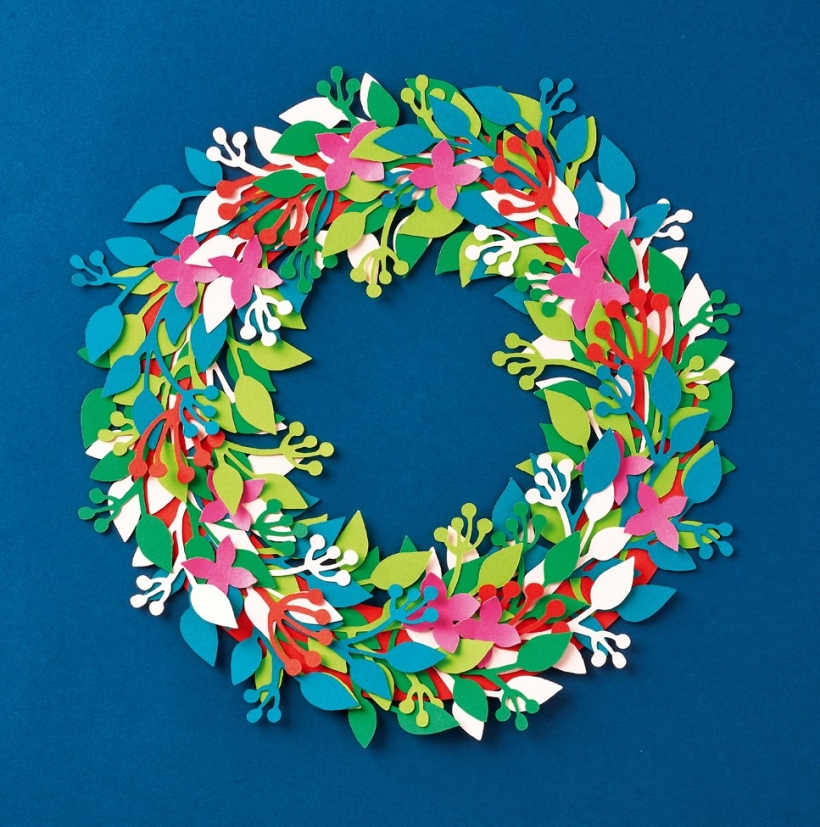
Dress your door this Christmas with a handmade wreath
With just four digital cutting files, Corinne Bradd shows you how to design and create your very own Christmas wreath. Simply cut the foliage shapes as many times as you like from vibrant green, pink and red card, then get building. With your cutting files you’ll achieve pristine curved stems and perfectly formed flowers, resulting in a stunning centrepiece for your table, or an inviting decoration for your door. Add an extra flourish of Christmas cheer by sprinkling your creation with glitter, or embossing card to create unique leafy textures.
You Will Need:
Templates or SVG files
Brother ScanNCut CM900 machine
Cardstock, various colours
Christmas wreath
1. Make a base for the wreath by setting a 20cm wide circle on the layout screen of your Brother ScanNCut machine. Place a 14cm wide circle in the centre of this, then set the machine to cut out the concentric circles from red card to create a ring.
2. Using the templates from our website, cut four foliage shapes from pink, teal, light and dark green card. Stick them to the ring by the stems, alternating the colours. Cut several berry sprigs from red card and add them to the arrangement, tucking the ends of the stems under the foliage.
3. Cut lots of flowers from bright pink card, then curl the petals with the blade on a pair of scissors. Adhere the flowers to the wreath randomly. If you’re planning to hang the finished decoration, stick a loop of baker’s twine on the reverse at the top.

Busy lives often involve a lot of memos and reminders, and it can sometimes be hard to keep track. Luckily, we’ve got a sophisticated solution to keep your desk tidy and…

If you’re having a quiet Valentine’s with your beloved at home this year, make the place look a little more special with a speedy-to-make hearts frieze. Papercrafting doesn’t get much easier than…
Home decor Home decorations How to Papercraft Papercrafter Techniques Projects

1. Using a 3.5cm circle die, cut eight discs from chipboard and sixteen circles from patterned paper. Glue the patterned circles to either side of the discs and punch a…

Craft essentials
1. Cut a 5cm x 15cm strip of double-sided patterned paper and fold in half lengthways. Draw parallel pencil lines at 1.5cm and 2cm from the…


