


Card making Papercraft Projects
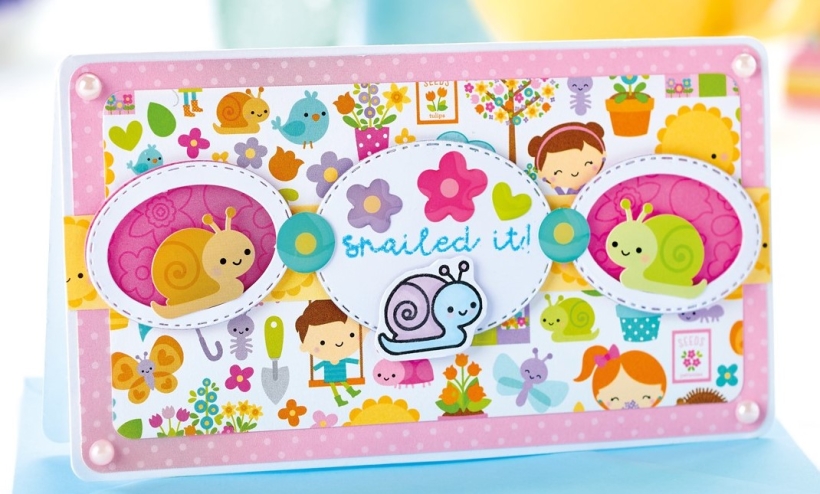
While everybody’s spring cleaning, we’re spring crafting – and we wouldn’t have it any other way. This take on Doodlebug Design’s glorious Simply Spring collection by Sarah Jackman Read is first and foremost an adorable one, with cute-as-buttons motifs and a heartwarming sentiment.
YOU WILL NEED:
Patterned papers, Doodlebug Design Inc Simply Spring 12” x 12” collection kit
Dies: stitched ovals
Punch, 5mm corner
Embossing powder, blue
Marker pens
Embellishments: Doodlebug Design Inc Icons stickers, Blooming Bugs stickers, Doodle-pops stickers, Oh Boy! Doodle Stamps, May Flowers Shape Sprinkles; pearl gems
Die-cutting machine
METHOD:
1. Create a white blank, 9cm x 16cm, and round off the corners with a corner punch. Matt a piece of spotty paper with rounded corners on top.
2. Trim bug paper to 7.5cm x 14.5cm, round off the corners, then mount on to the card front. Secure a border of sun paper across the middle. Stamp a ‘Snailed it’ sentiment onto white card and apply blue embossing powder to it. Die cut into a 4.5cm stitched oval, then attach in the centre with 3D foam pads.
3. Die cut two 3.5cm stitched ovals from white card, then die cut two 2.5cm stitched ovals through them to create frames. Die cut two 3.5cm ovals from pink paper and adhere behind the frames with 3D foam pads. Fix both ovals either side of the sentiment.
4. Stamp a snail, colour in, then cut out and attach under the sentiment. Add snail stickers in the frames with 3D foam pads, and stickers on the card front to complete.

Busy lives often involve a lot of memos and reminders, and it can sometimes be hard to keep track. Luckily, we’ve got a sophisticated solution to keep your desk tidy and…

If you’re having a quiet Valentine’s with your beloved at home this year, make the place look a little more special with a speedy-to-make hearts frieze. Papercrafting doesn’t get much easier than…
Home decor Home decorations How to Papercraft Papercrafter Techniques Projects

1. Using a 3.5cm circle die, cut eight discs from chipboard and sixteen circles from patterned paper. Glue the patterned circles to either side of the discs and punch a…

Craft essentials
1. Cut a 5cm x 15cm strip of double-sided patterned paper and fold in half lengthways. Draw parallel pencil lines at 1.5cm and 2cm from the…


