


Home decor Home decorations How to Papercraft Papercrafter Projects
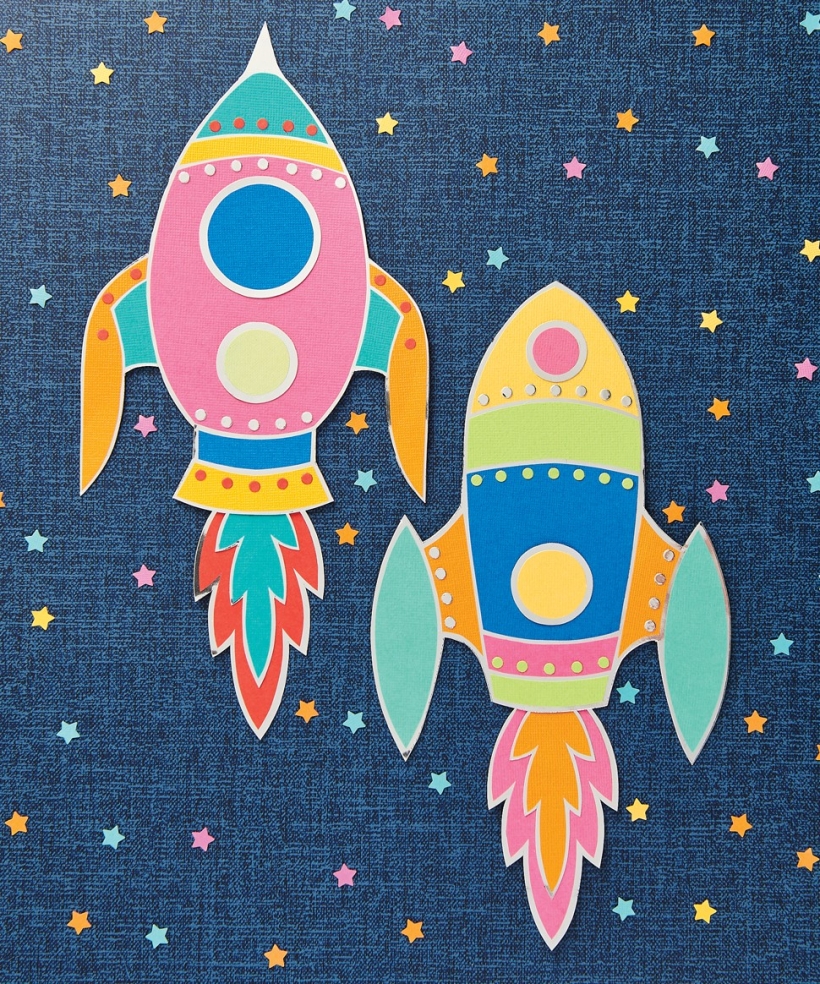
These paper retro rocket decorations from Corinne Bradd are the perfect space-age addition to your crafting. With ready-to-go templates and SVG files by your side, you’ll be thrilled to know that there’s no rocket science involved in this project – thank goodness for that. Plus, there are limited supplies required so you’ll be able to whip up a paper retro rocket in your colourway of choice faster than you can say ‘lift off’! If you’ve got scrap cardstock to hand, now’s the time to use it… we’re always trying to find ways to cut down on waste and do our bit for the planet.
You will need:
Templates or SVG files
Cardstock: various colours, mirri
Punch, hole
Adhesives: glue, double-sided tape
1 Download the rocket templates or SVG files from our website and cut them out. Trace the main body of a rocket, the largest flames and largest circular windows onto the reverse of silver mirri card, then trim.
2 Use coloured cardstock to trace and cut out the individual components of the rocket and flames. Make sure no two colours are sitting next to each other and remember to flip over the fin parts so they make a pair.
3 Arrange and glue the elements onto the main body and flames. Fix the flames to the bottom of the rocket with double-sided tape. Use a hole punch to cut lots of dots from leftover metallic and coloured card, then secure to the banded sections of the rocket.
If you prefer to learn visually, then Corinne Bradd has got you covered over on The Crafts Channel.

YOU WILL NEED:
Old books
Die, circle
Wooden skewer
Binder clips
Alcohol marker, orange
Adhesives: PVA glue, glue stick
Die-cutting machine

METHOD:
1. Use a circle die to cut lots of discs from book pages. Fold each circle in…
Halloween crafts Home decor Home decorations How to Papercraft Papercrafter Revamping Techniques Projects

Whilst this may look like a paper cutting that took hours to create, it really couldn’t be any easier. Our talented designer Corinne Bradd has created 15 templates for you to…
Die cutting Home decor Home decorations How to Papercraft Papercrafter Projects

You Will Need:
Templates or SVG files
Brother ScanNCut SDX1200 (optional)
Strong card
Cardstock, various colours
Jute yarn
PVA glue
Autumnal Display
1. Draw a 25cm wide circle on strong card, then draw a concentric 17cm wide circle…
Home decor Home decorations Papercraft Papercrafter Techniques

Shadow box cards, otherwise known as tunnel greetings or diorama cards, are designed to transport the recipient to picture-perfect backdrops in an instant. In this case, PaperCrafter designer Francesca Vignoli…
Birthday crafting Card making Die cutting How to Stamping Techniques Card Making


