


Card making How to Quilling Techniques Card Making
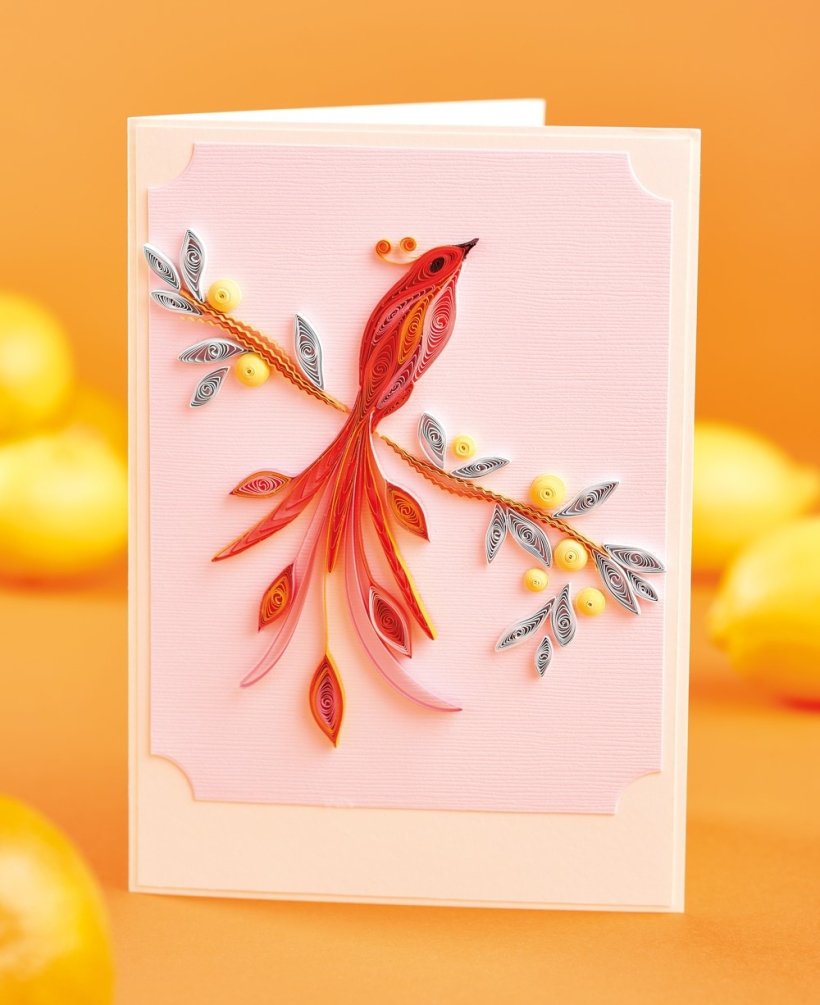
Using coils and pinched shapes, Elizabeth Moad’s beautiful bird card is packed with colour and texture. Have a go with the step-by-steps below and cutsomise your card with a sentiment to suit the occasion you’re crafting for.
YOU WILL NEED:
Quilling papers: 2mm brown, yellow, blue, orange; 3mm reds, oranges, pinks, black
Cardstock: cream, pink
Punch, circle
Tools: quilling, crimping, tweezers
Glue
METHOD:
1. Cut a rectangle of pink card and, using a circle punch, remove each corner. Mount onto a cream blank. Use the crimping tool and 2mm wide brown paper to make a wavy strip. Glue three lengths together, then mount two pieces to the card diagonally to form a branch.
2. With the quilling tool make tight coils from seven strips of 2mm wide yellow paper – use lengths ranging from 20cm to 40cm. Push the centre of the tight coils up to form domes and put glue inside so they hold their shape. Leave to dry.
3. For the leaves, use 2mm wide blue paper and vary the lengths from 15cm to 30cm. With the quilling tool make a loose open coil from a length, then pinch both ends to form a leaf shape. Bend this to become more of an ‘s’ shape and glue around the branches. Make about 17 leaves in total. Glue leaves and berries to the card.
4. The bird body uses four colours of paper that harmonise. Start with a 60cm length of red with a 5cm length of black attached to one end. Begin coiling at the black end then, with the paper still on the quilling tool, apply a dot of glue when the end of the black paper has been coiled, then keep coiling. Make a loose closed coil from the whole length.
5. Pinch the shape and keep the black coil to one end to become the eye. Press it into a long shape, bend the end with the eye into a head shape, then fix onto the card, holding in place while the glue dries.
6. Add coiled shapes to this, starting with a long pinched coil of 20cm pink. Next to this attach an eye shape from 40cm red, then one from 20cm orange. For the breast use a 40cm length of dark pink paper. Fill in the areas with coils made from 20cm light pink, 20cm dark pink and 15cm red.
7. Secure a tiny length of black paper for the beak, then add two open coils of orange to the two of the head. The tail has five pinched coils as the main feature. Glue three 15cm lengths of red, pink and orange together end to end. Coil these with the quilling tool, then pinch the coil into an eye shape.
8. Fold a 15cm strip of orange paper in half, place glue along the centre and wrap the eye shape coil. Trim the orange paper to the desired length and attach to the card. Make four more of these varying the colours used, and glue as shown.
9. Take a 12cm length of red paper, fold in half and glue to the bird. Tear 1cm lengths of red paper, fold in half and glue into the shape just attached for a tail feather. Use tweezers to insert the small pieces. Make two more of these feather shapes, then add two pink lengths to the tail.

Busy lives often involve a lot of memos and reminders, and it can sometimes be hard to keep track. Luckily, we’ve got a sophisticated solution to keep your desk tidy and…

If you’re having a quiet Valentine’s with your beloved at home this year, make the place look a little more special with a speedy-to-make hearts frieze. Papercrafting doesn’t get much easier than…
Home decor Home decorations How to Papercraft Papercrafter Techniques Projects

1. Using a 3.5cm circle die, cut eight discs from chipboard and sixteen circles from patterned paper. Glue the patterned circles to either side of the discs and punch a…

Craft essentials
1. Cut a 5cm x 15cm strip of double-sided patterned paper and fold in half lengthways. Draw parallel pencil lines at 1.5cm and 2cm from the…


