


Birthday crafting Card making Die cutting How to Techniques
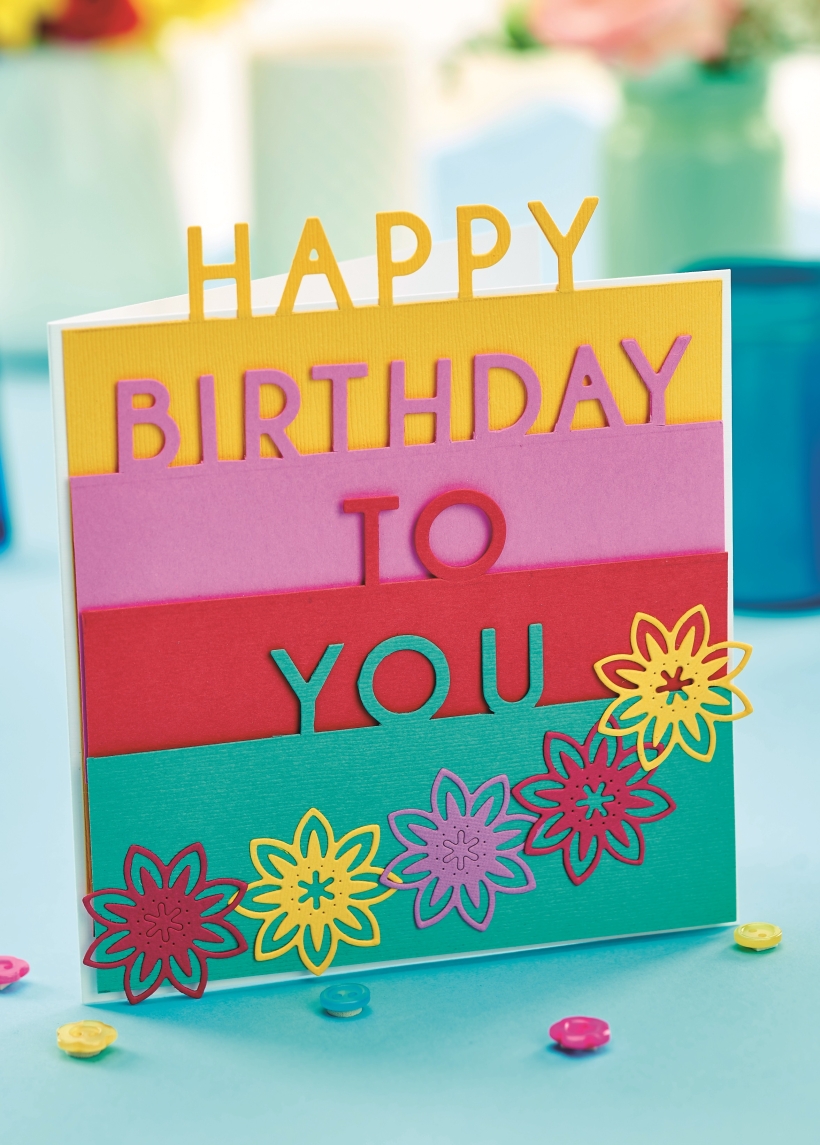
Partial die-cutting is a great way to mix it up when crafting with dies. This is where the metal die is placed on the cutting pad as usual but instead of being completely cut, the top cutting sheet is positioned so that an uncut area is left. You’ll then need to use a craft knife to release the excess card.
The idea of partially cutting out shapes can be adapted to words or numbers for a great effect. This method is easier than it sounds, plus whole words cut from one single sheet of card creates a professional, neat finish. The technique requires individual letter and number dies, so it’s worth keeping this in mind if you’re thinking of buying a new set. Many die sets also only have one letter of each, so when you cut a word such as ‘Happy’ leave a space for the ‘p’, run it through the die-cutter, then place the missing letter on its own and die cut it.
YOU WILL NEED:
Craft essentials
Dies: alphabet, flowers
Die-cutting machine
METHOD:
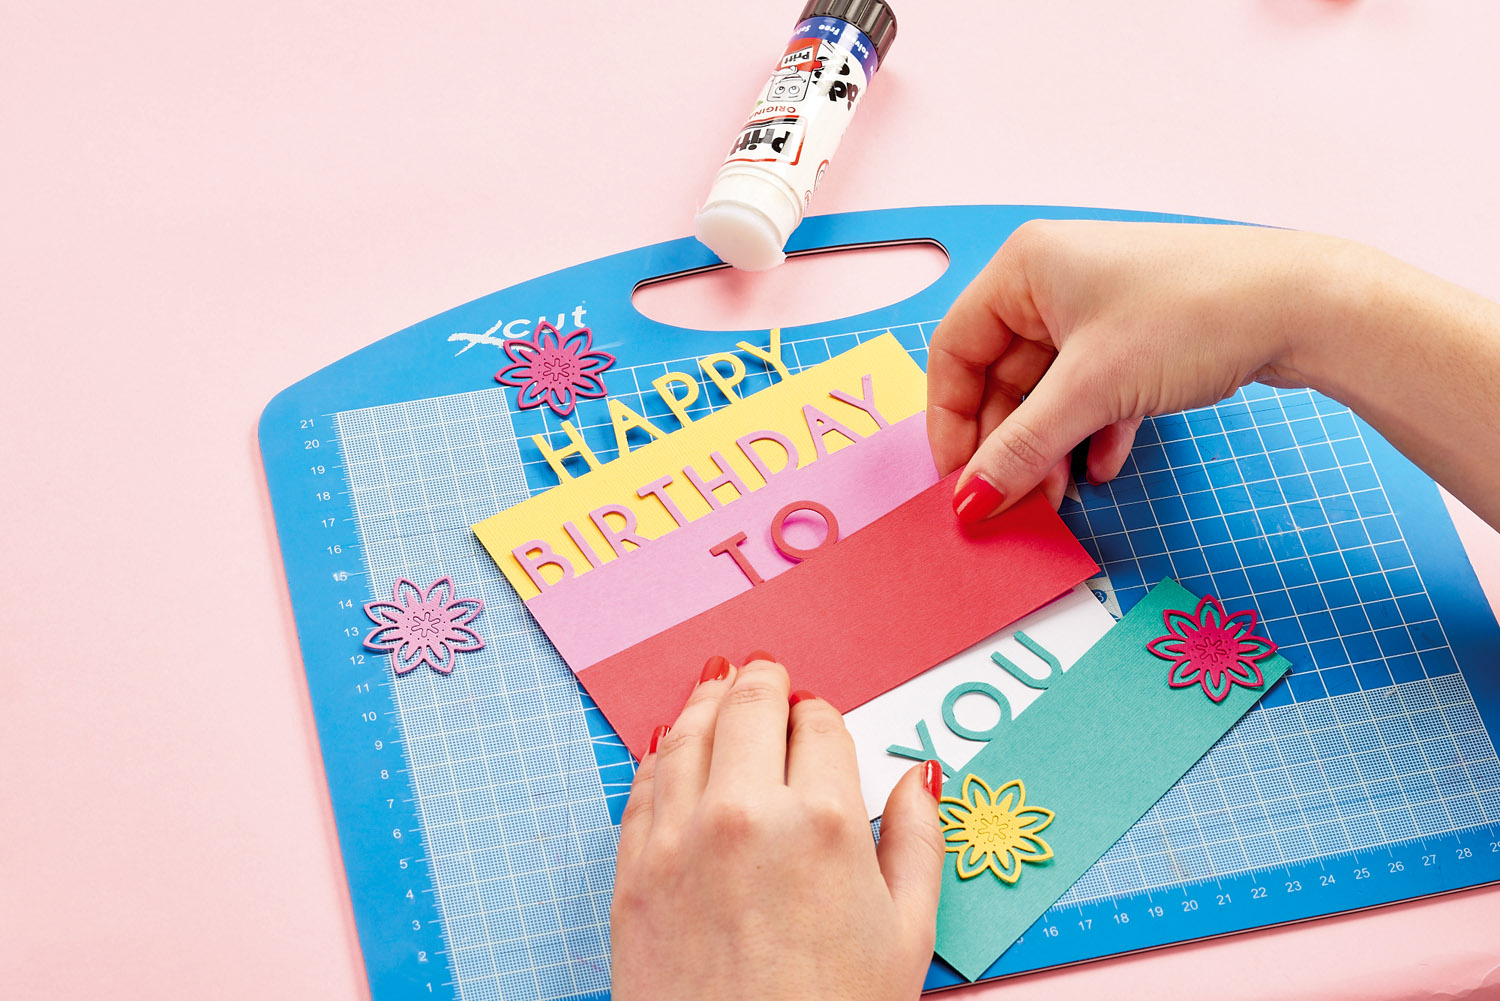
1. Draw a line with a pencil across coloured card where you would like the word to sit. Place the alphabet dies on the line, holding them in place with washi tape.
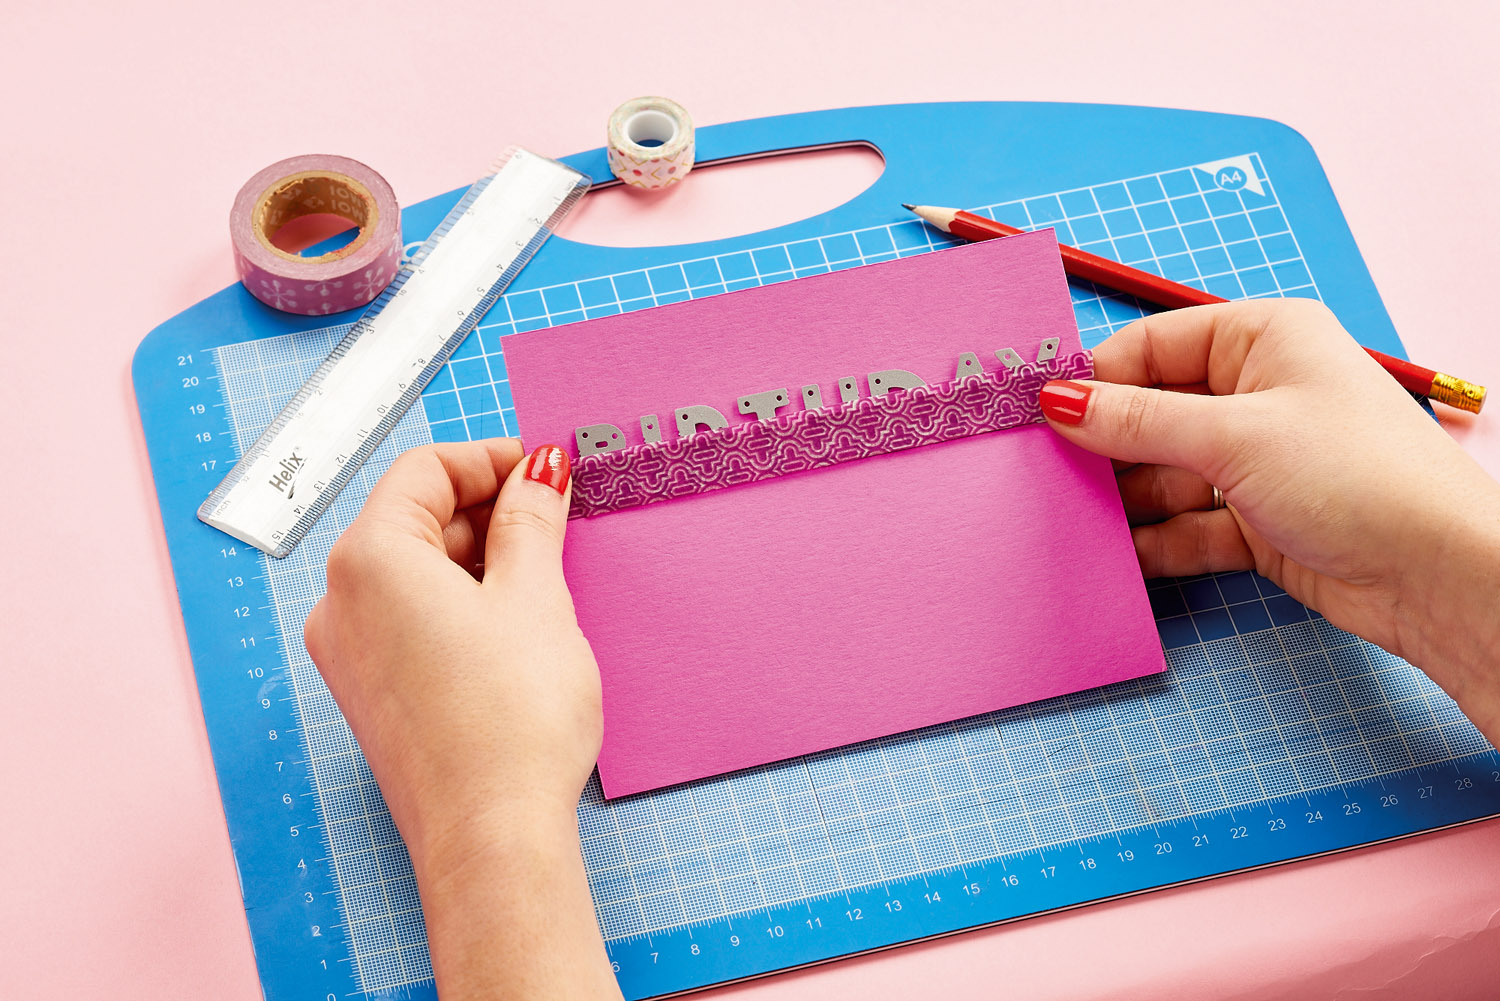
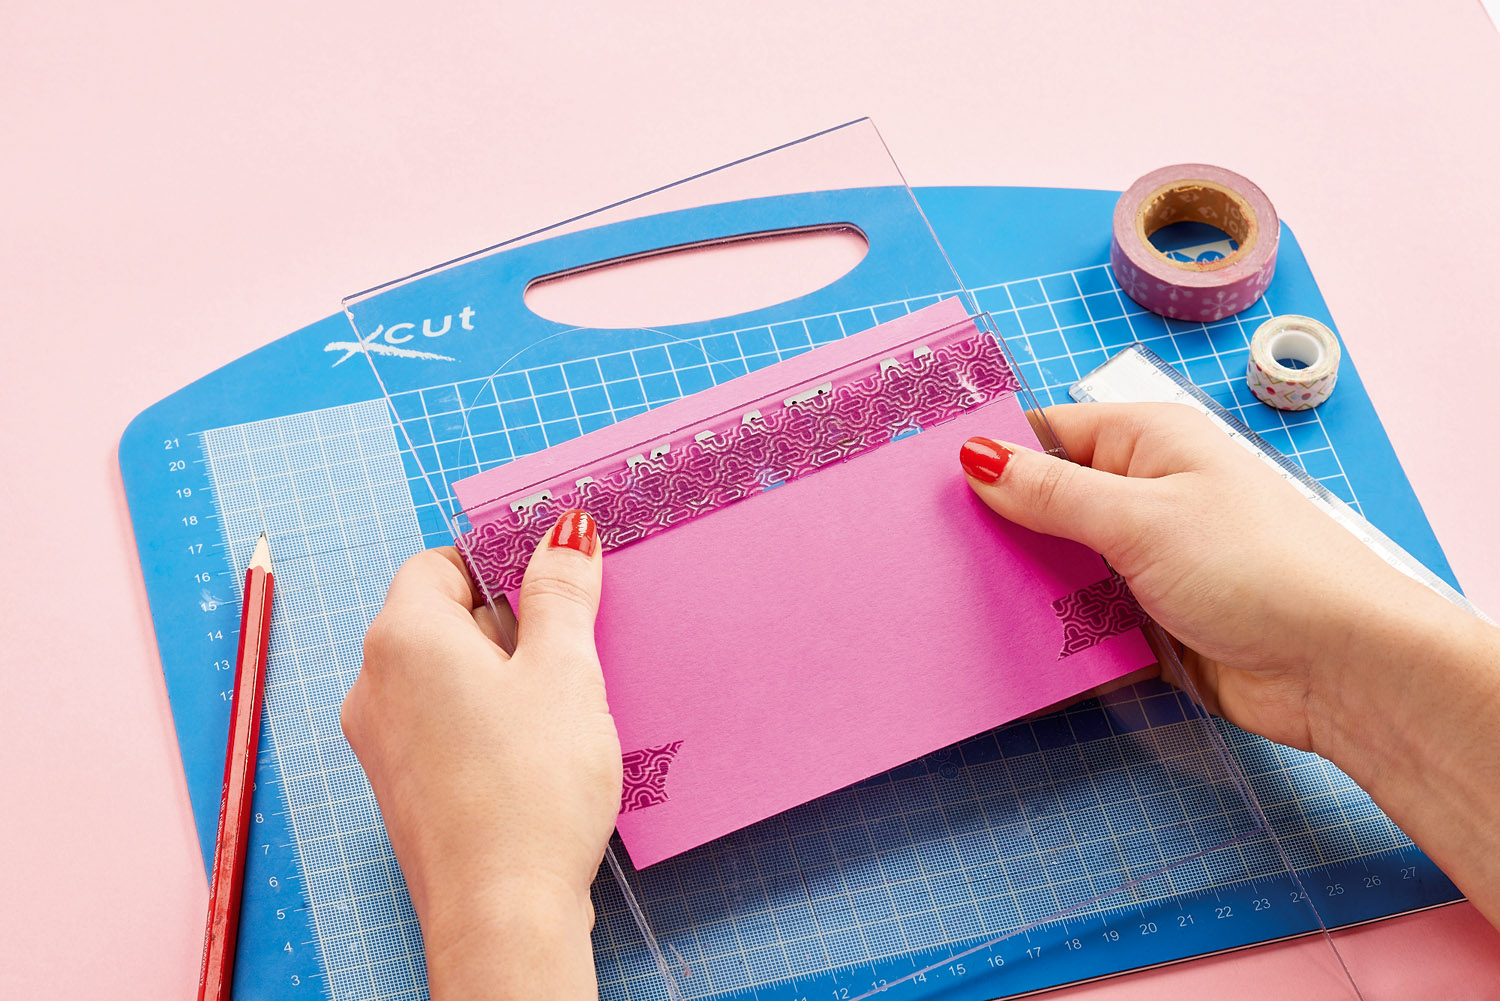
2. Position the card on the clear perspex die-cutting sheet, then place another on top, lining up the edge of the sheet with the dies just before the pencil line. Run this through the die-cutter to partially cut the words.
3. Carefully remove the perspex sheets, washi tape and dies. Using a craft knife, cut along the pencil line and inbetween the uncut parts of each letter to release the surrounding card leaving the word as part of the main section of card.
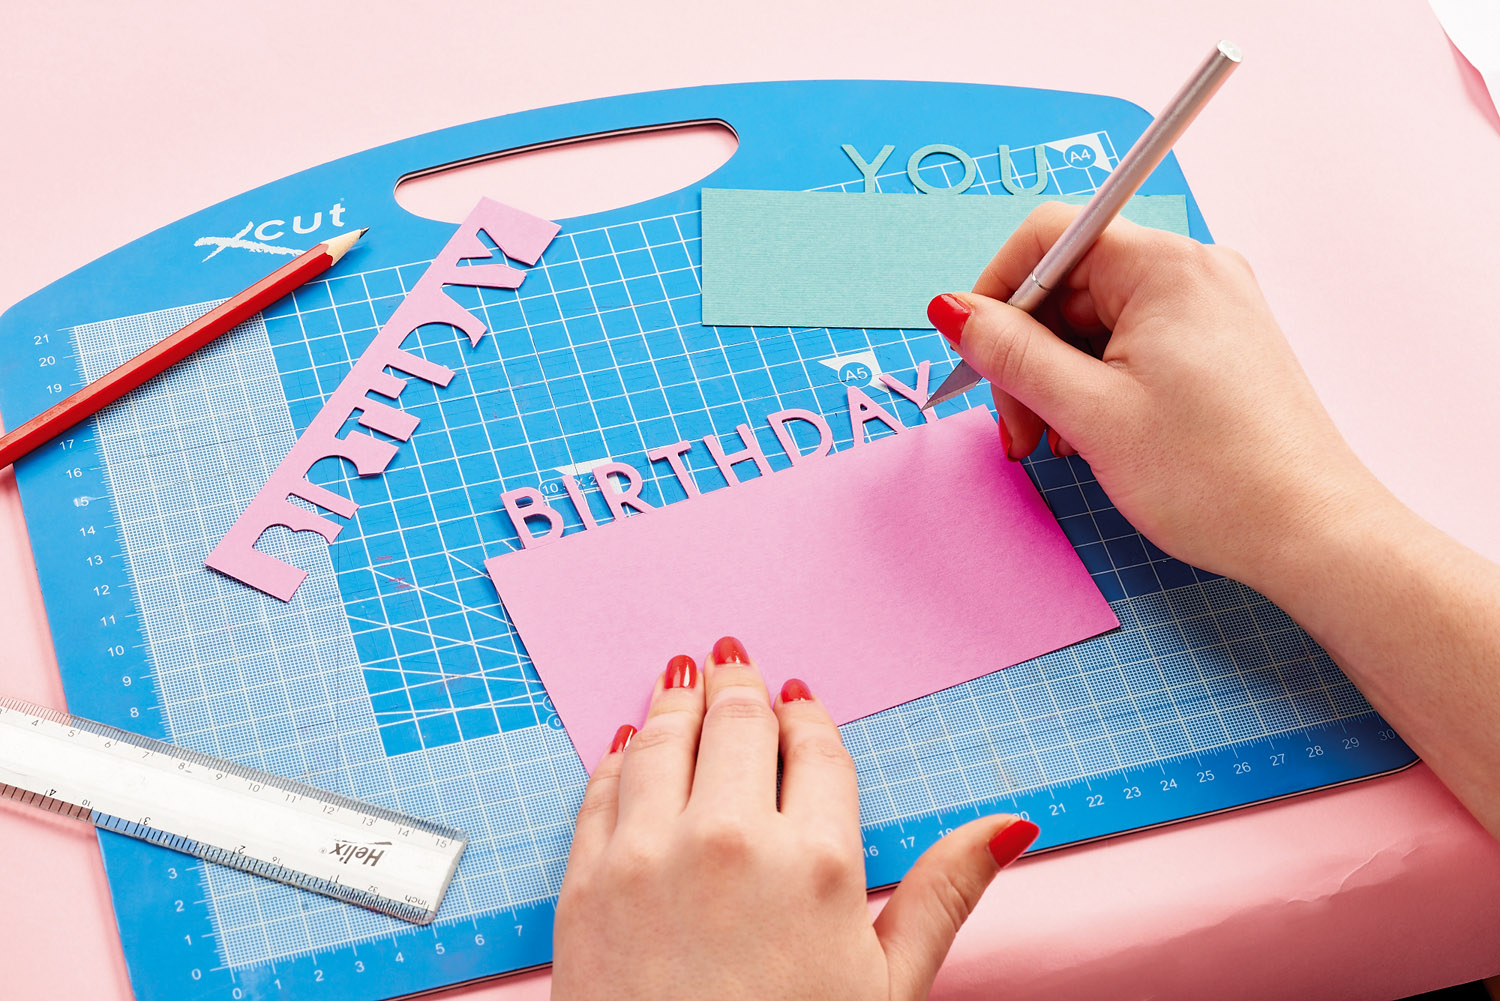
4. Die cut more words from coordinating coloured card in the same way. Starting with the bottom panel, layer each die-cut panel to a card blank. Use 3D foam pads to add dimension. Die cut flowers from coloured card, then adhere to the greeting.

Busy lives often involve a lot of memos and reminders, and it can sometimes be hard to keep track. Luckily, we’ve got a sophisticated solution to keep your desk tidy and…

If you’re having a quiet Valentine’s with your beloved at home this year, make the place look a little more special with a speedy-to-make hearts frieze. Papercrafting doesn’t get much easier than…
Home decor Home decorations How to Papercraft Papercrafter Techniques Projects

1. Using a 3.5cm circle die, cut eight discs from chipboard and sixteen circles from patterned paper. Glue the patterned circles to either side of the discs and punch a…

Craft essentials
1. Cut a 5cm x 15cm strip of double-sided patterned paper and fold in half lengthways. Draw parallel pencil lines at 1.5cm and 2cm from the…


