

_(1)_820_1182_s_c1.jpg)


Die cutting Home decor Home decorations How to Papercraft Papercrafter Party makes Techniques Projects
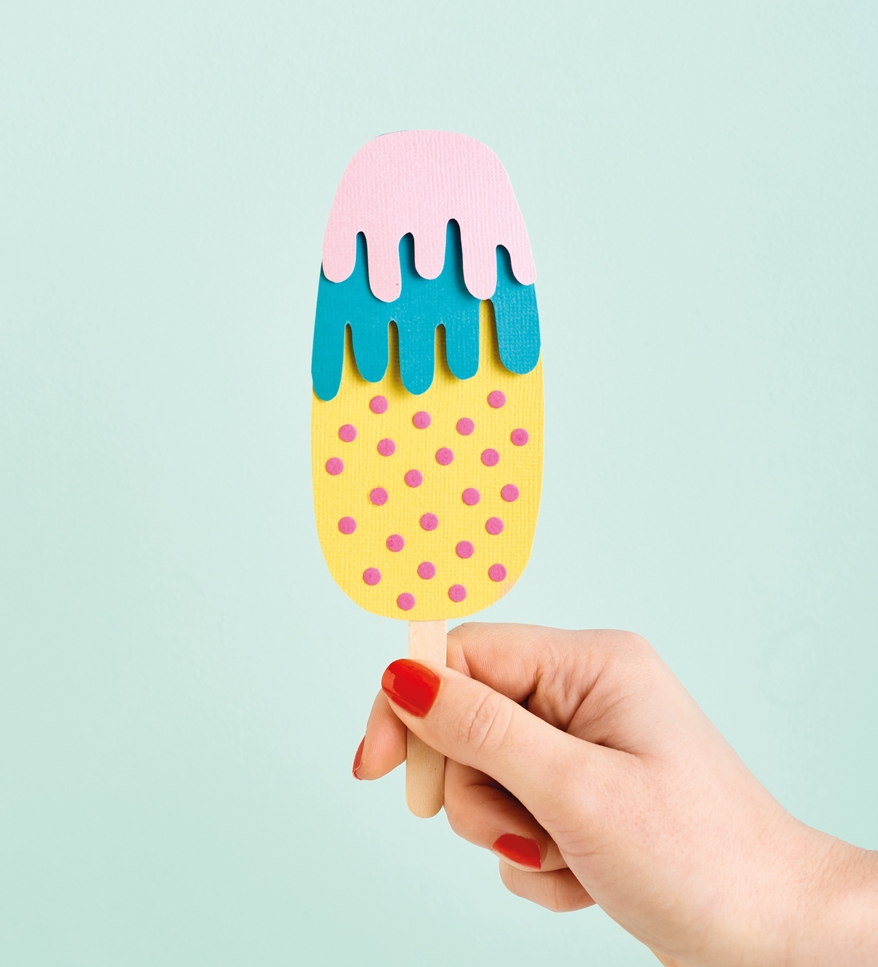
Focus on shapes and colour to make our zingy ice lollies
Something that always sparks joy in the summer months is the sound of the ice cream van. The rush to find shrapnel, racing outside, the excitement of deciding what to have… it’s small pleasures like this that have the ability to turn frowns upside down. In celebration, Corinne Bradd has crafted classic lollies from paper, using minimal supplies but having lots of fun in the process. Which design is making your mouth water?
YOU WILL NEED:
FREE Ice Lolly templates or SVG cutting files
Cardstock, various colours
Lolly sticks
Punch, hole
Adhesives: 3D foam pads, glue
METHOD:
1. Download the templates from our website and copy them onto thin scrap card by tracing around them. Group the lollies by letter and cut each piece from brightly coloured, contrasting cardstock.
2. Use the blade of a pair of scissors to gently curve the edges of each piece under. Layer together using 3D foam pads close to the lower edges of the layers, then glue the top portions together to give a slight 3D effect.
3. For the Zoom-style lolly, use a ball-ended tool to score slanted diagonal lines from the top point to the base. Concertina fold along the lines and re-flatten before layering, using 3D foam pads in the centre sections to give the raised shape.
4. For the Twister-inspired design, lay the pink and yellow swirls evenly down the length of the base before glueing in place at the same angle. With all lollies, trim any overlaps from the edges once they are assembled.
5. Fix a lolly stick to the centre back of each one, ensuring it is in line with the top. Use a hole punch to create hundreds and thousands from leftover cardstock. Fix to the lollies as desired with spots of PVA.
In a hurry? Download our FREE Ice Lolly SVG files and cut them out on your digital cutting machine!

Busy lives often involve a lot of memos and reminders, and it can sometimes be hard to keep track. Luckily, we’ve got a sophisticated solution to keep your desk tidy and…

If you’re having a quiet Valentine’s with your beloved at home this year, make the place look a little more special with a speedy-to-make hearts frieze. Papercrafting doesn’t get much easier than…
Home decor Home decorations How to Papercraft Papercrafter Techniques Projects

1. Using a 3.5cm circle die, cut eight discs from chipboard and sixteen circles from patterned paper. Glue the patterned circles to either side of the discs and punch a…

Craft essentials
1. Cut a 5cm x 15cm strip of double-sided patterned paper and fold in half lengthways. Draw parallel pencil lines at 1.5cm and 2cm from the…


