


Home decor Home decorations How to Papercraft Papercrafter Techniques Projects
Satisfy your wanderlust from the comfort of your home with Corinne Bradd’s well-travelled accessories
With the invasion of sat-navs and in-built tracking devices on our mobile phones, the need for the humble paper map has slowly dwindled. Relegated to the boot with the other odds and ends that accumulate there, maps are quickly forgotten and cast aside as old-fashioned and unnecessary. However, there can be another use for those old atlases, as demonstrated by our stylish makes. Turn the faded pages into chic accessories for your home, and dream of exotic places that you’d like to enjoy someday.
Map paper
Plate
PVA glue
Craft knife
Sponge
1. Choose a fairly shallow round design to begin with, as this is the easiest type to decorate. Take a piece of map paper, large enough to cover the plate with at least 2cm overlap all round. Spray the wrong side of the paper with a little water and leave to soak on a flat surface.
2. Use a sponge to cover the surface of the plate with an even coat of PVA. Lift the damp paper, turn right side up and lay centrally onto the plate. Gently press the paper onto the glue, starting from the centre and working out. Manipulate and smooth any wrinkles as evenly as possible, taking care not to tear the paper.
3. Leave the paper to dry on the plate overnight. When the paper is crisp again, flip the plate over onto a cutting mat and use a sharp craft knife to cut the excess from the edge. Apply a little more PVA around the edges to prevent the paper peeling away, then coat with two more thin coats of glue to seal.
Map paper
Patterned paper
Pearl-headed pins
Round beads
Wooden skewer
Eyelet and setting tool
Snipe-nosed pliers
Washi tape
Hole punch
Sponge
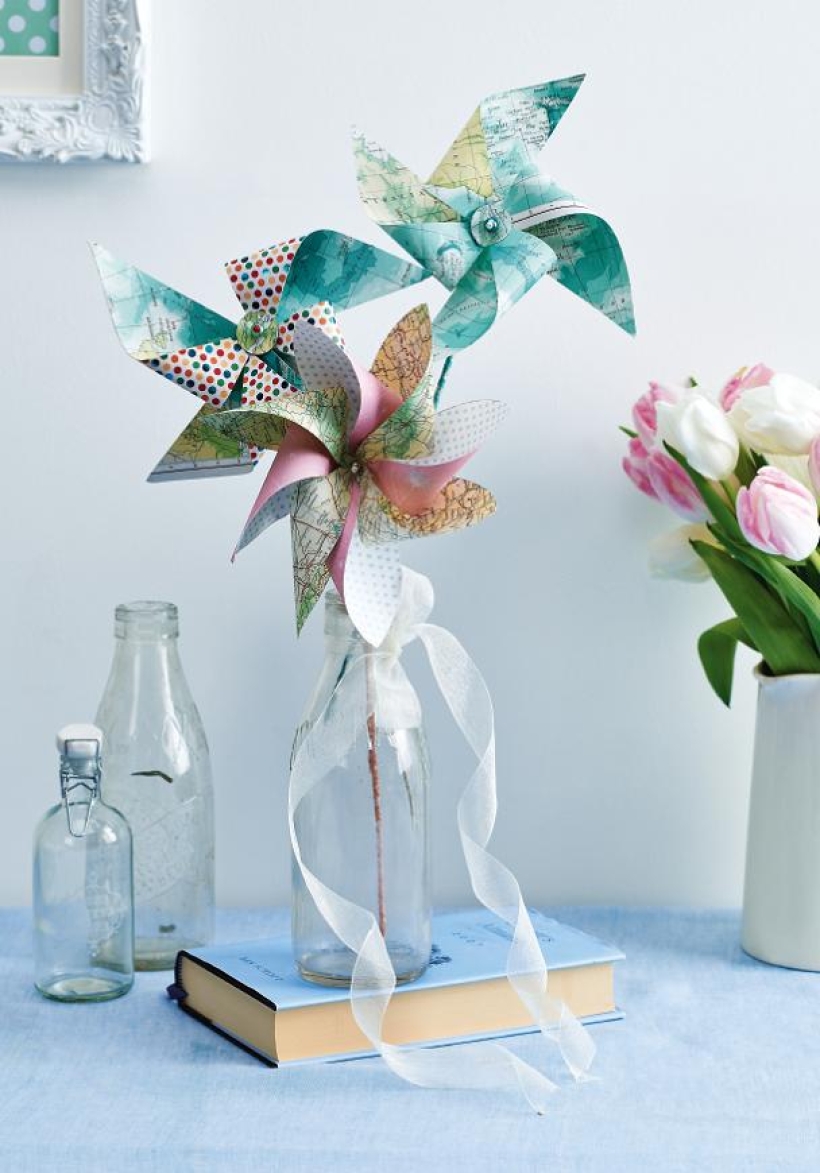
1. Layer a 10cm square of map paper onto patterned paper of the same size, ensuring the right sides face out. Mark the centre and draw a 1.5cm diameter circle around it.
2. Trim diagonal lines from each corner of the square to the edge of the circle. Punch holes in each alternate point and the centre of the square. Use an eyelet to secure the points to the hole in the centre.
3. Thread a bead onto a pearl-headed pin and pass through the eyelet. Place a second bead on the back and push through the top of a wooden skewer. Use pliers to bend the end of the pin and fix with washi tape. Cover the rest of the skewer with washi to decorate.
Map paper
Blank envelope
Embroidery thread
Needle tool
Coloured pencil
Printer (optional)
Glue
1. Unfold a ready-made envelope and trace around it onto map paper. Cut out and score where marked. Do not assemble the envelope.
2. Print off or trace your chosen letter, then position the template in the bottom-left corner and draw around it. Prick around the lines with a needle tool, making holes 4mm apart. Rub out the pencil lines.
3. Take three strands of embroidery thread and backstitch through the holes to outline the letter. Colour inside the stitching with a coloured pencil before assembling and sticking the envelope together.
1. Remove the glass and backing board from a picture frame. Cover the edges with strips of glued map paper, mitring the corners and folding under the excess.
2. Cut white and blue card to the same size as the glass. Trim the white card into a 2.5cm wide mount and fix foam tape around the reverse of the aperture. Place the blue card underneath this to create a recessed background.
3. Snip 12 circles from leftover map paper and arrange inside the aperture. Check the position before fixing each one in place with a little foam tape. Replace the glass, picture and backing board into the frame.

Busy lives often involve a lot of memos and reminders, and it can sometimes be hard to keep track. Luckily, we’ve got a sophisticated solution to keep your desk tidy and…

If you’re having a quiet Valentine’s with your beloved at home this year, make the place look a little more special with a speedy-to-make hearts frieze. Papercrafting doesn’t get much easier than…
Home decor Home decorations How to Papercraft Papercrafter Techniques Projects

1. Using a 3.5cm circle die, cut eight discs from chipboard and sixteen circles from patterned paper. Glue the patterned circles to either side of the discs and punch a…

Craft essentials
1. Cut a 5cm x 15cm strip of double-sided patterned paper and fold in half lengthways. Draw parallel pencil lines at 1.5cm and 2cm from the…


