


Use the ‘Print then Cut’ feature of Design Space with the Cricut Explore and printable vinyl to create a beautifully decorated phone case. This would make a lovely gift or would be fun to make for yourself too!
Craft Essentials, Cricut Explore, Cricut Design Space software, Cricut printable vinyl, Cricut Transfer Tape, Cricut tool set, Inkjet printer, Phone case
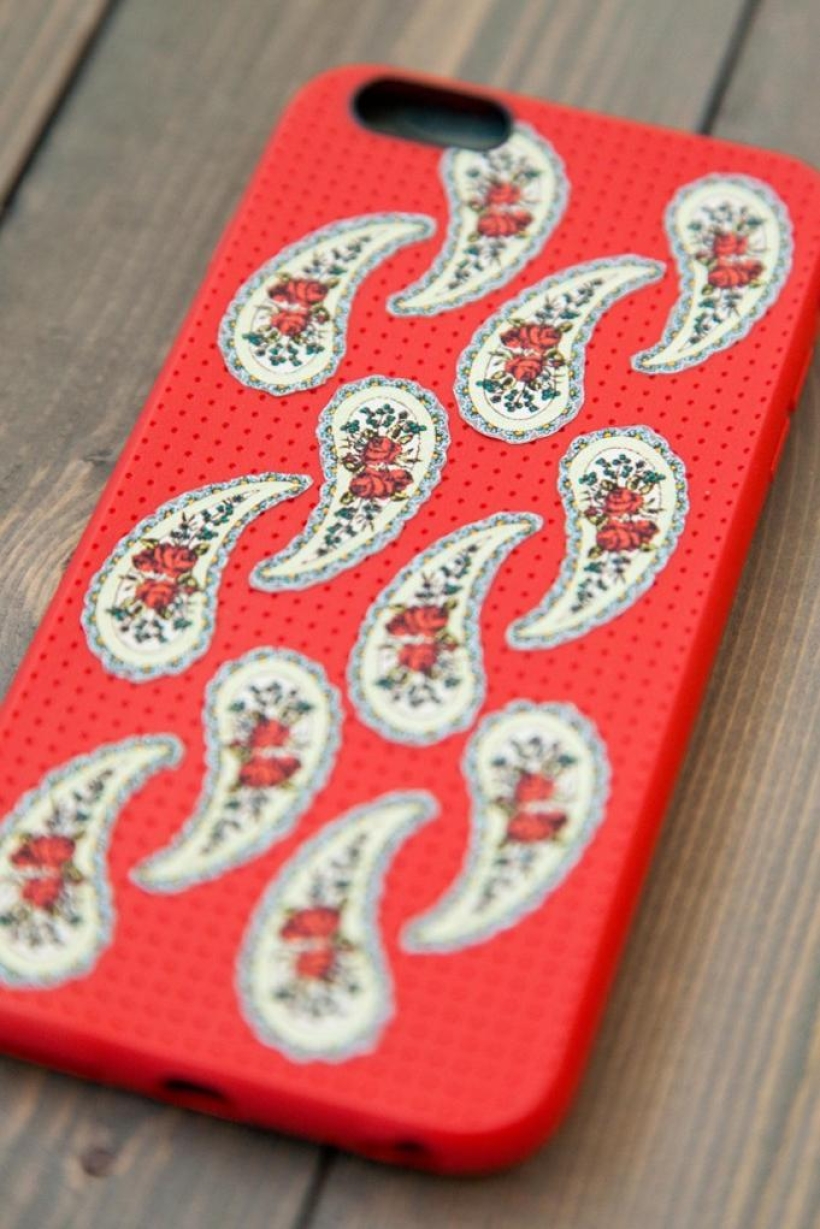
The ‘Print then Cut’ feature requires the image to be printed on an inkjet printer which is calibrated with the Cricut Explore. You can find full step-by-step instructions on the Cricut website
• Connect the Cricut Explore to a computer and log on to your Design Space account. Select ‘Gear’ from the categories menu and locate the ‘Phone Case Paisley’ project.

• To create the project as designed, click ‘Make it Now’. To resize the project or change the images, click ‘Customise’.

• Resize the images as required by first highlighting the picture and then dragging the corner point. The size appears in a black text box as the image is altered.

• Print the images on printable vinyl using an inkjet printer. The registration marks will print with the image.

• Place the printed vinyl sheet onto the cutting mat and cut out the images. Carefully remove the part of the vinyl not required, leaving the paisley image on the backing sheet.
TOP TIP: Use the weeder tool to remove small pieces of vinyl
• Cut a piece of transfer tape slightly larger than the paisley image and remove the backing. Firmly apply the transfer tape over the top of the heart image using the scraper tool. Carefully lift up the tape - the heart image should be attached to it.
• Place the image side where required on the phone case. Rub over the transfer tape with the scraper tool. Carefully lift the tape, leaving the paisley image in place on the mug.

Busy lives often involve a lot of memos and reminders, and it can sometimes be hard to keep track. Luckily, we’ve got a sophisticated solution to keep your desk tidy and…

If you’re having a quiet Valentine’s with your beloved at home this year, make the place look a little more special with a speedy-to-make hearts frieze. Papercrafting doesn’t get much easier than…
Home decor Home decorations How to Papercraft Papercrafter Techniques Projects

1. Using a 3.5cm circle die, cut eight discs from chipboard and sixteen circles from patterned paper. Glue the patterned circles to either side of the discs and punch a…

Craft essentials
1. Cut a 5cm x 15cm strip of double-sided patterned paper and fold in half lengthways. Draw parallel pencil lines at 1.5cm and 2cm from the…


