


Card making Papercrafter Card Making
Would you love to create your own die-cut designs? Well, that dream is now a reality! Here, PaperCrafter designer Corinne Bradd teaches you how to make a card with the Brother ScanNCut.
Craft essentials, Brother ScanNCut , Bird template
This nifty gadget can take your scanned images, photos or hand drawn sketches and turn them into die-cuts without the need for a computer, software or cartridges.
All you need to do is sketch out your shape, tweak and outline it with black pen, then feed it into the machine which will present you with a perfectly-cut image. It’s a brilliant machine that allows crafters to tailor projects exactly to their liking by creating motifs from scratch.
Like this? Check out more ScanNCut cards by Corinne Bradd in issue 87 of PaperCrafter
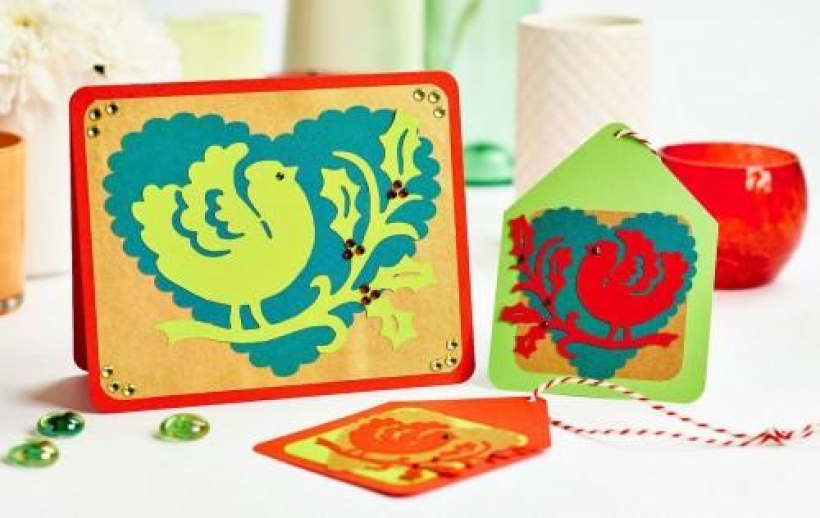
• Trace our bird template onto white paper with a soft pencil then go over it with a fine black pen before rubbing out the pencil lines.
• Mount the image onto the ScanNCut's sticky mat and feed it into the machine to scan it. Save the image to the machine's memory.
• Resize your motif to 6.5cm tall. Position one image on the ScanNCut's display screen and add a second, flipped motif next to it. Cut the images from dark green paper.
• Choose a scallop-edged rectangle from the machine's pre-stored motifs and resize to 7cm x 17cm. Cut out and mount onto lime green paper, trimming to size and rounding the corners.
• Place the mirrored motifs facing each other on the scallop-edged rectangle so they are touching. Mount the completed panel onto a 10cm x 20cm landscape gold blank.
• Add small red gems to the top and bottom scallops of the card. Use more red gems for berries and make eyes from tiny green diamantes.

Busy lives often involve a lot of memos and reminders, and it can sometimes be hard to keep track. Luckily, we’ve got a sophisticated solution to keep your desk tidy and…

If you’re having a quiet Valentine’s with your beloved at home this year, make the place look a little more special with a speedy-to-make hearts frieze. Papercrafting doesn’t get much easier than…
Home decor Home decorations How to Papercraft Papercrafter Techniques Projects

1. Using a 3.5cm circle die, cut eight discs from chipboard and sixteen circles from patterned paper. Glue the patterned circles to either side of the discs and punch a…

Craft essentials
1. Cut a 5cm x 15cm strip of double-sided patterned paper and fold in half lengthways. Draw parallel pencil lines at 1.5cm and 2cm from the…


