


Card making Halloween cards Halloween crafts Stamping Projects
With Halloween fast approaching, Laura Bradley tests out Avery Elle’s coordinating Bewitching stamps and dies. Featuring smiling ghosts and stylised gravestones, this stamp and die collection might not be the scariest thing you’ve seen, but it’s definitely the cutest! Accentuating them with purple and orange inks, and adding dimension with 3D foam pads, crystal drops and embossing powder, this card set is a must-have for those who love a fun-filled Halloween. Have a go at recreating them yourself, or experiment on your own. Just be sure to have a spooktacular time!
You will need: Craft essentials, Stamps, Avery Elle Bewitching, Dies: Avery Elle Bewitching; Lawn Fawn Large Stitched Rectangles; My Favorite Things Stitched Rounded Rectangles; Moonstone Nesting Circles, Inks: VersaMark; VersaFine, Onyx Black; Ranger Distress Wilted Violet, Shaded Lilac, Chipped Sapphire, Black Soot, Carved Pumpkin, Hickory Smoke, Embossing powder, Wow! Opaque Bright White, Masking paper, Pens, Zig Clean Color Real Brush, Glitter drops, Nuvo Ebony Black, Glue, Cosmic Shimmer

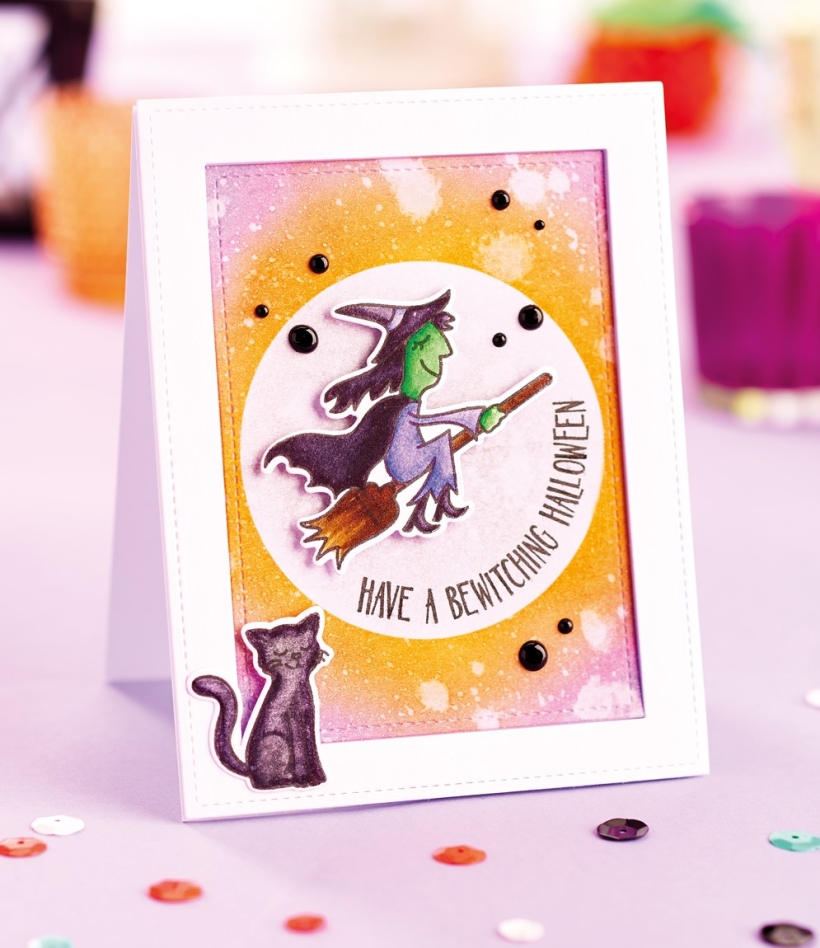
1 Die cut the biggest Stitched Rectangle from stamping card, then create an 11cm x 14cm blank. Die cut the centre from the rectangle using the second biggest rectangle to make a seperate 8.5cm x 11.5cm panel, then add the white frame to the card front with 3D foam pads.
2 Blend Hickory Smoke distress ink to the centre of the smaller panel where the moon will be. Die cut a circle from masking paper and place over the inked area once dry. Add Carved Pumpkin distress ink around the edge of the mask, blending that into the Wilted Violet.
3 Remove the mask, spritz, then dab off the excess with a paper towel. Curve the sentiment from the stamp set onto an acrylic block, then stamp onto the moon in black ink. Stick the outer frame to the panel, then the card front using double-sided tape.
4 Stamp a witch and cat onto stamping card and colour using marker pens. Die cut with their coordinating dies and add to the card front with 3D foam pads. Finish with different sized black glitter dots and leave to dry.
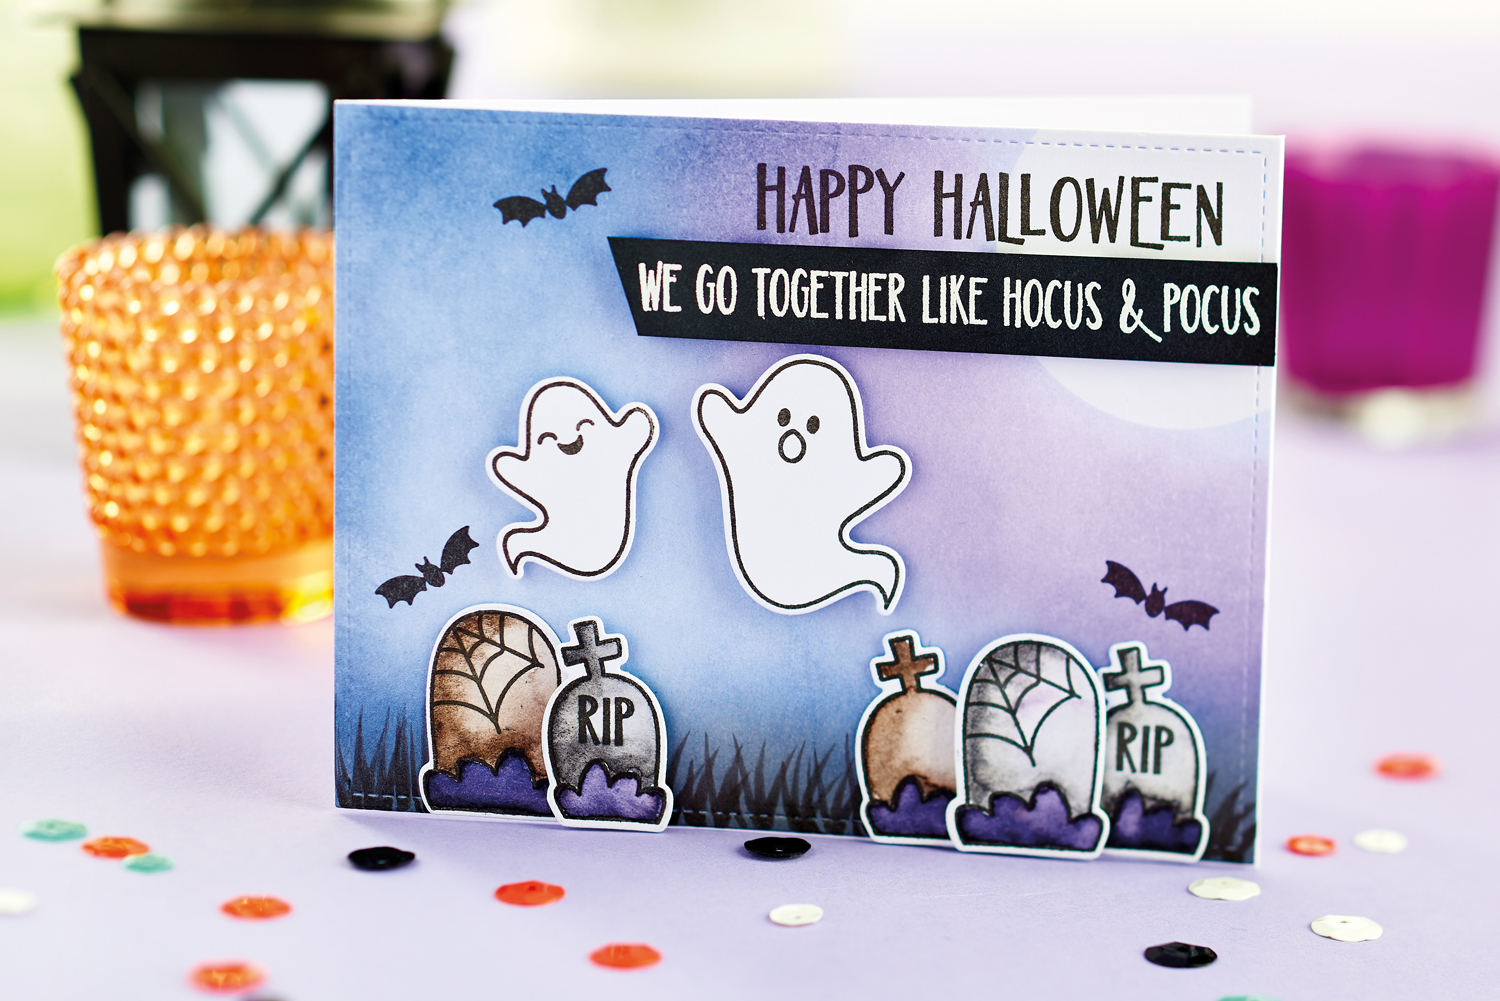
1 Die cut the biggest Large Stitched Rectangle from stamping card, then create a 11cm x 14cm blank the same size as the panel. Die cut a circle from masking paper and adhere at the top-right corner of the die-cut panel.
2 Add Shaded Lilac distress ink with a blending tool around the edges of the masked circle, then add Wilted Violet followed by Chipped Sapphire over the remainder of the piece to create an ombré effect. Blend Black Soot to the bottom, then remove the masking tape.
3 Add grass to the bottom of the card with a black fineliner pen using light, upward-flicking motions, then add the panel onto the blank with double-sided tape. Stamp gravestones and ghosts onto stamping card and die cut with their coordinating dies.
4 Colour the gravestones using marker pens, then add them to the background; lay some flat, and others with 3D foam pads. Adhere the ghosts using 3D foam pads. Stamp the bats and ‘Happy Halloween’ with black VersaFine ink onto the background.
5 Stamp a sentiment onto a strip of black card with VersaMark ink and sprinkle with white embossing powder. Heat set, then affix to the card with 3D foam pads.
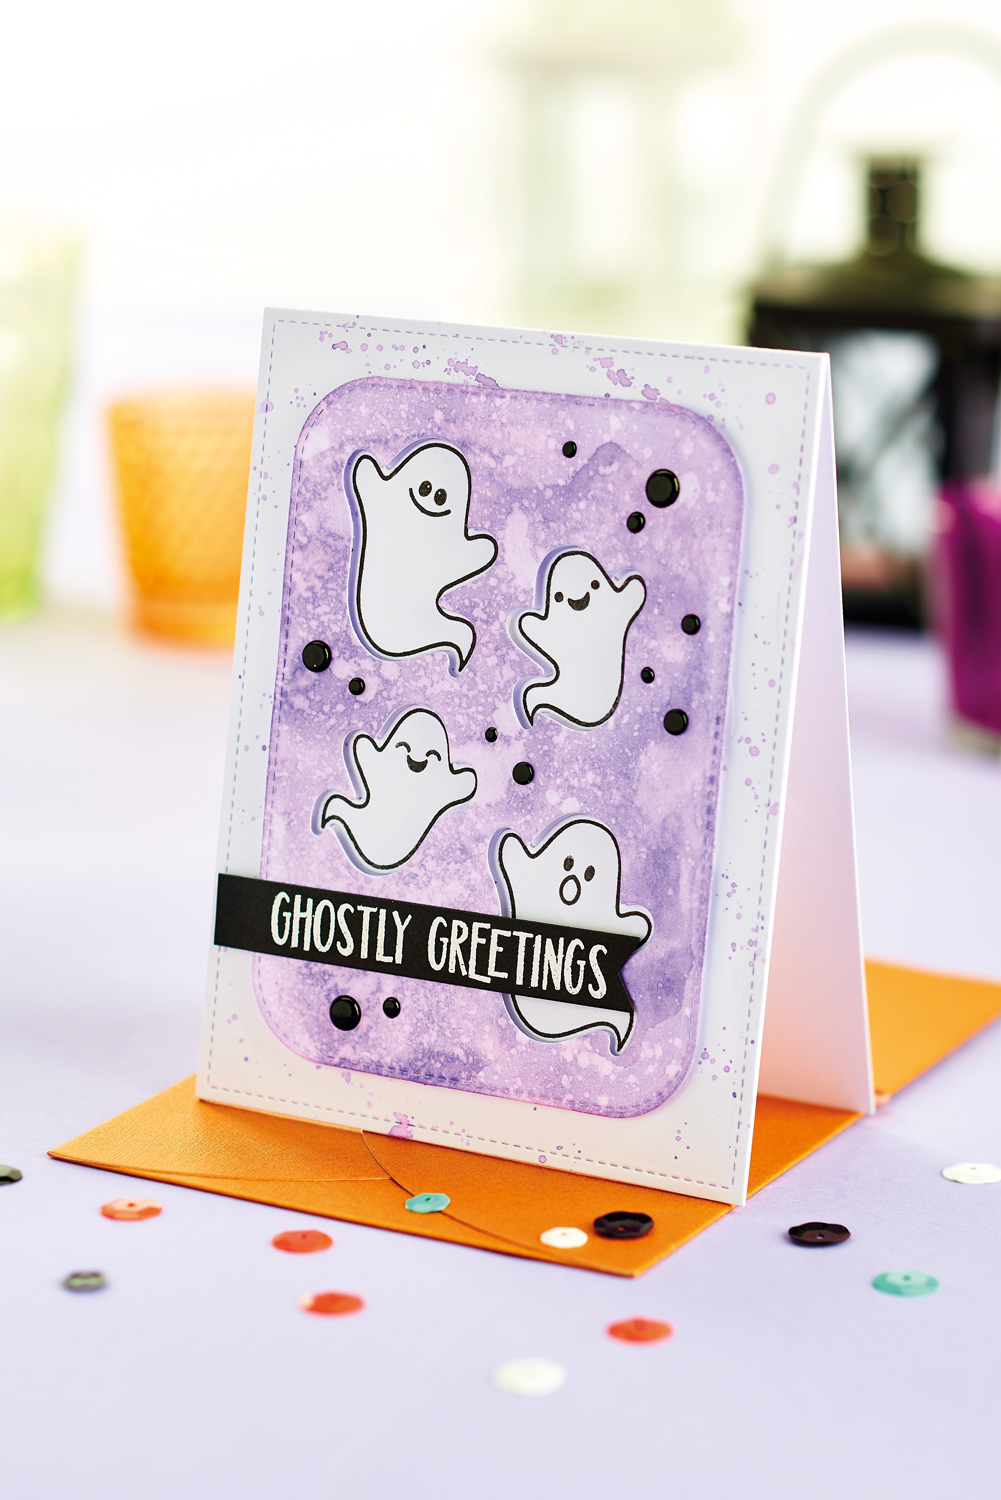
1 Die cut the biggest Stitched Rectangle from stamping card, then create a 11cm x 14cm white top-folding blank the same size as the panel. Apply Wilted Violet distress ink onto a glass mat. Spritz with water, then use a wet paintbrush to splatter the ink all over the die-cut rectangle. Dry with a heat tool, then adhere to the card front.
2 Die cut the largest Stitched Rounded Rectangle from stamping card for an 8.5cm x 12cm panel. Apply Wilted Violet distress ink onto a glass mat and spritz with water. Dip the die-cut rectangle into the ink, covering the whole piece, then dry with a heat tool. Splatter a little clean water over the piece and dab the excess off with paper towel.
3 Die cut the ghosts from the panel, then adhere to the centre of the card front with 3D foam pads. Stamp the ghosts and their faces onto white card with VersaFine Onyx Black ink, then die cut with their coordinating dies. Adhere them through the gaps in the rounded rectangle.
4 Stamp a sentiment onto a strip of black cardstock with the VersaMark ink and sprinkle white embossing powder over it. Set with a heat tool, cut the end into a banner shape, then adhere to the card. Add different sized black glitter dots and leave to dry overnight.

Busy lives often involve a lot of memos and reminders, and it can sometimes be hard to keep track. Luckily, we’ve got a sophisticated solution to keep your desk tidy and…

If you’re having a quiet Valentine’s with your beloved at home this year, make the place look a little more special with a speedy-to-make hearts frieze. Papercrafting doesn’t get much easier than…
Home decor Home decorations How to Papercraft Papercrafter Techniques Projects

1. Using a 3.5cm circle die, cut eight discs from chipboard and sixteen circles from patterned paper. Glue the patterned circles to either side of the discs and punch a…

Craft essentials
1. Cut a 5cm x 15cm strip of double-sided patterned paper and fold in half lengthways. Draw parallel pencil lines at 1.5cm and 2cm from the…


