

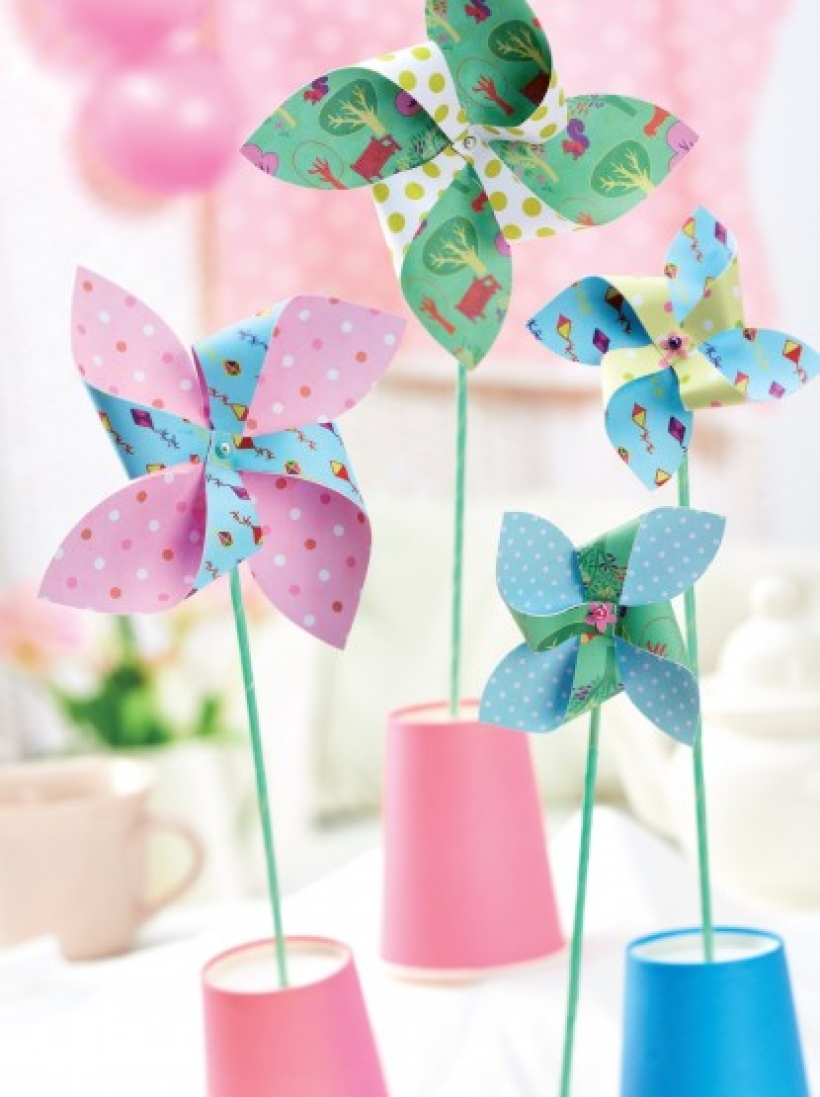


Paper windmills just scream summer and days in the sun. They’re simple to make but look really effective when placed around the garden at a summer bash or decorating your windowsill for all to see. Follow Corinne Bradd’s instructions below and get crafting! You’ll find more paper party ideas in issue 84 of PaperCrafter.
Craft Essentials, Skewers: wooden, Washi tape, Hole punch, Eyelets and setter, Pins: glass-headed, Beads: pearl, Pliers
• Cut two 8cm and two 13cm squares of double-sided paper. Draw a 2.5cm diameter circle in the centre of each and punch a 4mm hole in the middle.
• Place a ruler from corner to corner in both directions and mark where it crosses on the edge of the circle. Mark a point 1cm from one corner of each square.
• Draw a convex curve from this mark to the nearest mark on the circle. Repeat for the other corners and then cut along the curves.
• Make a 4mm hole in each of the 1cm wide arms of the windmills. Bend the arms towards the centre and secure by fitting an eyelet through all five holes.
• Thread a glass-headed pin through the eyelet and add a pearl bead behind each windmill. Use pliers to bend the pin at 90º, approximately 3mm from the pearl.
• Split the top of a skewer with a craft knife and slot the bent pin into the split so the windmill sits parallel with the main part of the stick and the bent pin can be taped securely to it with washi tape.

Busy lives often involve a lot of memos and reminders, and it can sometimes be hard to keep track. Luckily, we’ve got a sophisticated solution to keep your desk tidy and…

If you’re having a quiet Valentine’s with your beloved at home this year, make the place look a little more special with a speedy-to-make hearts frieze. Papercrafting doesn’t get much easier than…
Home decor Home decorations How to Papercraft Papercrafter Techniques Projects

1. Using a 3.5cm circle die, cut eight discs from chipboard and sixteen circles from patterned paper. Glue the patterned circles to either side of the discs and punch a…

Craft essentials
1. Cut a 5cm x 15cm strip of double-sided patterned paper and fold in half lengthways. Draw parallel pencil lines at 1.5cm and 2cm from the…


