


Card making Halloween cards Halloween crafts How to Techniques
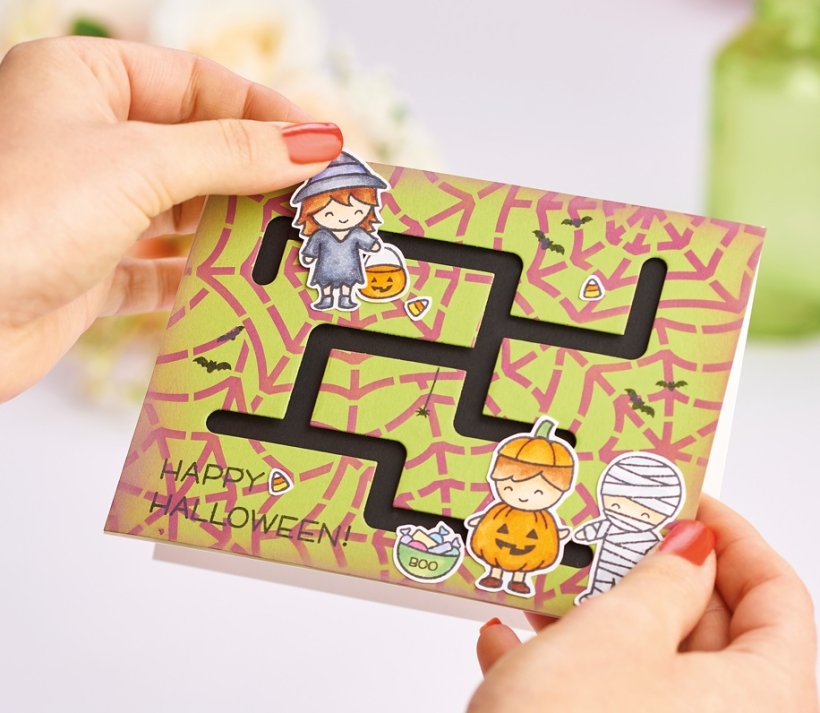
Mix things up and add a kinetic, interactive element to your makes with our trick-or-treat maze cards
More Than A Card
It’s the time of year for trick or treating, so what better way to celebrate than with some fun interactive cards? The key to all of these designs is the Lawn Fawn Slide On Over Maze die. It’s really versatile, but I think it’s especially perfect for creating fun and dynamic scenes. It allows you to craft an impressive card and tell a story at the same time. Get creative by placing some spooky surprises for your characters along the way!
Perfect Pads
The trick when working with this maze die is to use plenty of 3D foam pads to give your card the necessary depth, but you still need to make sure the interactive element can flow freely. Be careful not to place your 3D foam pads too close to the edges of the maze to ensure your sliding elements don’t get stuck! As for the kinetic motifs, small double-sided circular 3D foam pads work great. This way they can move around easily without being forced.
YOU WILL NEED:
Dies: Lawn Fawn Slide On Over Maze, Cute Cobweb
Stamps: Lawn Fawn Spooky Village, Costume Party, Tiny Halloween
Stencils: Newton’s Nook Spiderweb, My Favorite Things Mini Cloud Edges
Ink pads: Ranger Distress Oxide Seedless Preserves, Pumice Stone, Ripe Persimmon, Carved Pumpkin, Wilted Violet; black
Cardstock, various colours
Ranger Glossy Accents
Alcohol markers
Adhesives: 3D foam pads, glue
Die-cutting machine
Happy Halloween Maze Card
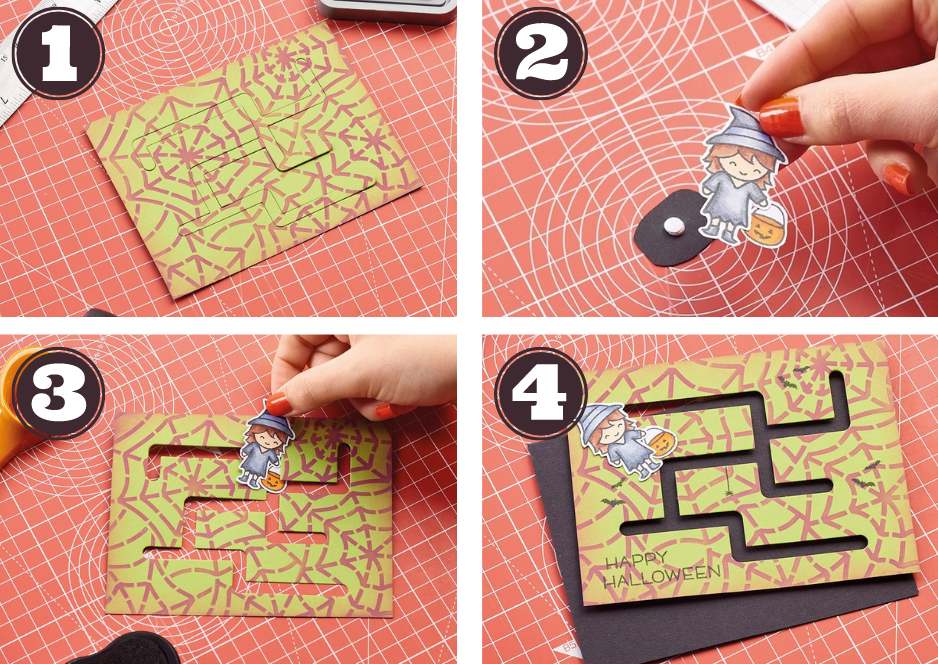
1. Trim black card to 10cm x 13cm, then adhere onto an 11cm x 14cm blank. Cut green card to 11cm x 14cm and use a cobweb stencil with purple distress oxide ink to create a background. Blend the ink around the edges. Die cut the maze from the panel.
2. Stamp a witch, pumpkin, mummy, sweets and bucket onto white card. Colour in with alcohol markers, then trim. Secure a black disc to the back of the witch with two small 3D foam pads
to create the slider element. Glue the remaining motifs onto the maze panel.
3. Stamp a sentiment, bats and a spider in black ink. Attach to the card front with 3D foam pads and slide the witch into the maze.
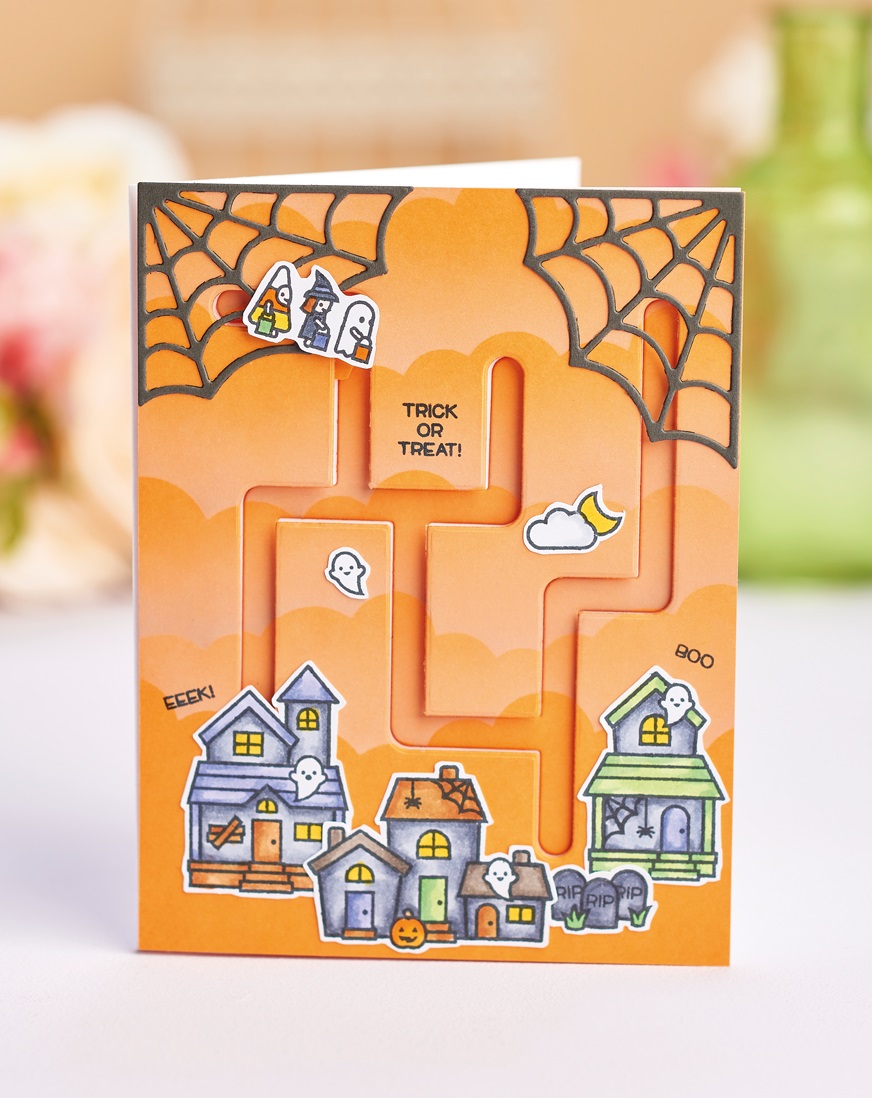
Trick Or Treat Maze Card
1. Cut orange card to 11cm x 14cm. Use a cloud stencil with grey distress oxide ink and rotate several times to create the background. Die cut a maze from the background, then position
onto a white 11cm x 14cm blank. Line up the maze offcut, remove the background panel and glue the offcut to the blank.
2. Die cut two spider webs from dark grey, then adhere to the top-left and top-right corners of the background panel. Stamp trick or treaters, haunted houses, gravestones, ghosts and
a moon onto white. Colour in with alcohol markers, then cut out. For the slider element, snip a small disc from orange, then secure to the back of the trick or treaters motif with two
small 3D foam pads.
3. Add the remaining motifs onto the background, then stamp three sentiments in black ink. Use 3D foam pads to fix the background onto the card front, lining it up with the maze offcut. Slide the trick or treaters motif into the maze.

Spooktacular Maze Card
1. Apply orange distress oxide ink to the top two-thirds of an 11cm x 14cm panel of white card. Blend purple ink along the lower section. Sprinkle on water droplets, then leave to dry. Die cut the maze from the background and position onto a white 11cm x 14cm blank. Line up the maze offcut, remove the background panel and glue the offcut to the blank.
2. Stamp pumpkins, ghosts and a cat onto white card. Colour in with alcohol markers and cut out. Trim a small disc from orange card, then attach to the back of the large pumpkin with two small 3D foam pads to make the slider element.
3. Adhere the remaining motifs onto the background panel. Stamp a sentiment, bats and stars in black ink. Colour in the stars, then embellish with Glossy Accents. Use 3D foam pads to secure the background to the card front, lining it up with the maze offcut. Slide the pumpkin into the maze.

Busy lives often involve a lot of memos and reminders, and it can sometimes be hard to keep track. Luckily, we’ve got a sophisticated solution to keep your desk tidy and…

If you’re having a quiet Valentine’s with your beloved at home this year, make the place look a little more special with a speedy-to-make hearts frieze. Papercrafting doesn’t get much easier than…
Home decor Home decorations How to Papercraft Papercrafter Techniques Projects

1. Using a 3.5cm circle die, cut eight discs from chipboard and sixteen circles from patterned paper. Glue the patterned circles to either side of the discs and punch a…

Craft essentials
1. Cut a 5cm x 15cm strip of double-sided patterned paper and fold in half lengthways. Draw parallel pencil lines at 1.5cm and 2cm from the…


