


Although the festive season is a little while off, now’s the time to treat yourself to a lesson from gift and card making specialist Jane Means. There’s no denying, some gifts are just harder to wrap than others — and one of those awkward shapes is the champagne or wine bottle.
Scotch Magic Tape, Wrapping paper, A boxed gift
In collaboration with Scotch gift-wrapping whiz Jane Means has put together a handy step-by-step tutorial to help us debunk those tricky wraps. Come Christmas-time, you’ll be grateful for your new-found abilities!
• Cut your cellophane to the same size as your sheets of tissue paper. Lay flat onto a table

• Add strips of Scotch Magic Tape to your cellophane in a pattern of your choice. Jane suggests making a star or stripes with the tape

• Using a marker pen write a personalised message across the tape. If you make a mistake you can simply peel it off and start again

• Turn the cellophane over so the personalised side is now against the table, and place a sheet of tissue paper on top

• Position the bottle in the centre of the tissue paper

• Cut a length of ribbon ready to be used as a bow at the top of the bottle and have this close to hand. Now for the wrapping itself. Start at the back of the bottle and pull both layers of cellophane and tissue paper up towards you, and hold in place at the back of the bottle in one hand

• With your free hand pull up the next piece of cellophane and tissue paper to the right of the bottle. Fold it back to create a pleat next to the first piece of cellophane and hold in place with your hand around the bottle

• Repeat until you have created a series of folded pleats halfway around the bottle. When you reach this point, switch hands so you are not crossing over yourself. Once you have finished pleating the wrap around your bottle, while keeping hold of the top, lay the bottle down on top of your ribbon and secure the wrap in place by making a bow around the neck of the bottle

• To add an additional layer of decoration, cut your second sheet of contrasting coloured tissue paper in half. Grab the centre of the tissue paper and give it a good shake to form a posy. Repeat with both halves

• Place one hand around the neck of the bottle to keep the gift wrap in place and with your free hand, loosen or remove the ribbon from the neck of the bottle

• Using your free hand place the additional tissue paper posies inside the gift wrap you have already created on the left and right hand side of bottle neck. This will conceal the top of your gift and make a colourful addition to the gift wrap

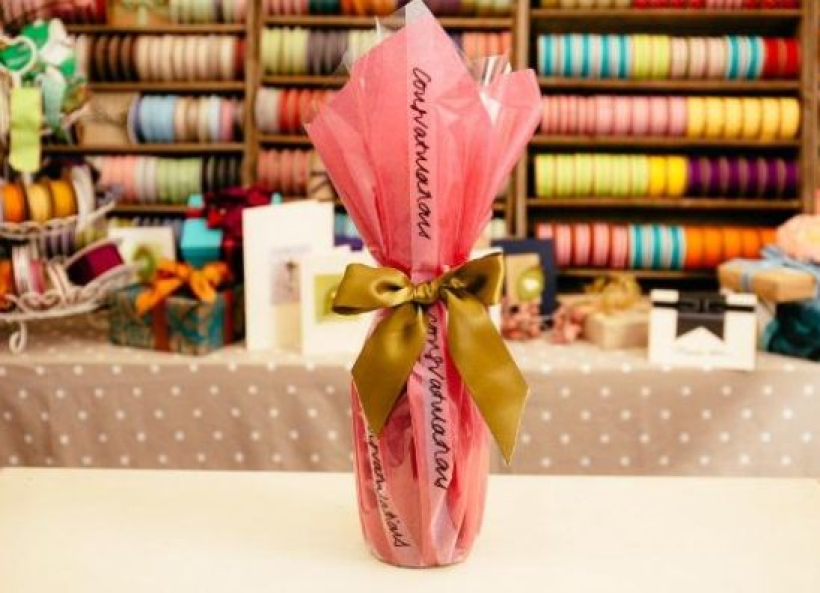
• Using your free hand, secure the tissue paper and cellophane in place by creating a bow around the neck of the bottle with your ribbon. And there you have your beautiful finished gift wrapped bottle!


Busy lives often involve a lot of memos and reminders, and it can sometimes be hard to keep track. Luckily, we’ve got a sophisticated solution to keep your desk tidy and…

If you’re having a quiet Valentine’s with your beloved at home this year, make the place look a little more special with a speedy-to-make hearts frieze. Papercrafting doesn’t get much easier than…
Home decor Home decorations How to Papercraft Papercrafter Techniques Projects

1. Using a 3.5cm circle die, cut eight discs from chipboard and sixteen circles from patterned paper. Glue the patterned circles to either side of the discs and punch a…

Craft essentials
1. Cut a 5cm x 15cm strip of double-sided patterned paper and fold in half lengthways. Draw parallel pencil lines at 1.5cm and 2cm from the…


