


Die cutting Home decor Home decorations Papercraft Papercrafter Techniques
Introduce a riot of colour into your home with these joyous die-cut displays
You Will Need:
Templates or SVG files
Brother ScanNCut SDX1200
Cardstock, various colours
Canvas, A4
Paint, acrylic: pale yellow, off-white
Paint brush
Paint pens, various colours
Adhesives: glue, 3D foam pads
Get Started
1. Download our templates onto a USB stick and plug straight into the ScanNCut machine to access. Alternatively, print out the PDF files and scan into the machine manually. Group each set of shapes so they can be resized in proportion to suit your needs and still be layered perfectly.
2. Choose several shades of cardstock in bright colours, mixing light hues with darker tones for the best contrast. Arrange a set of layered shapes in one area of the display screen and cut a piece of card to fit this area. Trim all the images at once and repeat the process to create a selection of colours. You will need at least seven for the best effect.
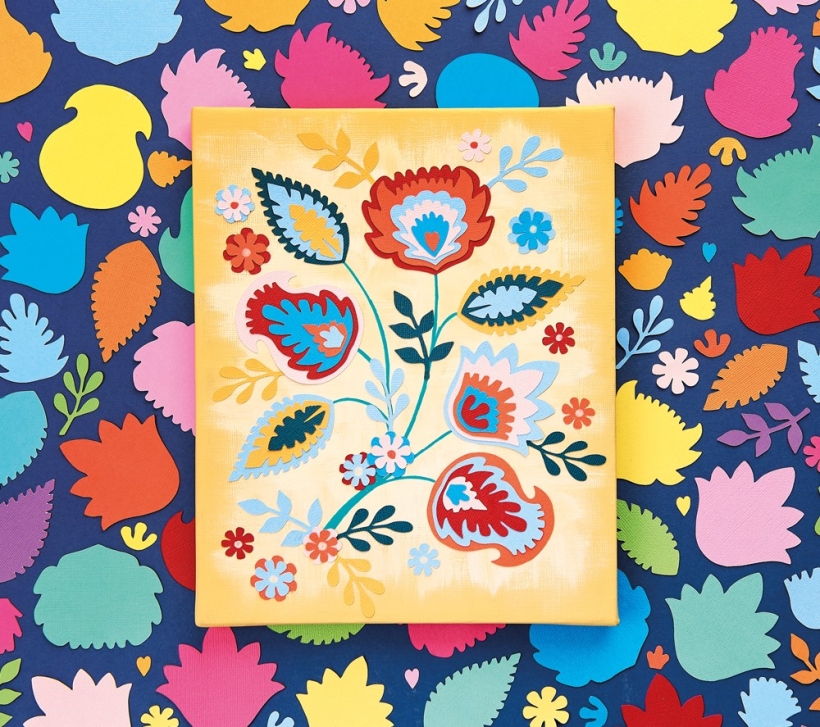
Canvas
1. Prepare an A4 canvas with two thin coats of pale yellow acrylic paint. While the second coat is still drying, add off-white paint in the centre, blending it out to the edges with a large, soft brush. Leave to dry. Gather your die-cuts and layer together, checking the arrangement before glueing in place. Layer small flowers together in pairs and add a dot to the centre of each one with a paint pen.
2. Place the layered flowers and leaves on the canvas and sketch stems to each one with a pencil. Remove the die-cuts and draw in the stems with a paint pen. Fix the layered shapes in place with 3D foam pads. Add single leaves and layered flowers around the arrangement, tucking the stems under the main motifs.
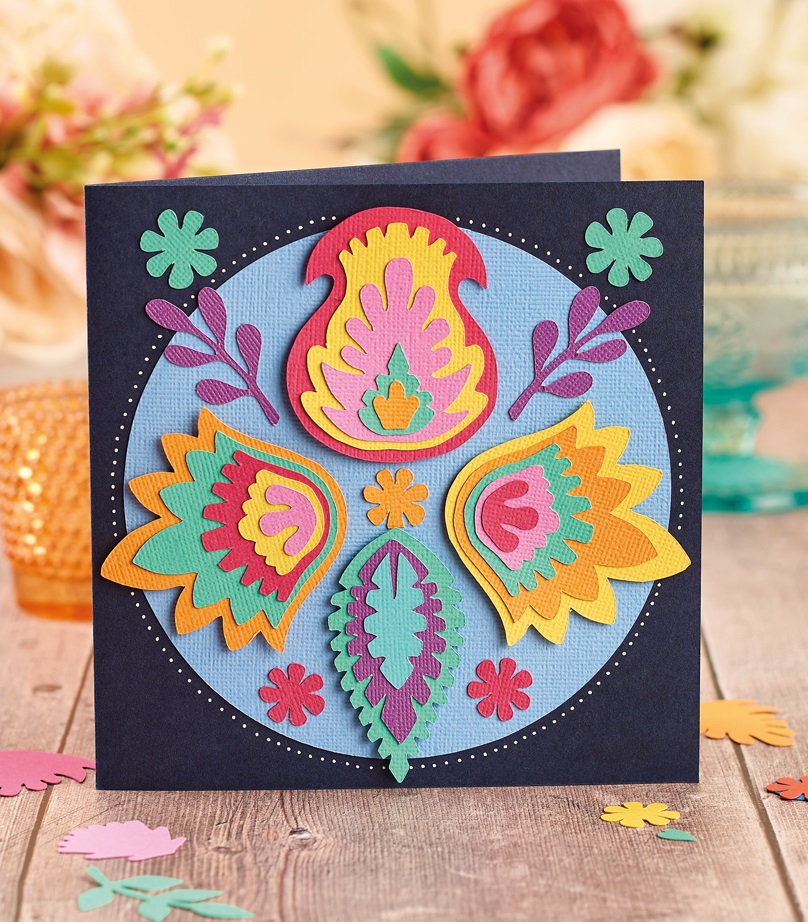
Matching Card
1. Make a 15cm square blank from navy cardstock. Die cut a 13cm diameter circle from light blue card and adhere to the centre. Draw a ring of small dots around the circle with a white paint pen.
2. Arrange the layered flowers and leaves in a symmetrical pattern, radiating from the centre of the circle, and fix in place with 3D foam pads. If you’d like a sentiment, leave a space in your design and choose a phrase from the ScanNCut’s library or use your favourite stamp and ink combo.
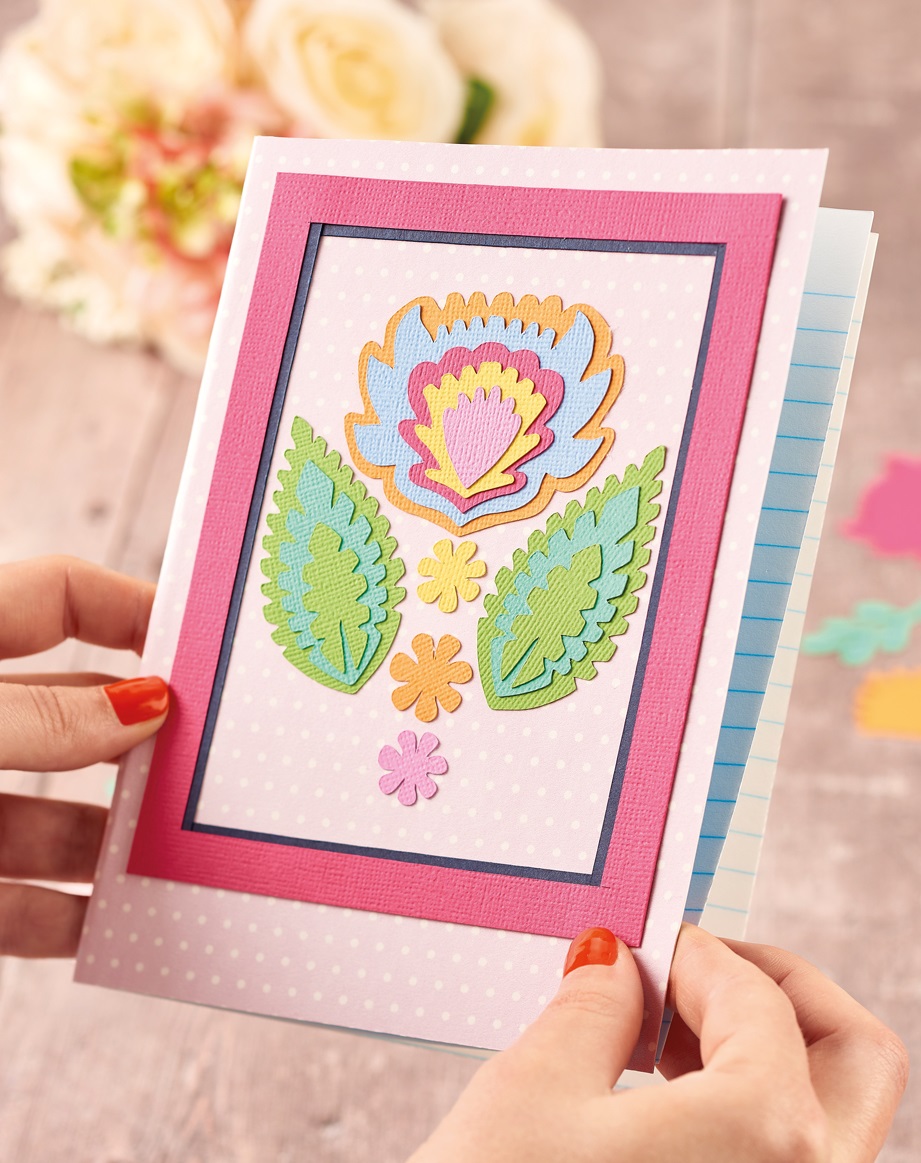
Notebook
Use leftover layered flowers from your projects to decorate other flat items, such as a notebook or journal. Fix the pieces to the cover with glue rather than 3D foam pads and cover with clear plastic film for extra protection if necessary.
“The ScanNCut is great for stash-busting! When working with paper scraps, use the on-screen grid to help place the areas you want to cut”
Corinne Bradd, designer

Busy lives often involve a lot of memos and reminders, and it can sometimes be hard to keep track. Luckily, we’ve got a sophisticated solution to keep your desk tidy and…

If you’re having a quiet Valentine’s with your beloved at home this year, make the place look a little more special with a speedy-to-make hearts frieze. Papercrafting doesn’t get much easier than…
Home decor Home decorations How to Papercraft Papercrafter Techniques Projects

1. Using a 3.5cm circle die, cut eight discs from chipboard and sixteen circles from patterned paper. Glue the patterned circles to either side of the discs and punch a…

Craft essentials
1. Cut a 5cm x 15cm strip of double-sided patterned paper and fold in half lengthways. Draw parallel pencil lines at 1.5cm and 2cm from the…


