


Home decor Home decorations How to
Learn how to make papier-mâché vases with our step-by-step tutorial and templates
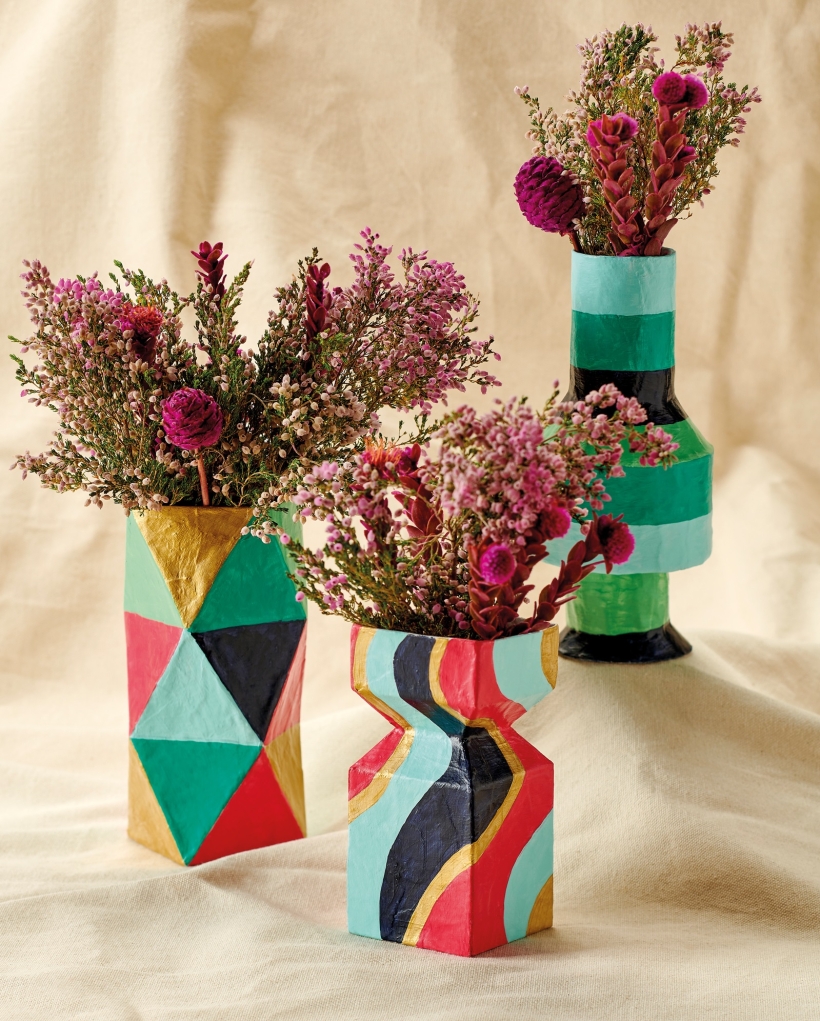
Papier-mâché (or paper mache) is a malleable mixture of paper and glue that becomes hard once dry. It can be used to make boxes, decorations and more, and Corinne Bradd is here with a particularly lovely trio of modern vases, made entirely from scratch, for you to try. Follow our simple tutorials and download the accompanying templates, and you can’t go wrong!
YOU WILL NEED:
Templates
Cereal boxes
Cardboard tubes
Masking tape
Newspaper
Plain paper
Acrylic paint
PVA glue
How To Papier-Mâché
Tear a sheet of newspaper into 2-3cm squares and begin pasting them over the vase with diluted PVA glue. Make the layers of newspaper as even as possible, whilst ensuring all the taped joins are covered over at least three times. Create your final layer from plain absorbent paper if desired and leave the vase to dry completely. Paint the entire vase with two coats of white acrylic paint to provide a clean base to decorate.
Square Vase
1. Use the square vase template with cereal box card, creasing along the score lines and cutting the solid lines. Tape the card into a square tube and push down the top so the horizontal scores concertina fold to create a narrow neck. Tape the diagonals together to hold the neck in place. Cut a square of card and tape to the bottom of the tube to make a base.
2. Papier-mâché the vase. Sketch wavy lines of different widths down the vase with a soft, pale pencil. Use a thin brush to paint the waves in three or four contrasting acrylic paint colours; two thin coats are better than one thick one. Once dry, seal with a coat of diluted PVA glue.

Geometric Vase
1. Use the geo vase template with cereal box card, creasing along the score lines and cutting the solid lines. Valley fold the horizontal lines and mountain fold the diagonal lines. Roll into a tube and secure with the tabs. Tape a square of card onto the base. Ensure the horizontal lines are pushed in to allow the diagonal ones to pop out.
2. Papier-mâché the vase. Choose several shades of acrylic paint and colour each triangular section so no two sections with the same hue touch. Seal the finished vase with a layer of diluted PVA glue.
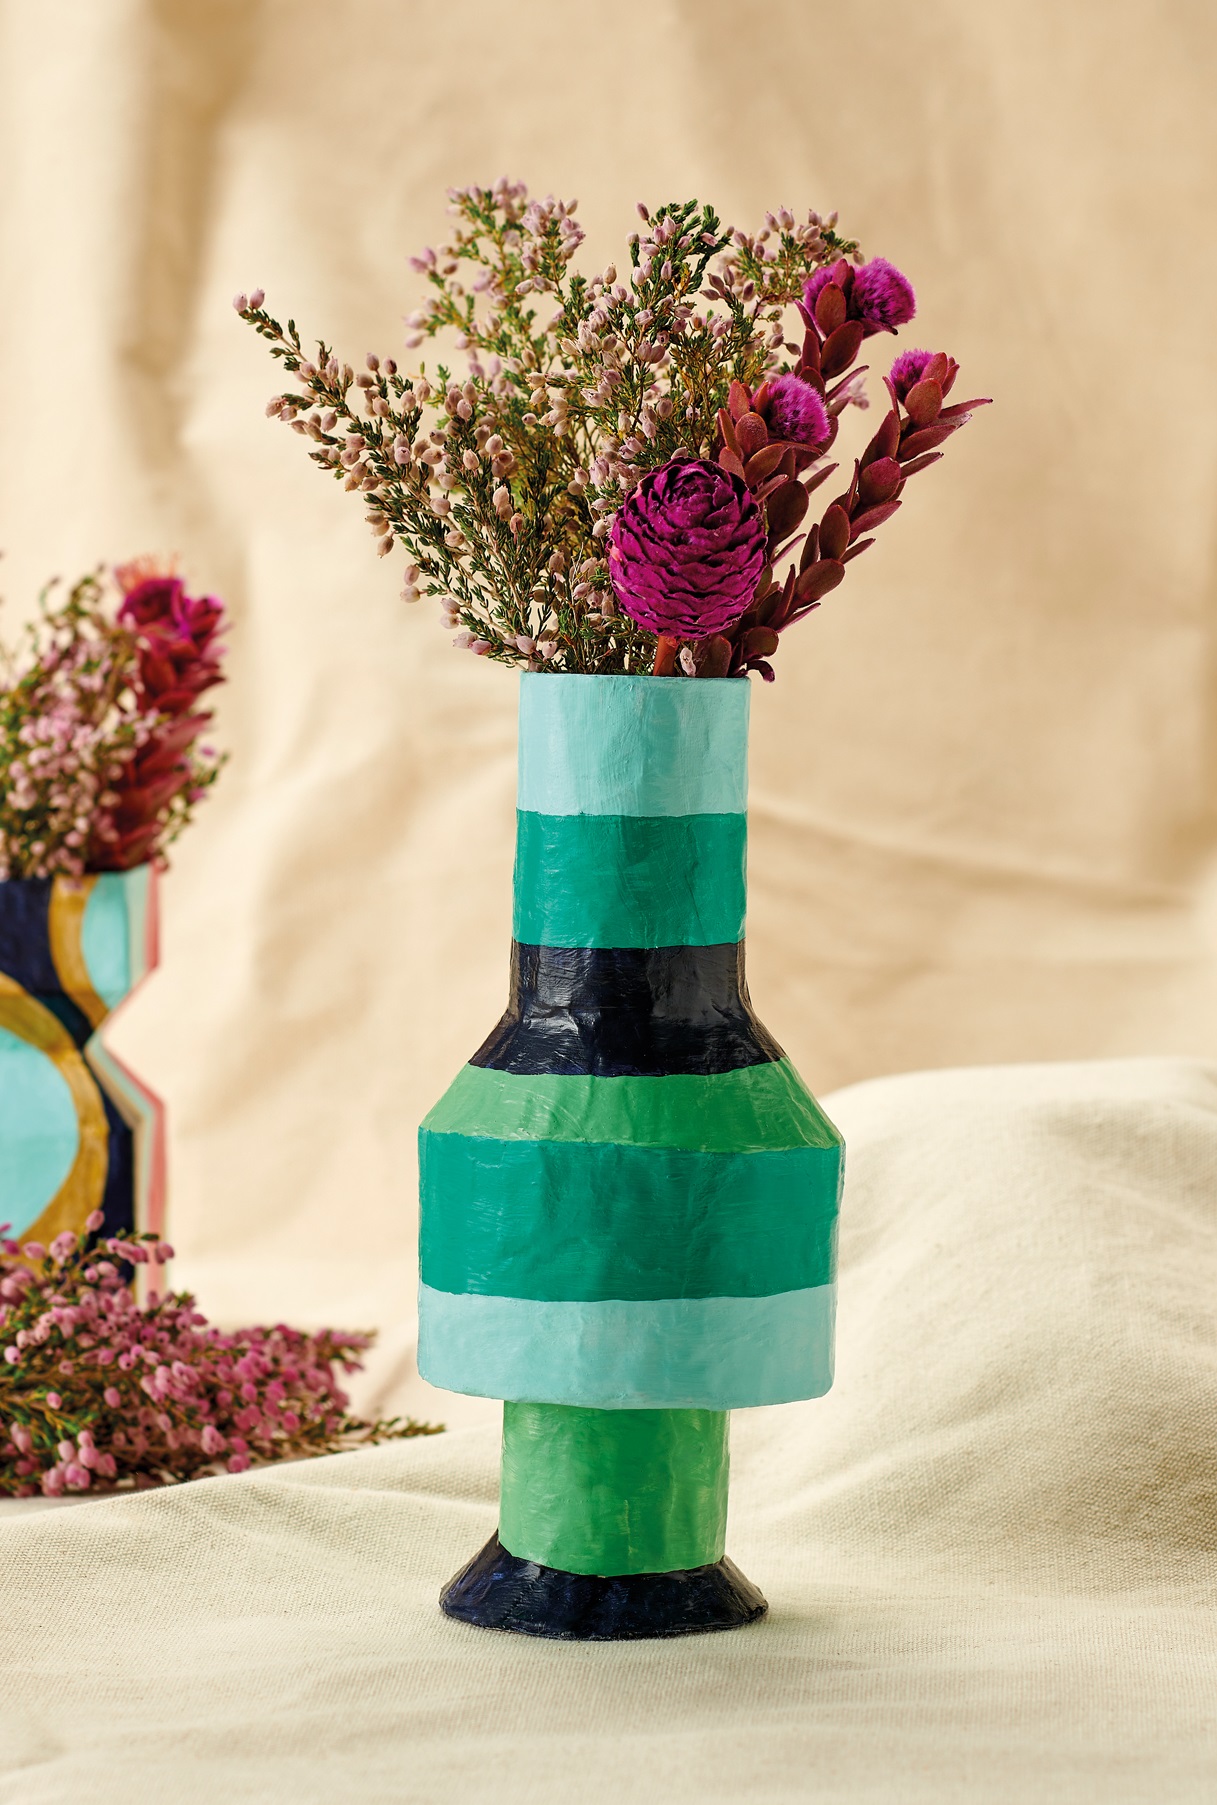
Round Vase
1. Make a 6.5cm disc of card for the base. Trim another disc of card 8cm wide, cut halfway into it, roll and tape into a shallow cone so it will fit on the base. Tape in place and glue a 3cm length of toilet roll tube over the top of the cone.
2. Take a packing tape roll and tape an 8.5cm disc of card to one end. Tape the bottom of this roll centrally to the top of the base. Cut an 11cm disc of card, then trim a 5cm circle from the centre. Snip into the ring and roll to make a cone that fits on top of the packing roll tube. Tape in place and add the remaining 7cm of toilet roll tube to the top of this.
3. Cover the vase with papier-mâché. Use a soft pencil to sketch horizontal lines around the vase – best done by resting the pencil on something and rotating the vase on a flat surface while holding it against the tip of the pencil. Paint the stripes in three or four coordinating acrylic paint colours and seal with a coat of PVA glue.
TOP TIP
Pop dried flowers in these DIY vases or hide a narrow glass vase inside so you can display real blooms

Busy lives often involve a lot of memos and reminders, and it can sometimes be hard to keep track. Luckily, we’ve got a sophisticated solution to keep your desk tidy and…

If you’re having a quiet Valentine’s with your beloved at home this year, make the place look a little more special with a speedy-to-make hearts frieze. Papercrafting doesn’t get much easier than…
Home decor Home decorations How to Papercraft Papercrafter Techniques Projects

1. Using a 3.5cm circle die, cut eight discs from chipboard and sixteen circles from patterned paper. Glue the patterned circles to either side of the discs and punch a…

Craft essentials
1. Cut a 5cm x 15cm strip of double-sided patterned paper and fold in half lengthways. Draw parallel pencil lines at 1.5cm and 2cm from the…


