


Decoupage Home decorations How to Papercraft Papercrafter Techniques Projects
Decoupage polystyrene eggs with pretty napkins and enjoy the process
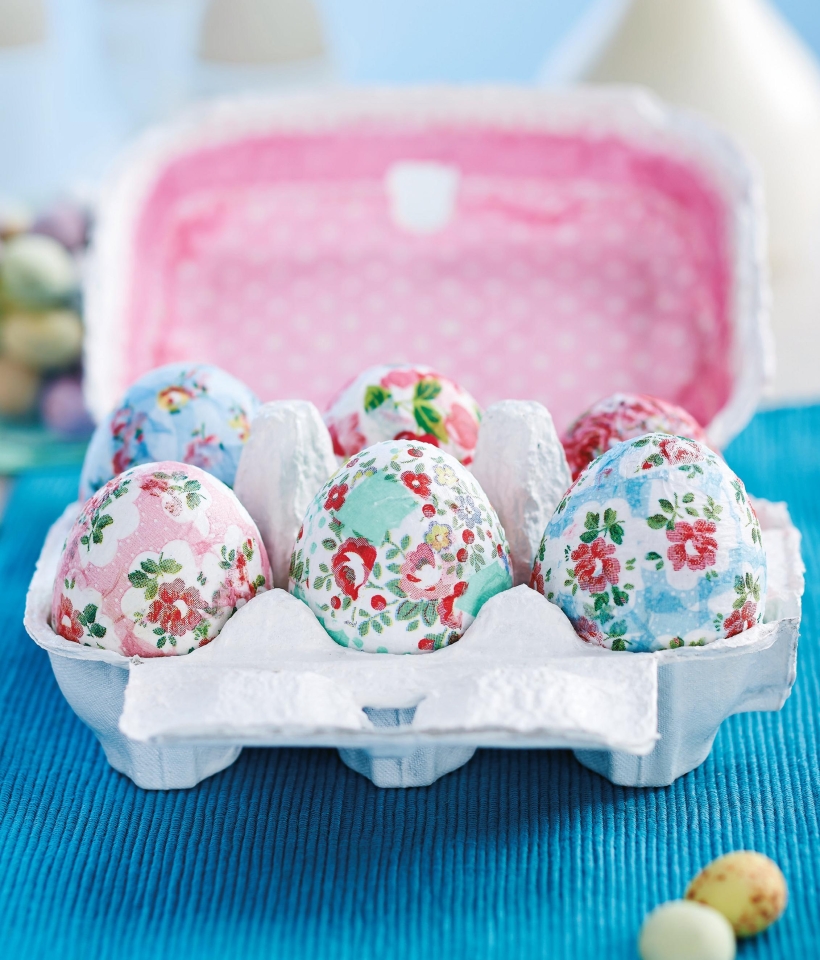
In an age where upcycling has become more cherished (and more important) than ever, we’re absolute suckers for anything that can turn daily household items into something spectacular. Jane Kharade’s inspired use of an old egg box, and reimagining of the eggs that sit within it, are the perfect example of such a feat. A project that requires minimal materials and time, that is genuinely fun to get stuck into and leaves you with a table feature that you won’t ever tire looking at? We chalk that up as a lockdown star.
Polystyrene eggs
Cardboard egg box
Napkins, patterned
Paint, white matt
Paint brush
PVA glue
1. Apply multiple coats of matt white paint to an egg box, leaving to dry between each layer. Trim a section of napkin paper to fit on the underside of the lid. Lightly cover the area in glue, then use a paint brush to press the tissue onto it, applying more glue over the top as a seal. Cut out a strip of napkin paper and secure in sections to create a border.
2. Peel away the white layer from each napkin, then cut them roughly into 2cm squares. Apply PVA glue onto polystyrene eggs using a paint brush, then adhere the napkin pieces. Make sure each section doesn’t overlap too much so the pattern remains visible.
3. Carefully cover the entire egg, then rest it sideways on an egg cup to dry. Use the same method with different patterned napkins on five more eggs. Place them inside the egg box to complete.

Busy lives often involve a lot of memos and reminders, and it can sometimes be hard to keep track. Luckily, we’ve got a sophisticated solution to keep your desk tidy and…

If you’re having a quiet Valentine’s with your beloved at home this year, make the place look a little more special with a speedy-to-make hearts frieze. Papercrafting doesn’t get much easier than…
Home decor Home decorations How to Papercraft Papercrafter Techniques Projects

1. Using a 3.5cm circle die, cut eight discs from chipboard and sixteen circles from patterned paper. Glue the patterned circles to either side of the discs and punch a…

Craft essentials
1. Cut a 5cm x 15cm strip of double-sided patterned paper and fold in half lengthways. Draw parallel pencil lines at 1.5cm and 2cm from the…


