


Card making Papercraft Stamping
Make like a sewist to give your cards an instant dose of texture – we show you how with our simple craft tutorial!
These three greetings cards by Keren Baker show how you can use basic sewing techniques to add variety and a tactile feel to your designs – and it helps that the process is wonderfully mindful and enjoyable once you know how. You don’t need advanced skills, sewing supplies are minimal and you can choose between hand sewing and machine sewing.
If you don’t already, make sure to save your blunter needles from sewing fabrics as these are perfect for paper and cardstock. The same goes for old bits of thread too – the quality doesn’t need to be as high. Additionally, don’t worry if your machine sewing isn’t exactly straight, it just adds to the textured effect! Overall these makes are an upcycler’s dream. What’s better than taking something that would usually go to waste and turning it into something beautiful?
While the greetings we’re showing here are suited to any recipient, this stitching technique could be the perfect opportunity to send a bona-fide seamstress a personalised card. You could lose the caticorns and replace them with sewing tools. Perhaps a bobbin or two here and a needle there. Don’t forget those trusty fabric scissors! If you’ll pardon the pun, tailoring it to suit the sensibilities of someone who adores sewing could work absolute wonders.
You Will Need:
Dies: Mama Elephant Pegworks Creative Cuts, Altenew Craft A Flower Antique Rose, My Favorite Things Photo Booth Strip
Stamps: My Favorite Things Caticorn, Sugar Pea Designs Everyday Sentiments
Patterned papers, Lawn Fawn Hello Sunshine Remix
Ink pad, Ranger Jet Black Archival
Grafix Dura-Lar Film, Matte
Gel pen, gold
Alcohol markers
Embroidery thread, various colours
Sewing needle
Wool
Sequins
Adhesives: glue, 3D foam pads, washi tape
Sewing machine
Die-cutting machine
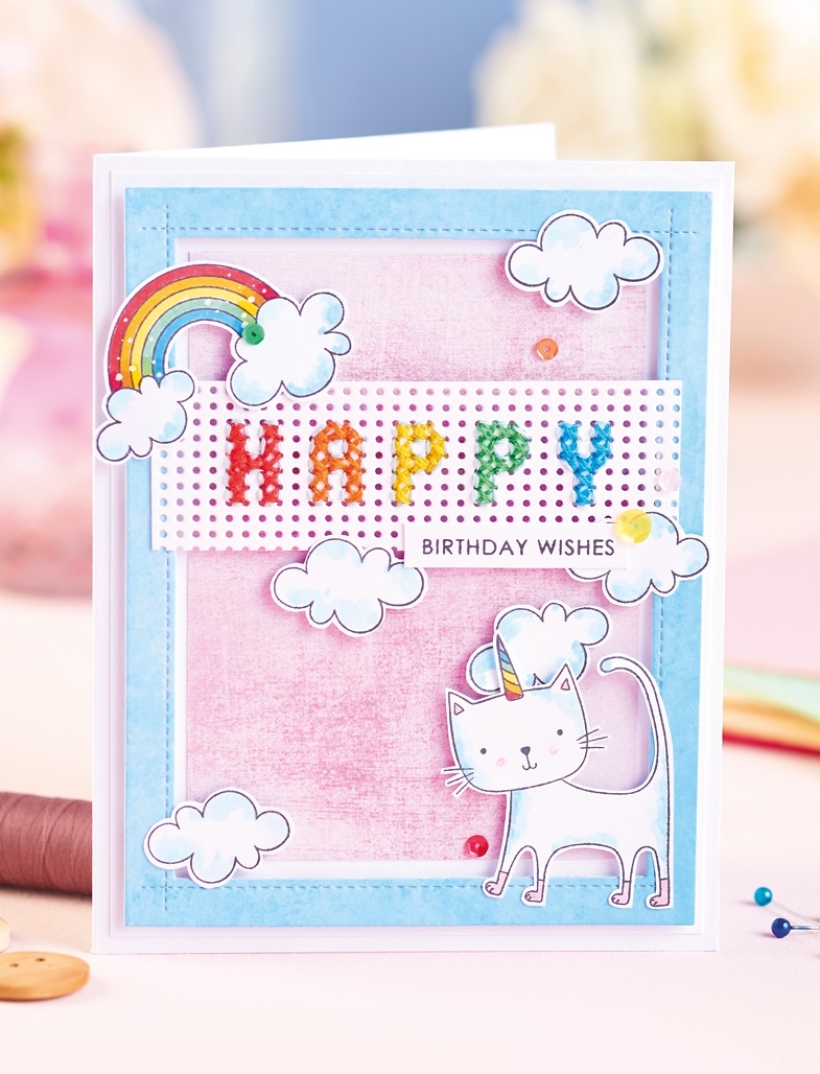
Cross-Stitch Birthday Card
1. Die cut a rectangular stitched frame from blue card, mount onto white with 3D foam pads, then add pink card inside the aperture. Layer the panel onto a white blank, 14cm x 16.5cm.
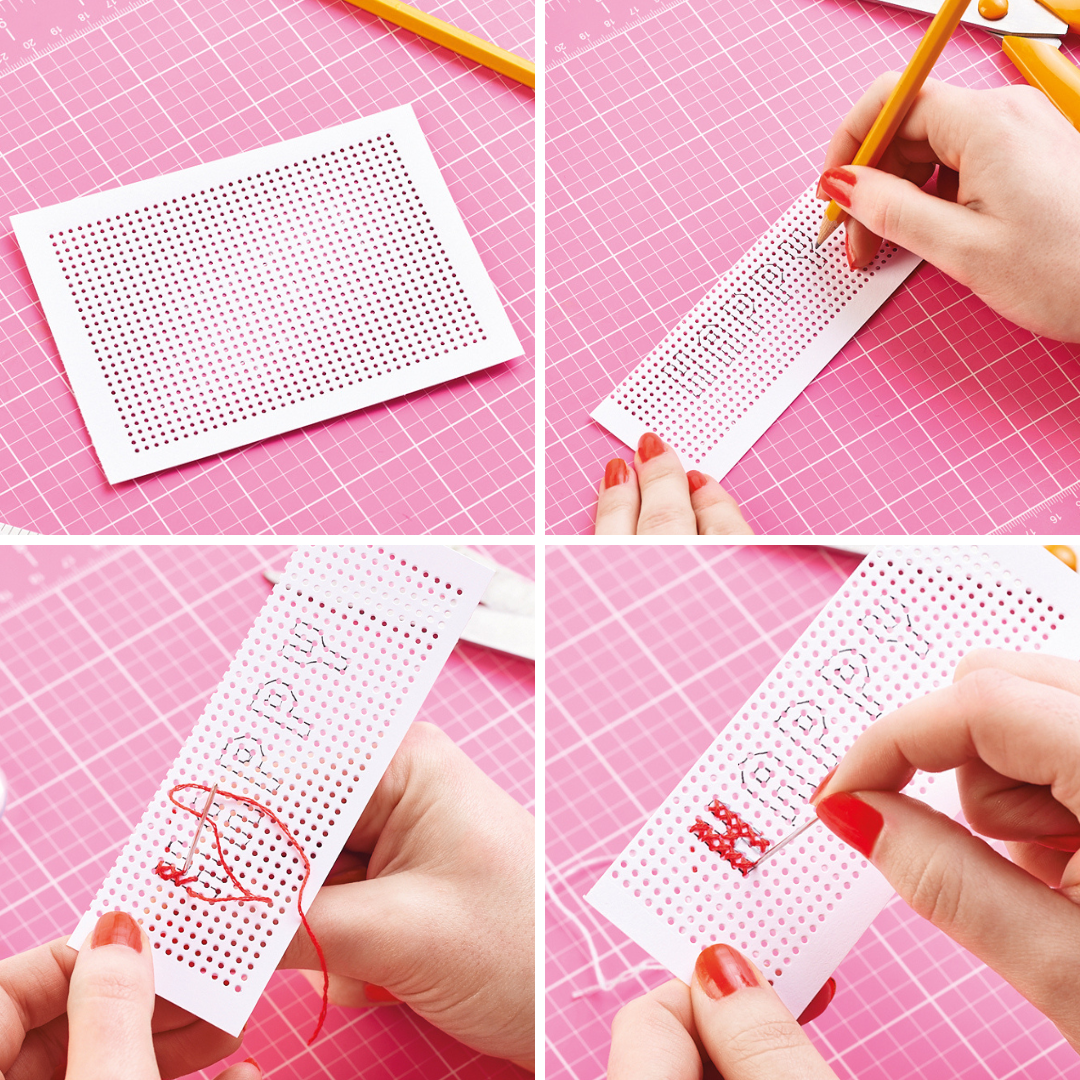
2. Follow the visuals above to create the stitched sentiment panel. Die cut the Mama Elephant Pegworks Creative Cuts panel from white card, then trim down. Using a pencil, trace out the letters for a sentiment, keeping the spacing between each character equal. Cross-stitch each letter using different coloured thread. Outline each letter by backstitching using a lighter coloured thread.
3. Trim the panel to size and fix towards the top of the frame. Stamp a rainbow, caticorn and cloud motifs onto white, colour in, trim, then secure to the card front with 3D foam pads. Glue a stamped sentiment below the stitched panel and embellish with sequins to complete.
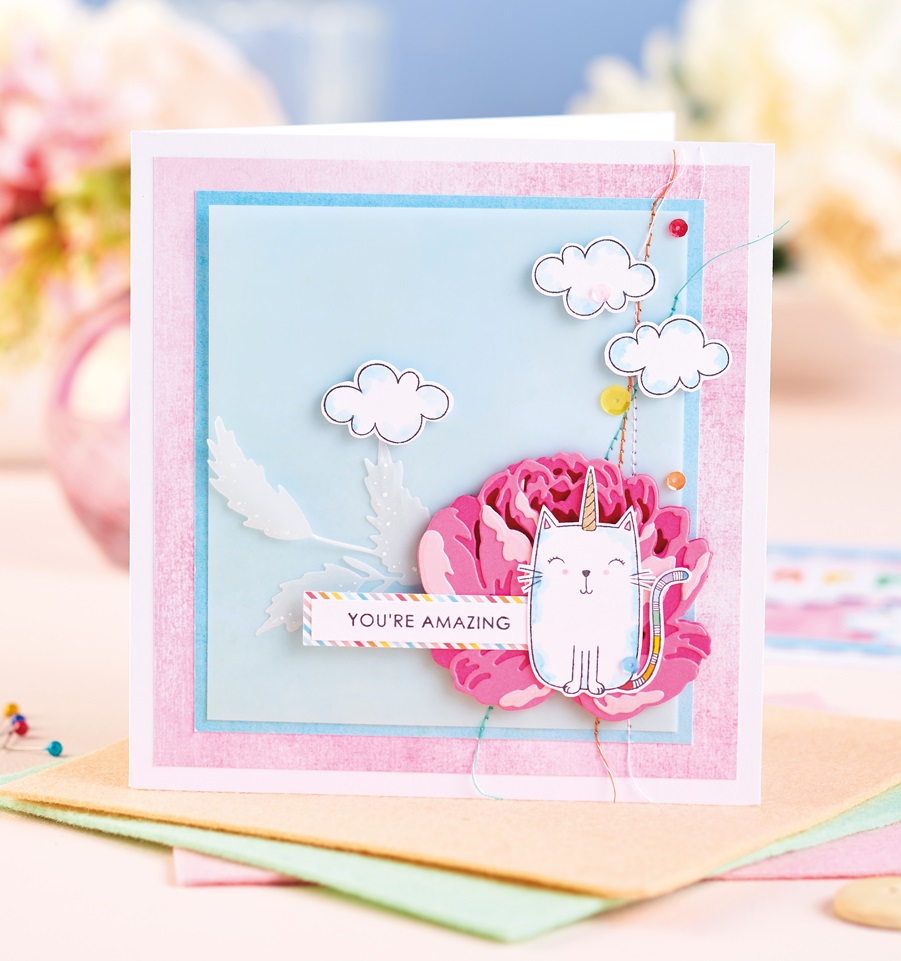
Easy Embroidered Card
1. Make a white blank, 15cm x 16cm, then matt pink patterned paper on top. Trim blue paper slightly smaller, then use washi tape to attach it to a layer of Dura-Lar Matte film. Stitch through the film, using various angles and different coloured thread. Leave some loose ends of the thread and glue in place.
2. Adhere the panel to the blank. Die cut a rose from different shades of pink and assemble, then die cut leaves from Dura-Lar Matte film. Attach in the bottom-right corner of the card. Stamp, colour and cut out cloud motifs and a caticorn.
3. Add a small piece of striped paper towards the left-hand side and attach the stamped motifs to the card front with 3D foam pads. Finish with a stamped sentiment and decorate with sequins.
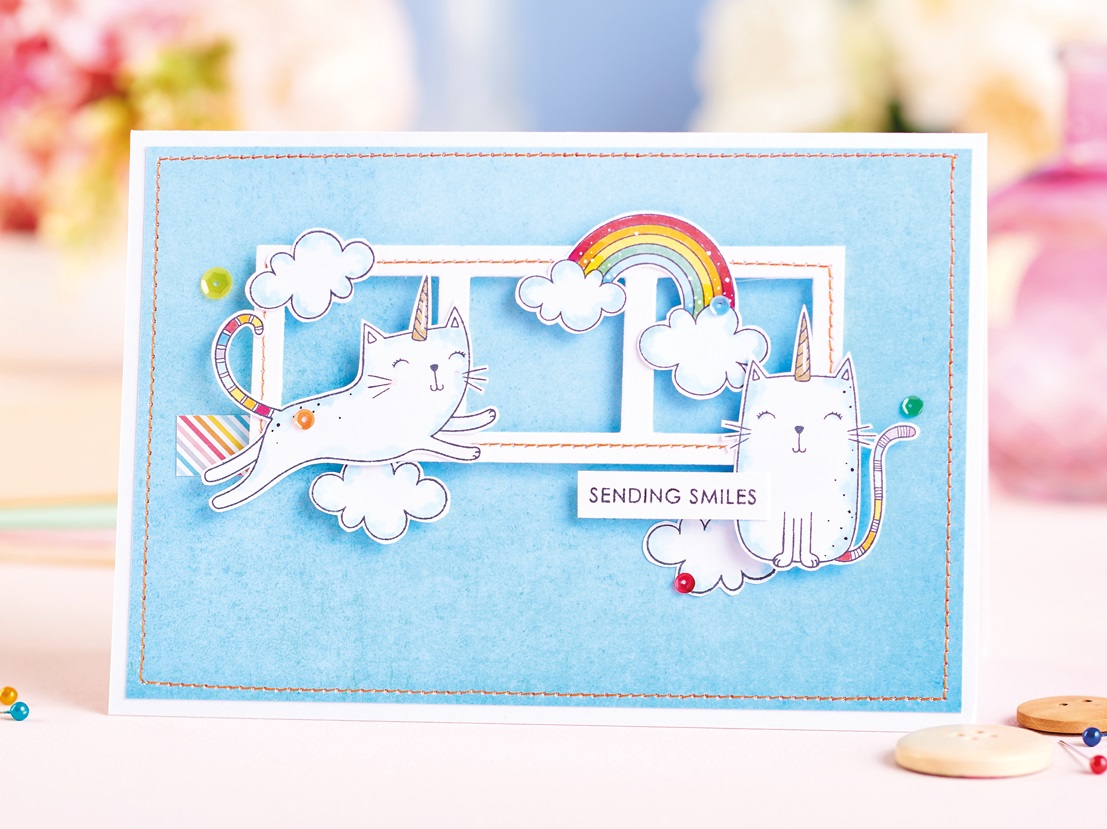
Embroidered Frame Greeting
1. Create a white top-folding blank, 12cm x 17cm, and layer blue patterned paper on top. Die cut a photo booth strip from white, then stitch around the outside using a sewing machine and orange thread.
2. Sew around the edge of the blue panel using the same orange thread. Add the photo booth strip in the centre with 3D foam pads. Stamp, colour and cut out two caticorns, a rainbow and cloud motifs.
3. Add a small piece of striped paper towards the left-hand side and attach the stamped motifs to the card front with 3D foam pads. Finish with a stamped sentiment and decorate with sequins to finish.

Busy lives often involve a lot of memos and reminders, and it can sometimes be hard to keep track. Luckily, we’ve got a sophisticated solution to keep your desk tidy and…

If you’re having a quiet Valentine’s with your beloved at home this year, make the place look a little more special with a speedy-to-make hearts frieze. Papercrafting doesn’t get much easier than…
Home decor Home decorations How to Papercraft Papercrafter Techniques Projects

1. Using a 3.5cm circle die, cut eight discs from chipboard and sixteen circles from patterned paper. Glue the patterned circles to either side of the discs and punch a…

Craft essentials
1. Cut a 5cm x 15cm strip of double-sided patterned paper and fold in half lengthways. Draw parallel pencil lines at 1.5cm and 2cm from the…


