


Minimal materials, maximum effect – just what we expect from the incomparable Corinne Bradd
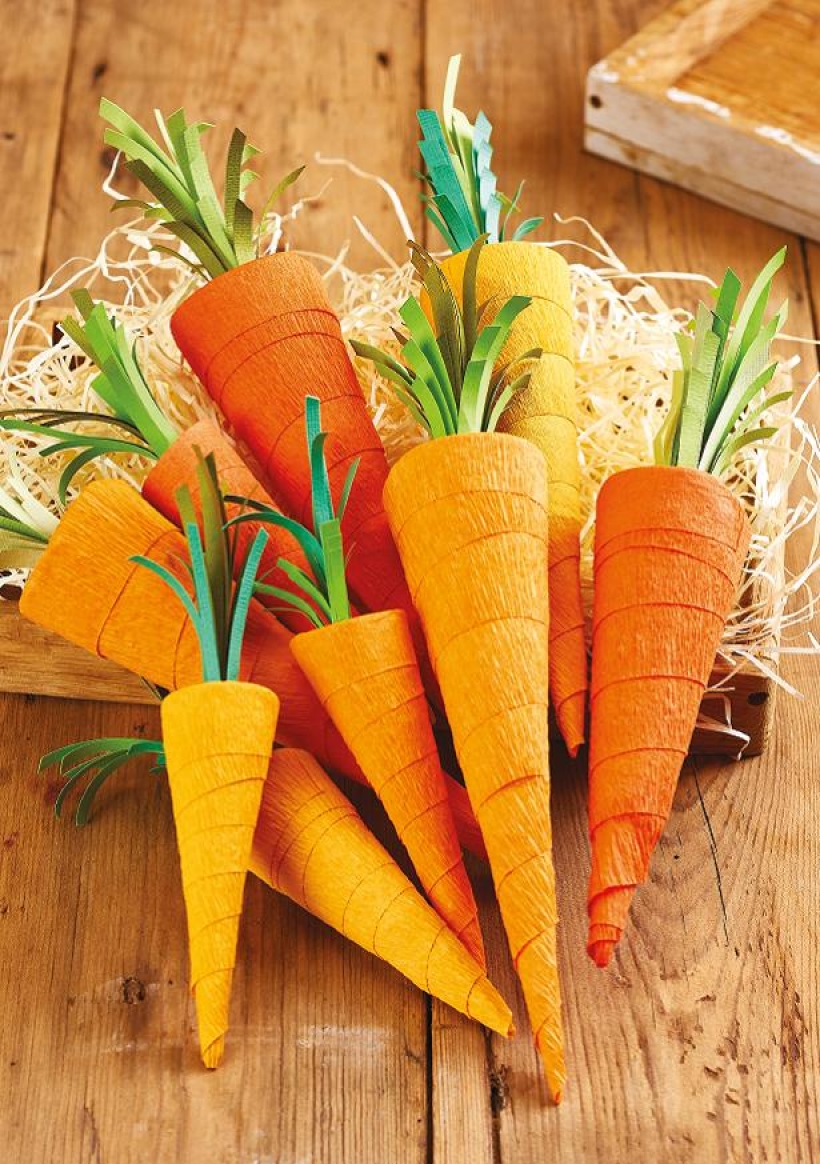
These delightful faux carrots look as luscious and bright as the real thing, with the added bonus of everlasting life. As spring gets into full swing, now is the perfect time to start growing, or crafting, your root veg. With this surprisingly simple design, you have a cost-effective option that only uses basic materials. Ideal for use as a table centrepiece or filling with sweet treats, they’re guaranteed to give your home a wonderful rustic feel.
Crepe paper, orange
Cardstock, greens
Stiff card
Cardboard tubes
Adhesives: glue, double-sided tape
1. Cut a deep ‘V’ shape into the side of a cardboard tube, 6cm wide at the top and stopping 2cm from the other end of the tube. Squeeze the sides of the tube together to form a cone and hold in place with double-sided tape. Trim the wide end flat. Roll the cut-out piece of card into a smaller cone, secure with double-sided tape and slip inside the first cone to make the point of the carrot.
2. Trim a 2.5cm wide strip of orange crepe paper against the grain so it can stretch. Apply a little glue to the end of the strip. Start 2cm away from the tip and wrap towards it, then wrap back up to the top, covering the cardboard. Add dots of glue every now and then to prevent slipping and allow the crepe paper to extend above the end of the cone. Secure the end and tuck the overhang of paper inside the cone.
3. Cut a disc of stiff card to fit snugly inside the top of the cone, approximately 4.5cm wide, and cover it with green cardstock. Make a small cross in the centre with a craft knife, then push a pencil through to make a hole.
4. Cut several 8cm x 12cm rectangles from different shades of green card. Snip across the rectangles at an angle and clip a fringe from the slanted edges up to 1cm of the straight edge. Roll the fringes into tassels, layering two or three different shades together, and glue to hold the coil in place. Carefully push the end of these leaves into the hole in the card disc, enlarging the hole if necessary. Fill the cone with sweet treats and fit the leafy lid into the top to close.

Busy lives often involve a lot of memos and reminders, and it can sometimes be hard to keep track. Luckily, we’ve got a sophisticated solution to keep your desk tidy and…

If you’re having a quiet Valentine’s with your beloved at home this year, make the place look a little more special with a speedy-to-make hearts frieze. Papercrafting doesn’t get much easier than…
Home decor Home decorations How to Papercraft Papercrafter Techniques Projects

1. Using a 3.5cm circle die, cut eight discs from chipboard and sixteen circles from patterned paper. Glue the patterned circles to either side of the discs and punch a…

Craft essentials
1. Cut a 5cm x 15cm strip of double-sided patterned paper and fold in half lengthways. Draw parallel pencil lines at 1.5cm and 2cm from the…


