


Birthday crafting Card making Die cutting How to Papercraft Papercrafter Stamping Techniques
Rethink your card folds with Kitty Day’s inventive trio of box cards, made possible with some very handy dies
Boxed Up
I love creating these card boxes – the best part is they’re so easy to make thanks to My Favorite Things’ amazing die sets. They come with all the pieces you need to get started. There’s no measuring required either, just your die-cutting machine, card and glue! My Favorite Things has not long launched this collection and each month there have been other designs added that you can mix in to create different scenes. Don’t worry, they fold flat for easy posting and storage!
Be inventive
If you’re anything like me, you’ve probably sent an incredible amount of cards to loved ones to help lift spirits. That’s why I think introducing new techniques that draw the eye and subvert expectations is key. Obviously the message and love put into the card is the most important thing, but we shouldn’t underestimate the sheer joy that an inventive greeting can
bring. All of these makes fit that description, and they’re as fun to make as they are to receive.
YOU WILL NEED:
Dies, My Favorite Things Outside The Box Level Up, Outside The Box Clouds, Outside The Box Snow Drifts
Stamps, My Favorite Things Fox & Friends, Birthday Buds, Cat-astrophe, Let’s Curl Up
Stencil, cloud
Ink pads: Ranger Distress Oxide Mowed Lawn, Mermaid Lagoon, Picked Raspberry, Seedless Preserves; black
Cardstock: Hunkydory Essential Card Block; various colours
Patterned papers
Alcohol markers
Ink blending tool
Gems, silver
Adhesives: 3D foam pads, glue
Die-cutting machine
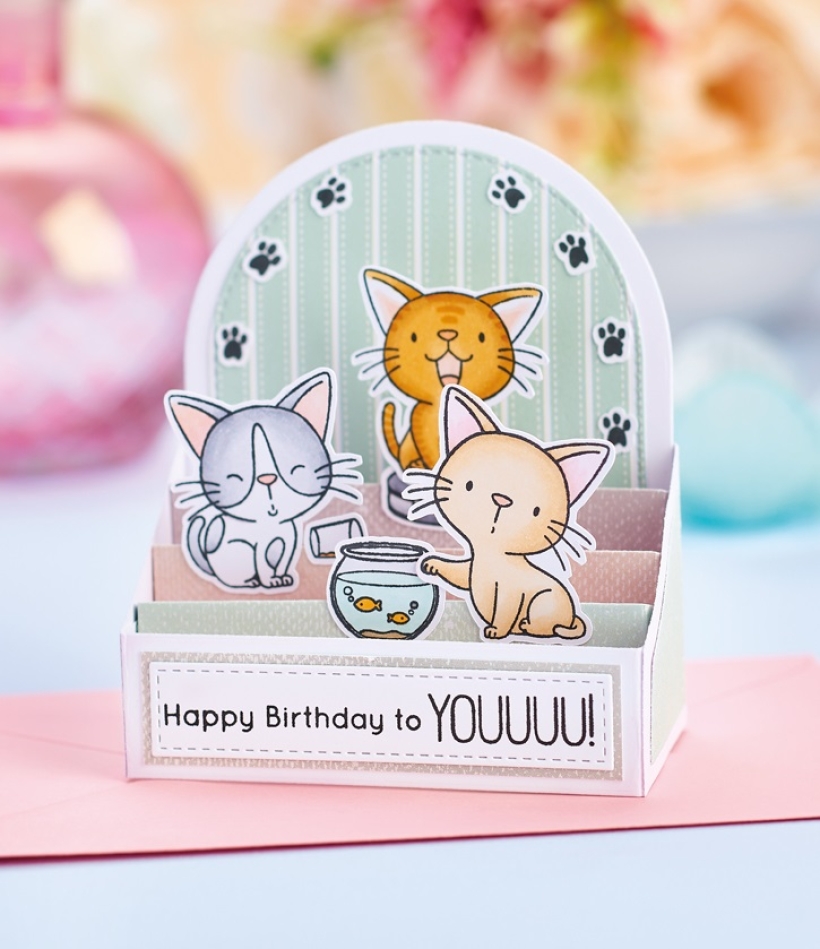
CAT BOX CARD
1. Die cut the box card elements from white card, along with three inner panels from pink and light blue patterned papers. Assemble by following the step-by-step below.
2. Cut a stitch-edged arch panel from patterned paper. Fix to the back panel. Stamp various motifs onto white card, colour in, then cut out. Adhere to the inner panels, then secure the paw die-cuts to the back.
3. Die cut two stitch-edged panels from patterned paper for the sides. Die cut a rectangular stitch-edged panel from white and matt onto grey card. Stamp a sentiment in black ink, then secure to the front to complete.
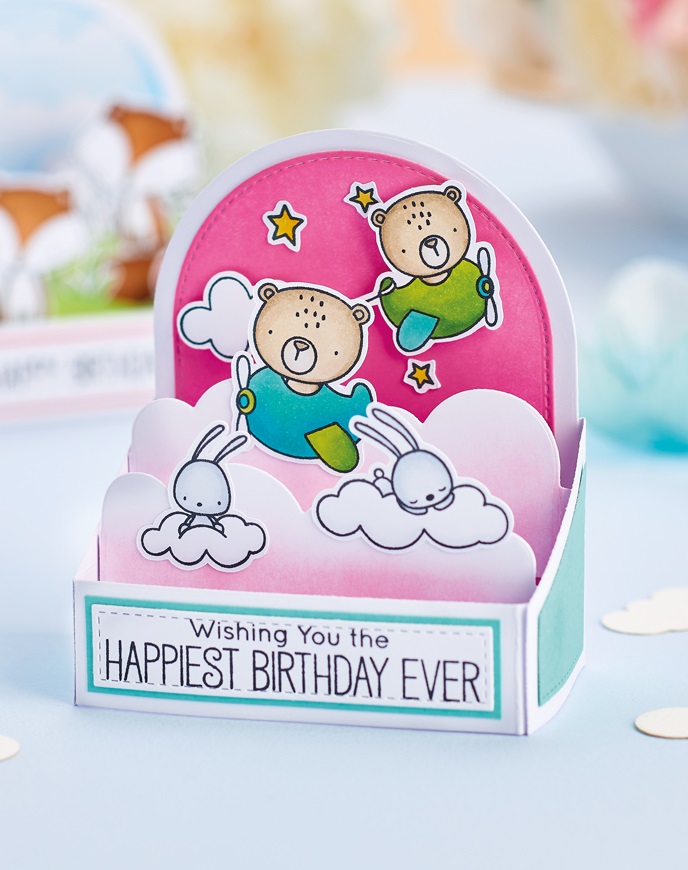
BEAR BOX CARD
1. Die cut the box card elements from white card using My Favorite Things’ Outside The Box Level Up set. Die cut two clouds and blend pink distress oxide ink along the bottom of each
shape. Follow the step-by step below to assemble. Layer stitch-edged panels to the back and sides.
2. Stamp bear, bunny, star and cloud motifs onto white. Colour in, then cut out. Fix to the clouds and back panel with 3D foam pads. Die cut a stitch-edged rectangular panel from white, stamp a sentiment on top in black, then mount onto blue card. Attach to the front panel to finish.
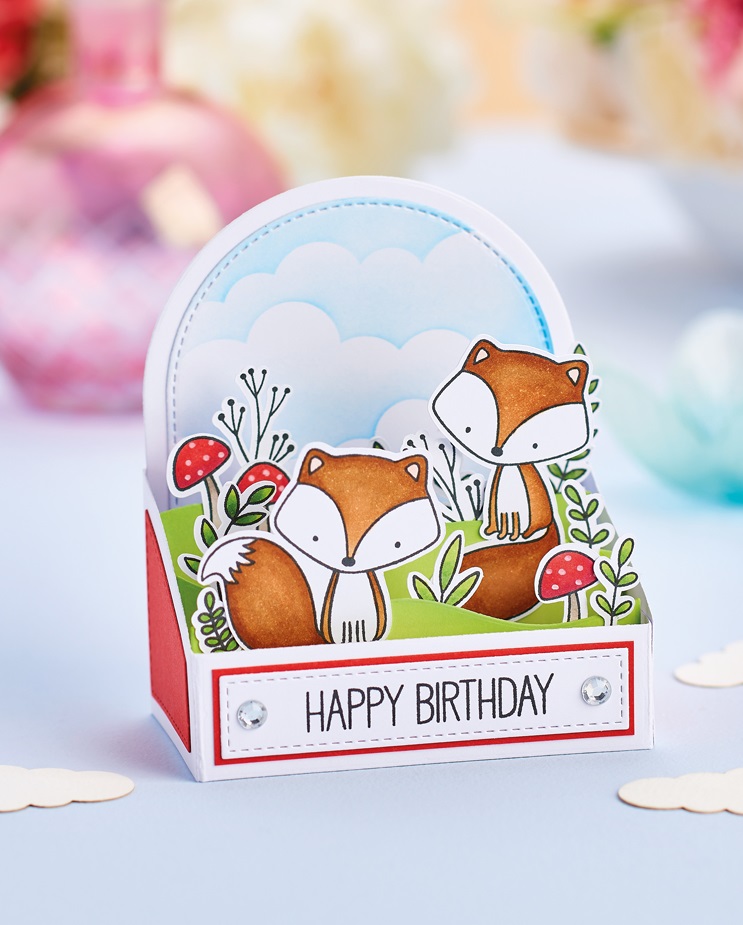
FOX BOX CARD
1. Die cut the box card elements from white using My Favorite Things’ Outside The Box Level Up and Snow Drifts die sets. Add green distress oxide ink to the hill shapes, then assemble together. Die cut a stitch-edged arch panel from white and stencil clouds on top with blue distress oxide ink. Secure to the back panel.
2. Matt the sides with two red die-cut stitch-edged panels. Stamp foxes, mushrooms and foliage motifs onto white card. Colour in, then cut out. Glue the motifs to the hill shapes. Die cut a stitch-edged rectangle from white and layer onto red. Stamp ‘Happy birthday’ in black ink, then fix to the front along with two gems.


Busy lives often involve a lot of memos and reminders, and it can sometimes be hard to keep track. Luckily, we’ve got a sophisticated solution to keep your desk tidy and…

If you’re having a quiet Valentine’s with your beloved at home this year, make the place look a little more special with a speedy-to-make hearts frieze. Papercrafting doesn’t get much easier than…
Home decor Home decorations How to Papercraft Papercrafter Techniques Projects

1. Using a 3.5cm circle die, cut eight discs from chipboard and sixteen circles from patterned paper. Glue the patterned circles to either side of the discs and punch a…

Craft essentials
1. Cut a 5cm x 15cm strip of double-sided patterned paper and fold in half lengthways. Draw parallel pencil lines at 1.5cm and 2cm from the…


