


Halloween cards Halloween crafts How to Papers
We know they're supposed to be scary, but these Halloween papers are just adorable!
Please login to download. Sign in here
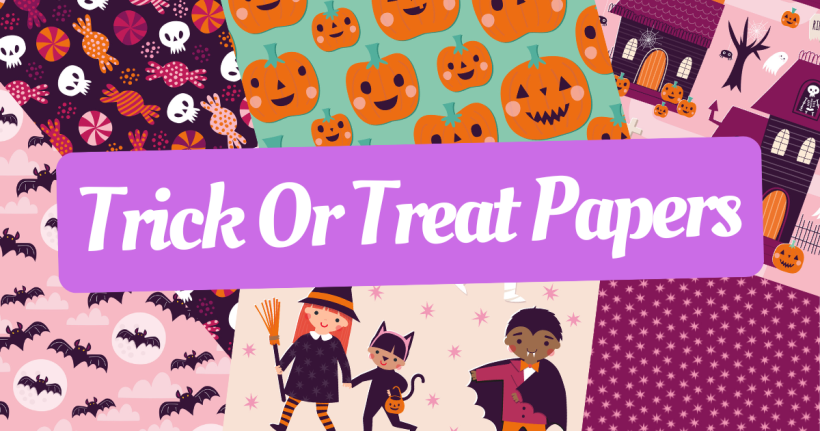
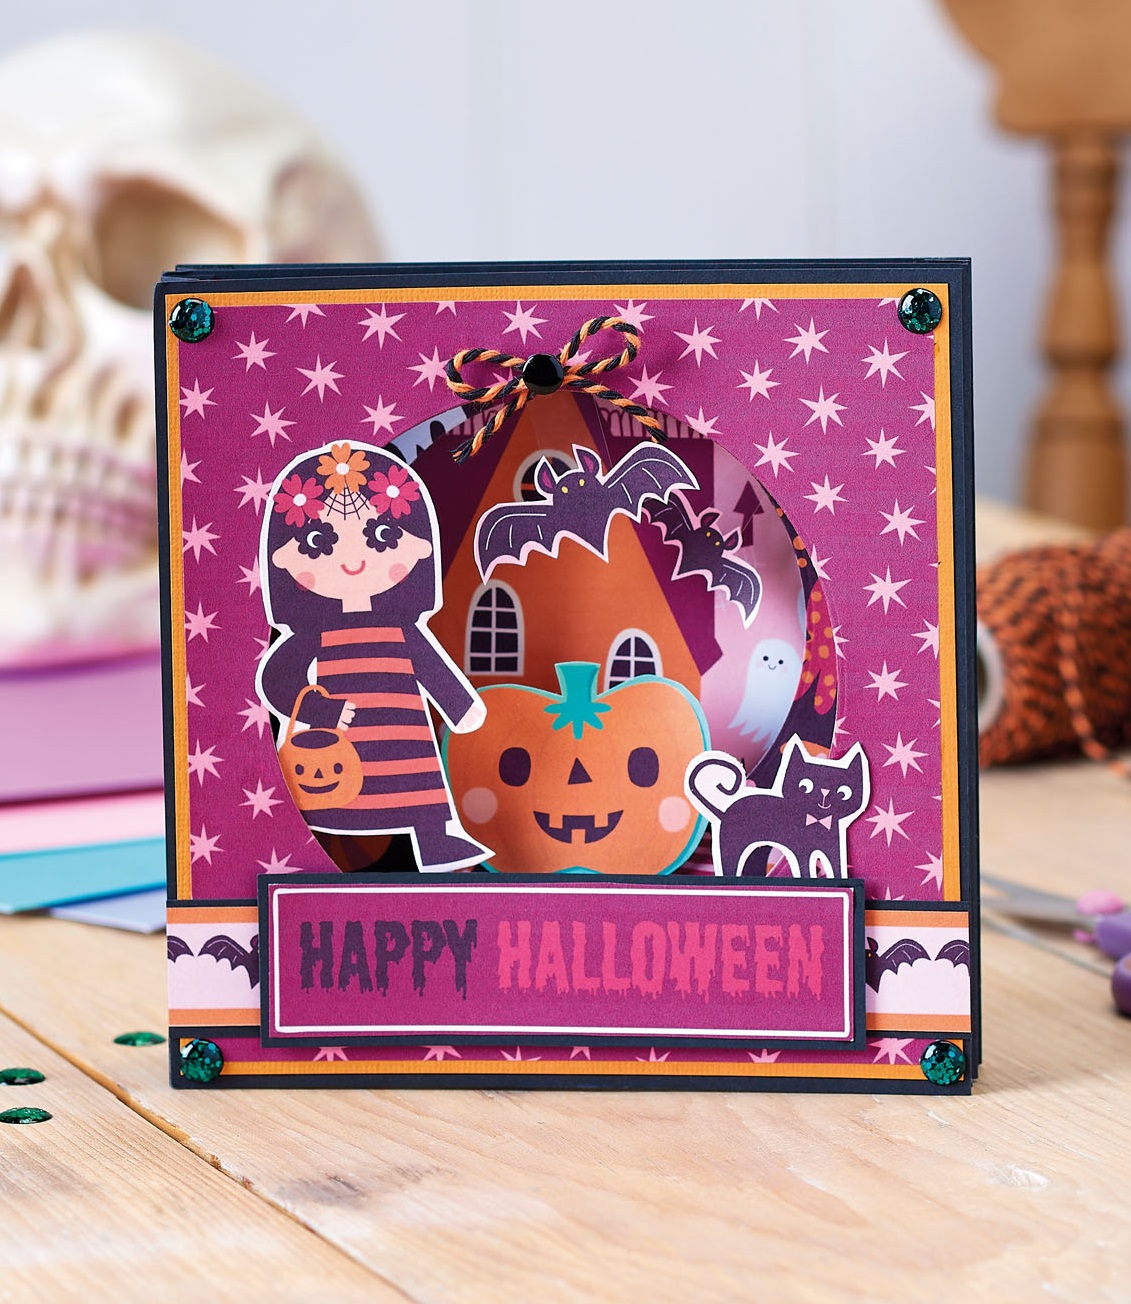
A massive thank you to Jane Farnham for these spook-tacular papers, just in time for Halloween crafting. Trick Or Treat is the theme, so expect epic fancy dress costumes, haunted houses, pumpkins, and enough sweets to give you a sugar high. Included in your digital pack are five borders and five sentiments, plus background prints that will make larger focals stand out brilliantly. All treats and no tricks, that’s for sure!
Sarah Jackman Read shies away from basic card folds, instead choosing to make stepper, tunnel and half-front varieties – what joy! Learn just how simple those techniques can be, then move onto the home décor tutorials. Create a fang-tastic sweet-collecting basket (no template required!) and a tealight holder that emits a lovely glow thanks to orange-tinted acetate.
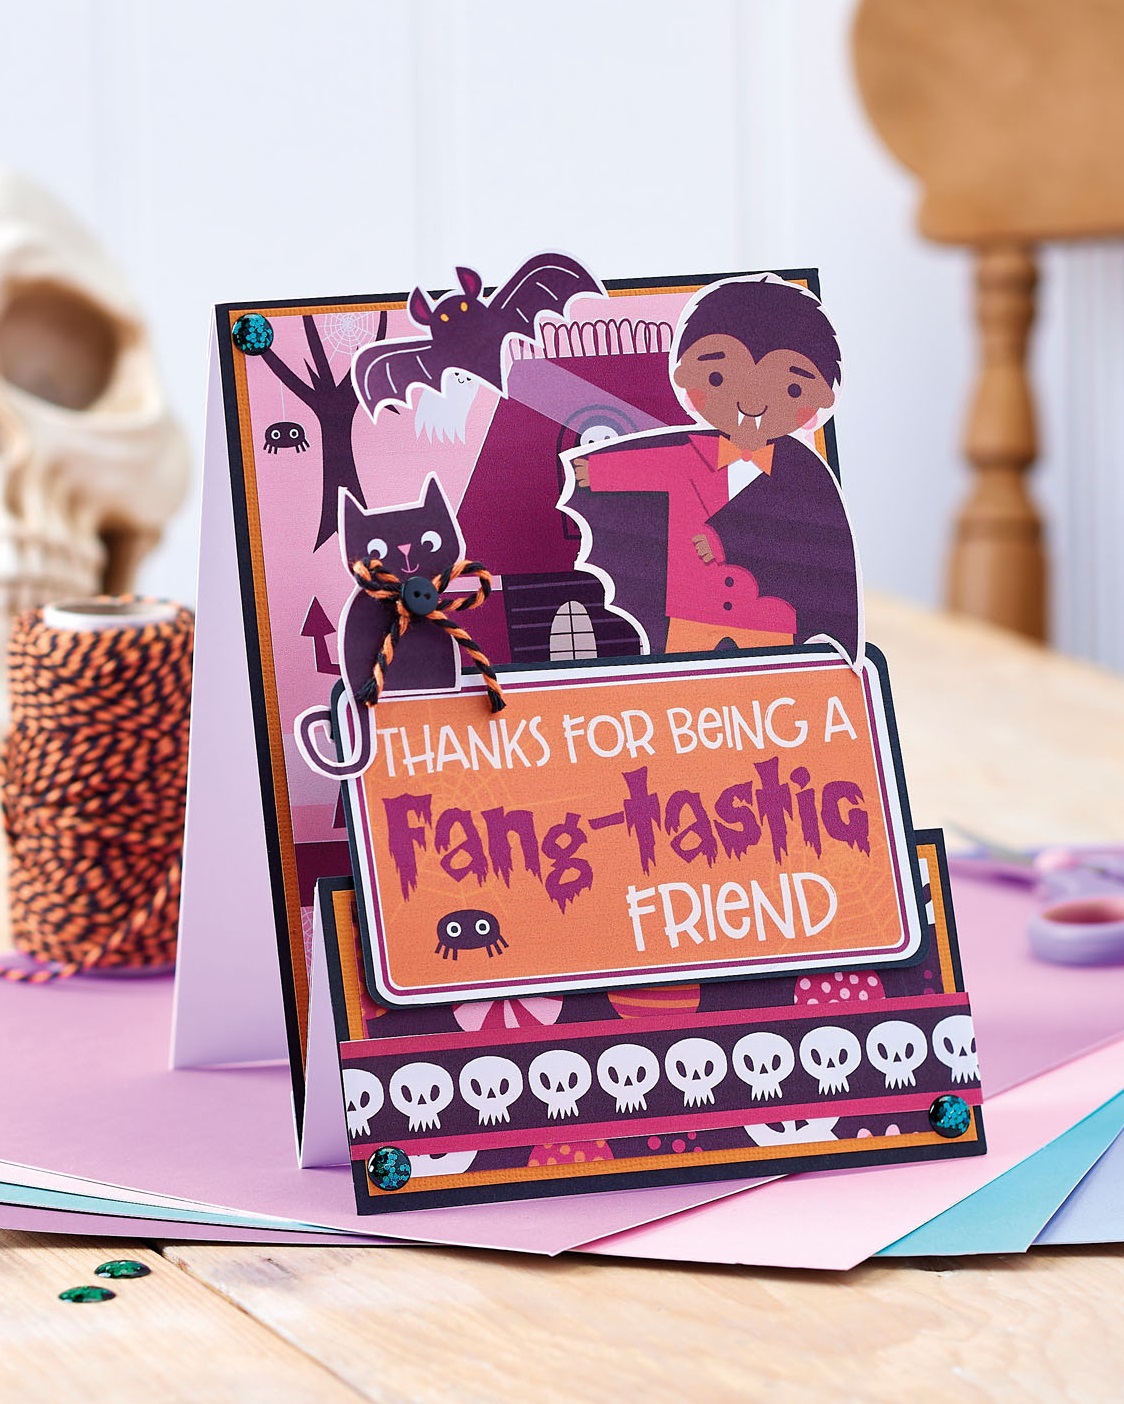
Halloween Stepper Card
1. Create a 12cm x 16cm top-folding black blank. Trim black card to 12cm x 13cm, then score down from the long edge at 6cm and 12cm. Adhere the flap to the bottom of the blank. Mountain fold the other score line to create a stepper card.
2. Matt haunted house paper, 11cm x 15cm, onto orange card and fix to the back panel. Layer two pieces of contrasting paper, 5cm x 11cm, onto orange card, then secure to the other panels.
3. Trim a skull border to 12cm long and attach towards the bottom of the front panel. Matt our ‘Fang-tastic friend’ sentiment onto black card, then secure above the border with 3D foam pads so it extends the fold.
4. Cut out a cat and vampire, then adhere behind the sentiment. Trim a bat, stick to a strip of acetate and add to the back of the vampire. Attach a baker’s twine bow to the cat, then cover the knot with a mini black button. Finish with green dome stickers.
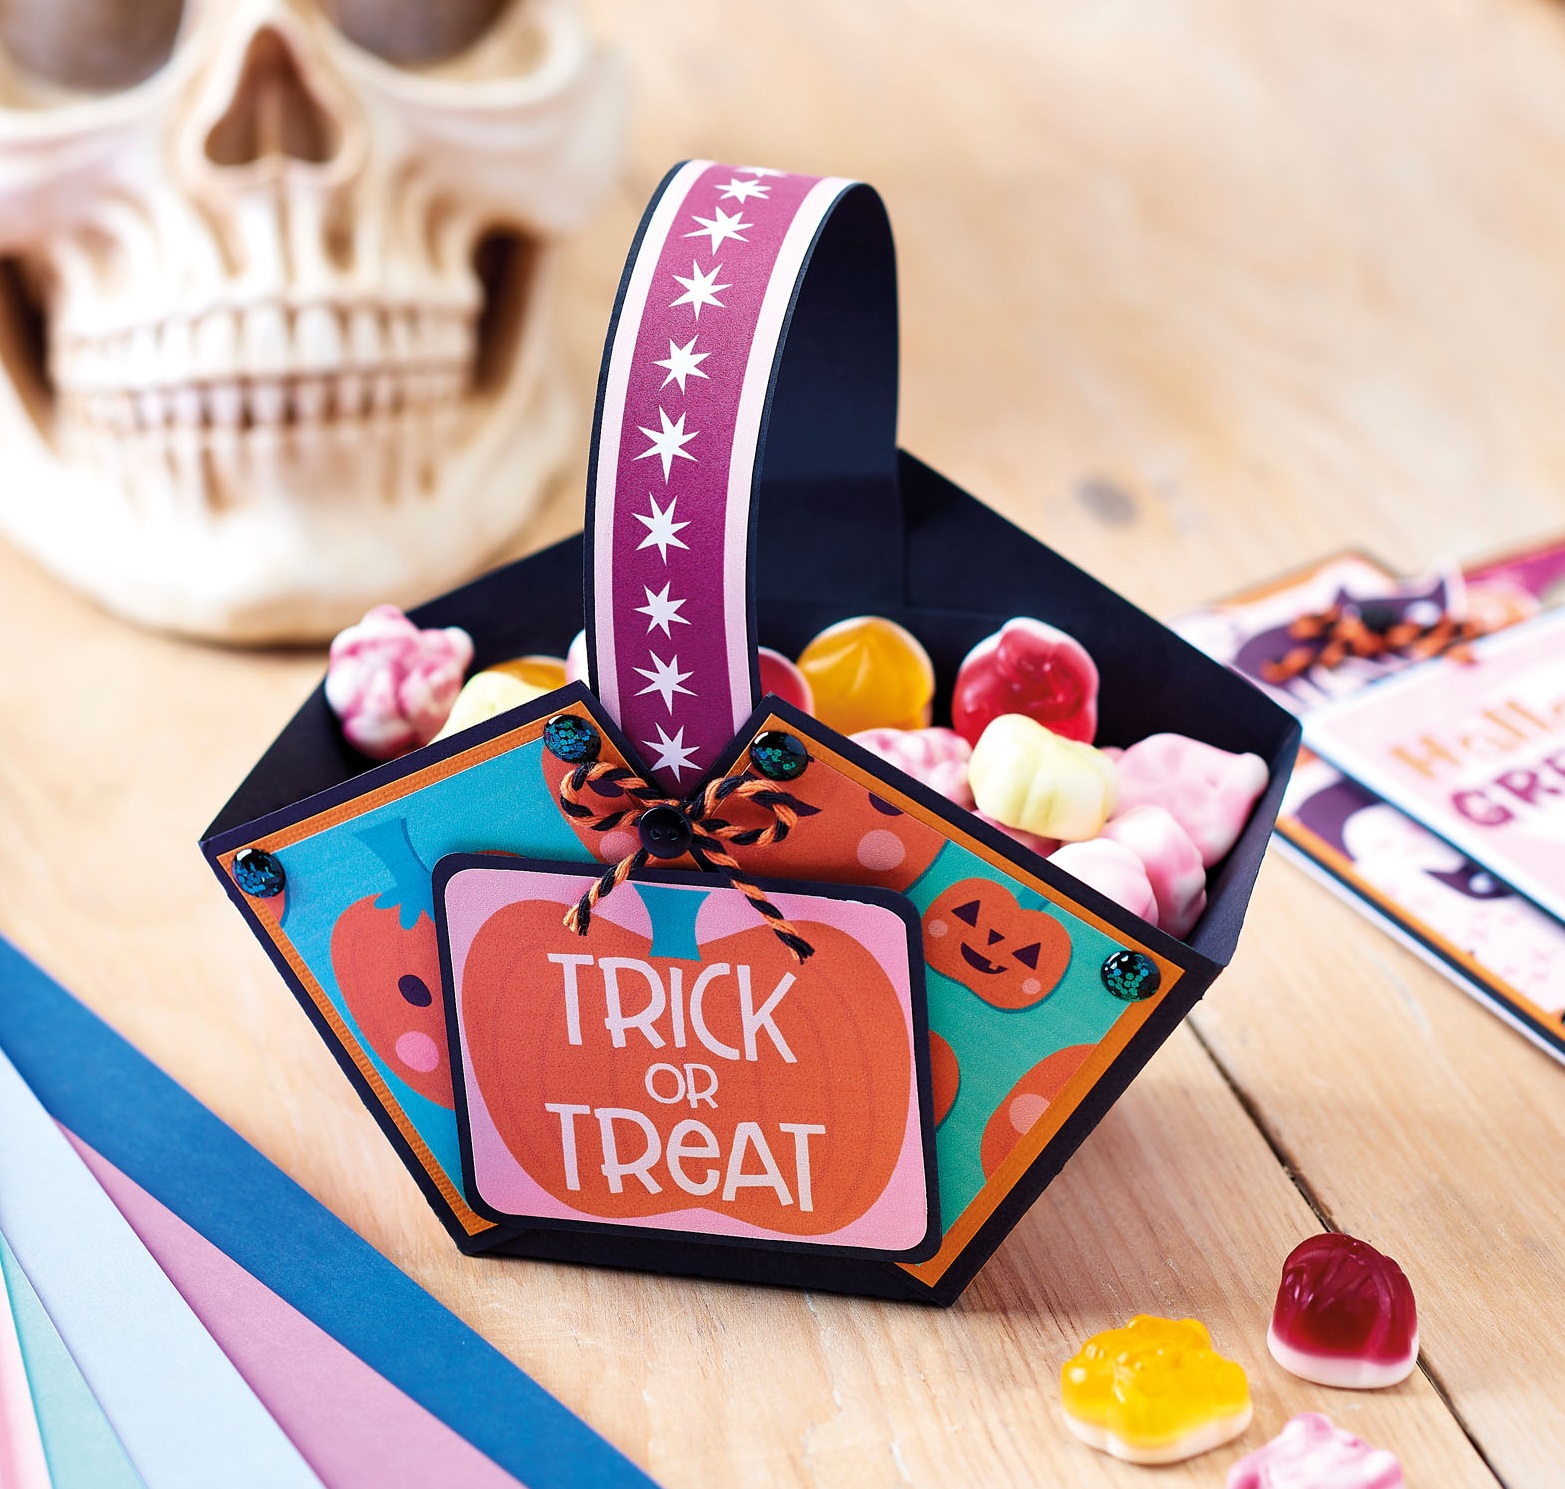
DIY Trick Or Treat Basket
1. Cut black card to 21cm square. Score down at 7cm and 14cm, turn 90°, then score down at 7cm and 14cm again. Trim the vertical score lines up and down to where they meet the horizontal score lines. Snip four pieces of pumpkin paper to 6cm square, then matt onto orange card.
2. Adhere the pumpkin panels to the four squares in the corners, so that the top of the pumpkins are facing the outside edges. Layer two pieces of sweet paper, 5cm square, onto orange, then adhere to the other two outside squares.
3. Turn the black card over and valley fold the score lines. Fold the corners inwards and adhere together to create a basket. Fix a star border to black card, then secure across the top in an arch to create a handle.
4. Layer our ‘Trick or treat’ sentiment onto black card and attach with 3D foam pads. Adhere a baker’s twine bow with a button above the sentiment, then finish with green dome stickers.

Halloween Half Front Card
1. Trim black card to 15cm x 19cm. Score down from the long edge at 6cm and valley fold. Matt the inside of the greeting with orange card, then die cut a 4cm circle towards the top-right corner. Adhere acetate on top.
2. Cut out a ghost and fix on top of the acetate. Trim star paper to 12cm x 14cm, die cut a 4cm circle towards the top so it matches the circle aperture already on the greeting, then adhere in place.
3. Snip our ‘Boo!’ speech bubble and attach next to the ghost. Fix bat paper, 7cm x 11.5cm, to the bottom of the star paper, leaving a narrow border. Adhere a ghost border above to hide the join. Matt cat paper, 5cm x 14cm, onto orange card and stick to the front.
4. Layer our ‘Halloween greetings’ sentiment onto black, then attach to the bottom of the front panel with 3D foam pads. Cut out a cat and fix above the sentiment. Adhere a baker’s twine bow with a button to the cat, then finish with green dome stickers.
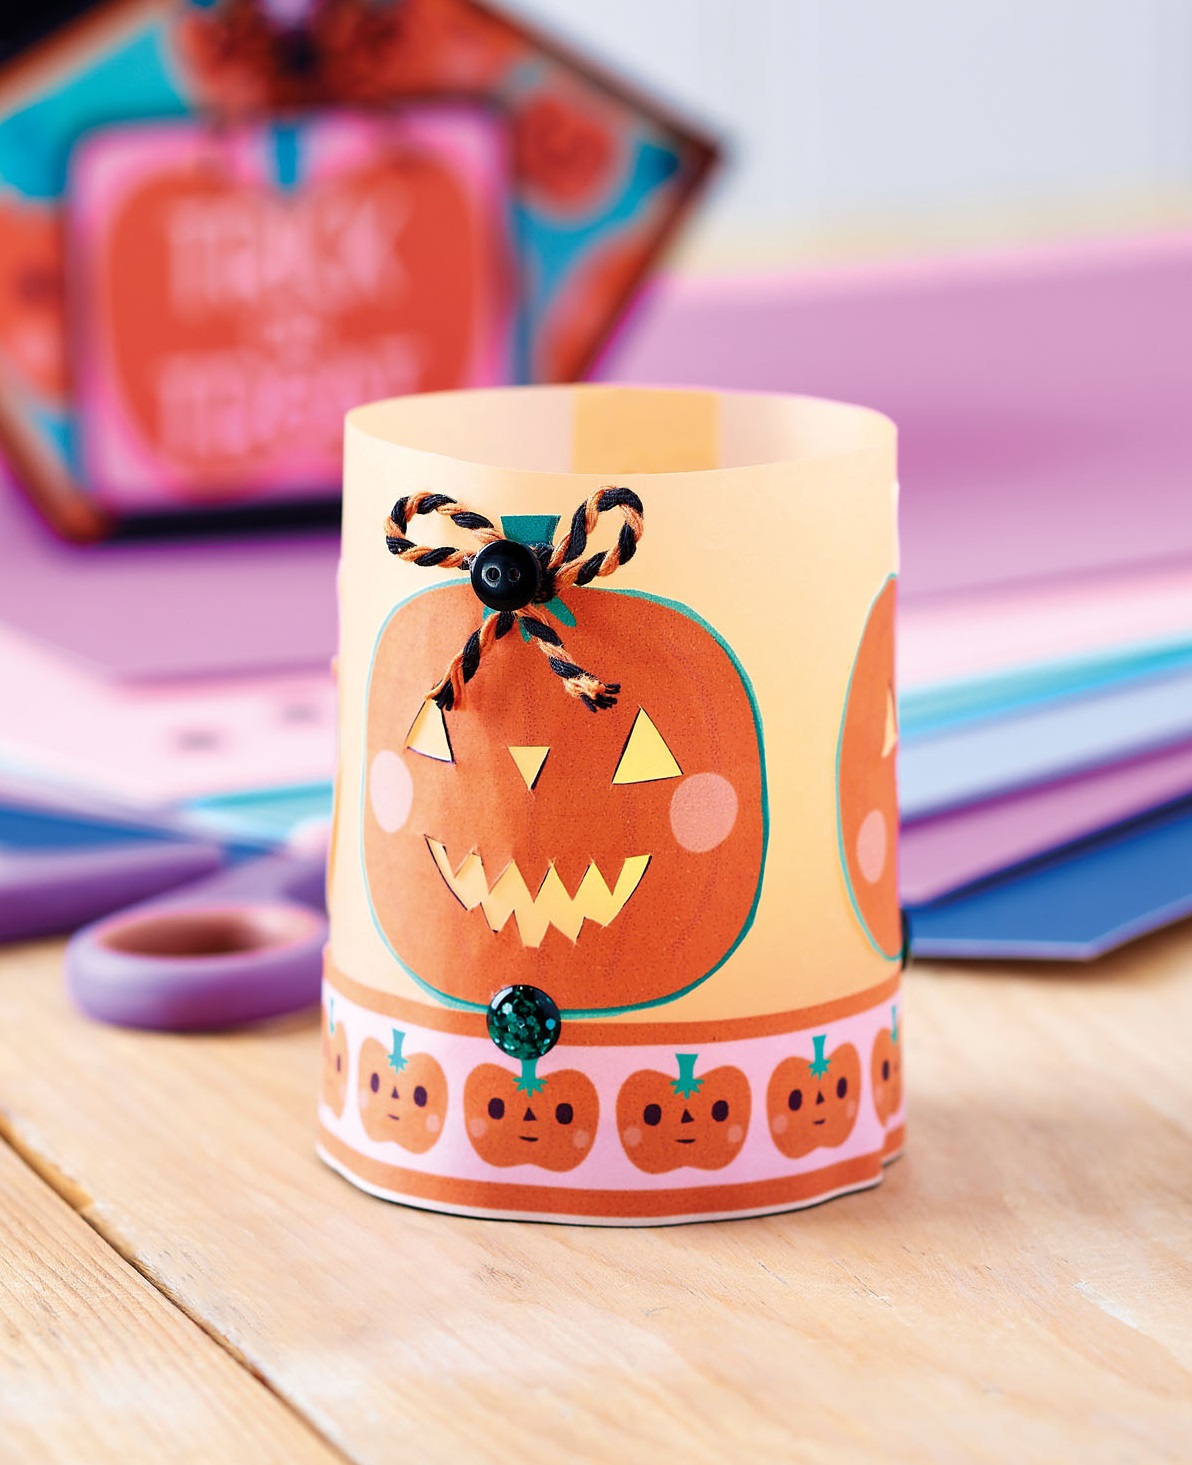
Halloween Tealight Holder
1. Die cut two 6cm circles from cardboard and glue together. Die cut a 6cm circle from star paper, then adhere on top. Trim A4 coloured vellum to 8cm in height.
2. Run double-sided tape down the side of the vellum. Fix the bottom of the vellum to the cardboard, trimming to fit. Secure the sides together with the tape. Adhere a pumpkin border around the bottom of the vellum.
3. Cut out three pumpkins, snip away the mouths and eyes, then fix around the vellum. Add a baker’s twine bow to the front pumpkin, then hide the knot with a mini black button. Decorate with green dome stickers, then pop an LED tealight inside.
Halloween Tunnel Card
1. Trim three pieces of black card to 14.5cm square. Cover one panel with haunted house paper. Cover another with sweet paper, then die cut an 8cm circle through it, slightly towards the top.
2. Layer star paper, 13.5cm square, onto orange card and fix to the final black card square. Die cut a 10cm circle in the centre. Matt a 14.5cm long bat border onto black card and adhere towards the bottom.
3. Cut out a cat and trick or treater, then attach around the aperture on the star paper. Layer ‘Happy Halloween’ onto black and secure to the bat border with 3D foam pads.
4. Snip a pumpkin and adhere to the bottom of the other circular aperture. Trim two bats, fix to strips of acetate, then attach so they’re suspended within the aperture.
5. Trim four pieces of black card to 4cm x 14.5cm. Score down from the short edge at 1cm, 2cm and 3cm, then concertina fold. Run double-sided tape down the sides of each piece. Attach two pieces down the sides of the haunted house paper, then stick the sweet paper on top.
6. Fix the other two folded pieces down the sides of the sweet paper, then secure the star paper on top. Adhere a baker’s twine bow with a button to the top of the aperture, before finishing with green dome stickers.
Loving our paper collections? We’ve got lots more for you to enjoy.

To download our templates, simply click ‘Download Now!’ and it will open in your browser. Why not send us a picture of your project once you’re done? For your chance to be…
Home decor Home decorations Papercraft Papercrafter Party makes Templates

There’s nothing quite so relaxing, or quite so fun, as settling down with a good colouring page. It’s even better if that colouring page happens to include Wallace & Gromit. This duo…
Gather your friends, get the TV on, bring a pen, and play Coronation Bingo! Extra points for prizes.
HOW TO PLAY
1. Each player will need one scorecard and a pile of…
.png)
Featuring motifs full of whimsy and joy, this Clearly Besotted digi stamp set is perfectly suited to wish someone a happy day. Use your nine-piece printable pack as many…


