

.png)


Birthday crafting Card making Die cutting How to Papercraft Stamping Techniques Digi Stamps
Raise a smile with our offering of free floral downloads
Please login to download. Sign in here
There are multiple ways to make these digi stamps work for your cards and, the best thing is, they suit almost every occasion under the sun. Add a splash of colour digitally à la Ingrid Vichova, or by hand for a sweet selection of pick-me-up greetings. Follow our handy hints below and have a go at the projects.
Download and print them
1 Press ‘Click here to download now’ then log in – or register if you don’t currently have an account with us.
2 Click ‘Download now’ and you’ll see the download processing at the bottom of your screen.
3 Open the folder, then right-click on the file and select ‘Print’.
Tech talk
Ingrid has used editing software to digitise her cards. You can use Procreate on an iPad or Adobe Photoshop on your computer to arrange and colour in the motifs. There are also free websites such as Canva. You’ll then need a colour printer! Be sure to use 250gsm or 300gsm smooth white printer cardstock for printing card blanks. Alternatively, print, trim and layer the design onto a sturdier blank. If you prefer to colour in by hand, skip the digital colouring stage and print out the black and white design.
Mix it up
Don’t feel like you’ve got to stick with the layout of the digi stamp as it comes. Follow Ingrid’s clever ideas and play around with the motif by adapting it on your choice of editing software. Mirror the image like Ingrid’s ‘Congratulations’ card opposite, create a busy background by enlarging the individual flowers or frame sentiments in a circular formation as shown on the ‘Happy birthday’ greeting. If you’re in a hurry, use the original design and make it the focal point on your card.
Word up
If you choose to create a background for your cards using the digi stamps, you’ll have to think carefully about the look of your sentiments to make sure they stand out. Ingrid has decided to print part of her sentiments onto strips of white card and has used bold letter dies which certainly do the job! Die cut your chosen words from two different colours, then layer and offset them to achieve shadow effects.
YOU WILL NEED:
Flower Power Digi stamps
Dies: Tonic Studios Layered Circle, Altenew Fine Alphabet
Stamps, Avery Elle Simple Sentiments
Ink pad, Versafine Onyx Black
Cardstock: white, gold glitter
Image editing software (Procreate, Adobe Photoshop or Canva)
Colour printer
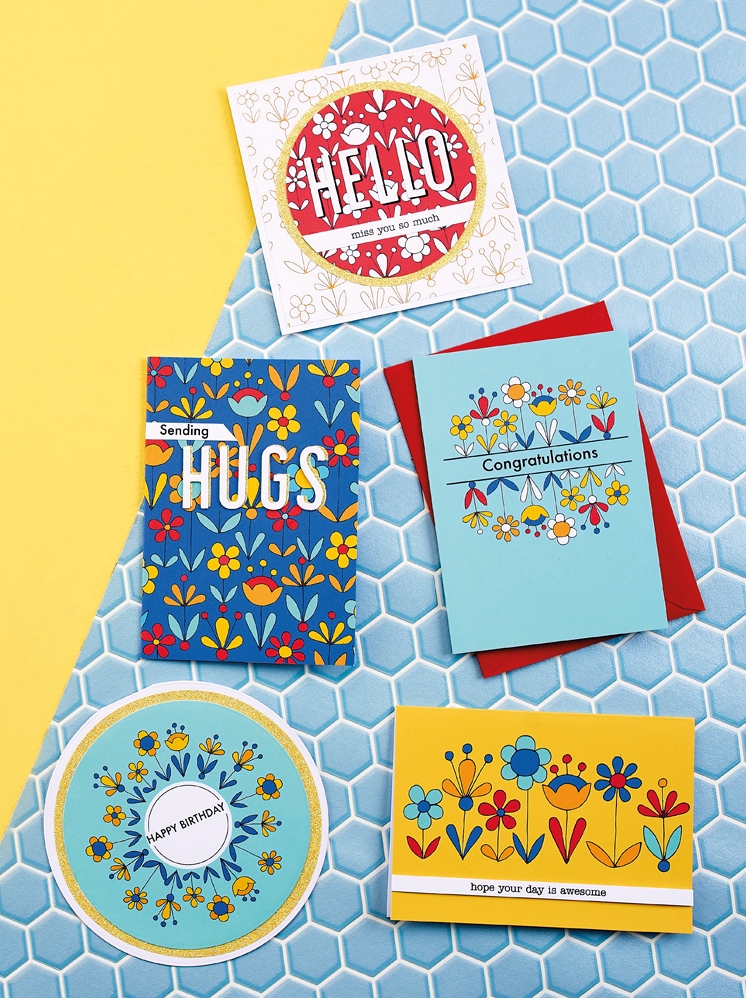
Sending hugs
Create a 21cm x 30cm canvas in your chosen image editing software and use the guides to split it into even quarters. Draw a blue rectangle in the top-right quarter. Separate the flowers onto individual layers and arrange them. Duplicate the original flowers a few times to cover the entire area. Overlap the edges and erase anything overlapping or use the clipping mask feature to clip the design onto the blue rectangle. Once happy with the arrangement, colour in the flowers. Copy the entire design onto the bottom-right quarter, then print to create two cards at once. Trim in half and fold in the centre. Die cut letters three times from white cardstock and once from yellow glitter paper. Layer up and adhere onto the card front. Stamp and add a sentiment banner.
Congratulations
Set up a 21cm x 30cm canvas in your chosen image editing software and use the guides to split it into even quarters. Draw an aqua rectangle in the top-right quarter. Type up a sentiment and draw a line underneath. Duplicate the line and drag it above the sentiment. Load the floral digi stamp onto the canvas, scale it down and place it above the top line. Duplicate and flip it vertically and horizontally, then place it below the bottom line. Colour in the flowers. Copy the entire design to the bottom-right quarter, then print to create two cards at once. Snip in half and fold in the centre.
Awesome Day
Make a 21cm x 30cm canvas in your chosen image editing software and use the guides to split it into even quarters. Flip the canvas to landscape. Draw a yellow rectangle in the bottom-right quarter. Load the floral digi stamp onto the canvas, scale it down and place it in the centre of the yellow rectangle. Colour in the flowers. Copy the entire design to the bottom-left quarter, then print to create two cards at once. Cut in half and fold along the centre. Stamp and add a sentiment banner to the bottom of the card front.
Happy Birthday
Create a 21cm x 30cm canvas in your chosen image editing software and use the guides to split it into two halves horizontally. Draw an aqua 14cm square in the top half and draw a small white circle in the centre. Load the flower digi stamp onto the canvas, scale it down and separate the flowers onto individual layers. Duplicate them a couple of times, arrange evenly around the white circle, then colour them in. Draw a black outline circle, making it slightly smaller than the white circle. Align, then erase the centre part and add a sentiment. Print out the design and die cut into a circle. Layer onto gold glitter card, then onto a white circular blank.
Hello
Make a 21cm x 30cm canvas in your chosen image editing software. Load the floral digi stamp onto the canvas, scale it down, then separate all the flowers onto individual layers. Duplicate the motif a few times and arrange the flowers onto the canvas. Group them all or flatten the layers once happy with the design. Flip your canvas horizontally, select the entire design and scale it down to 15cm x 21cm and flip to a portrait orientation. Fill one half of the canvas. Make a duplicate of the layer and move it to the second half. Colour the outline of the flowers in dark yellow on the first layer. Fill the background with red in the second layer using the colour drop feature, leaving the flowers white. Print the entire design. Cut the light pattern to 12.5cm square and die cut the red print into a circle. Layer the red panel onto gold glitter card, then onto the lighter panel. Mount onto the white 13cm square blank. Die cut a large sentiment from white card and again from black. Layer up and fix to the card front. Stamp and add a sentiment banner.
Simplify these projects by downloading Ingrid’s ready-made digital card designs!
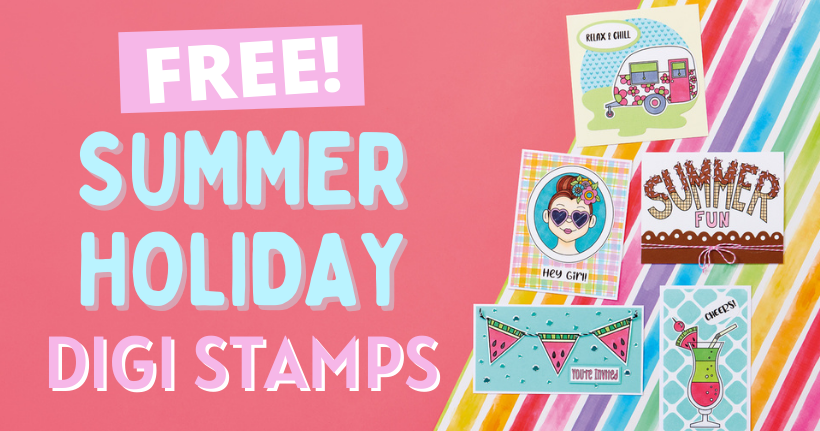
Download our free digi stamps and get your summer crafting off to a sizzling start. Colette Smith has drawn up 12 exclusive designs just for you – expect classic summer holiday…
Download our printable, grab your favourite pens or paints, then start colouring! This printable is perfect for crafters young and old, and you can go as simple or as extravagant…

To download our templates, simply click ‘Download Now!’ and it will open in your browser. Why not send us a picture of your project once you’re done? For your chance to be…
Home decor Home decorations Papercraft Papercrafter Party makes Templates

There’s nothing quite so relaxing, or quite so fun, as settling down with a good colouring page. It’s even better if that colouring page happens to include Wallace & Gromit. This duo…


