


Card making Die cutting How to Stamping Techniques Card Making
Kitty Day shows you four genius techniques with your stencils
Stencils are one of the most versatile craft items you will ever own. There are so many ways to use them and multiple mediums to use them with. They’re also very affordable too! Kitty Day shows you four different methods: apply water for watercolour effects, run your stencil through a die-cutting machine to create an embossed look, layer up distress oxide inks for multicoloured motifs and use glitter paste for added sparkle.
Ink layering
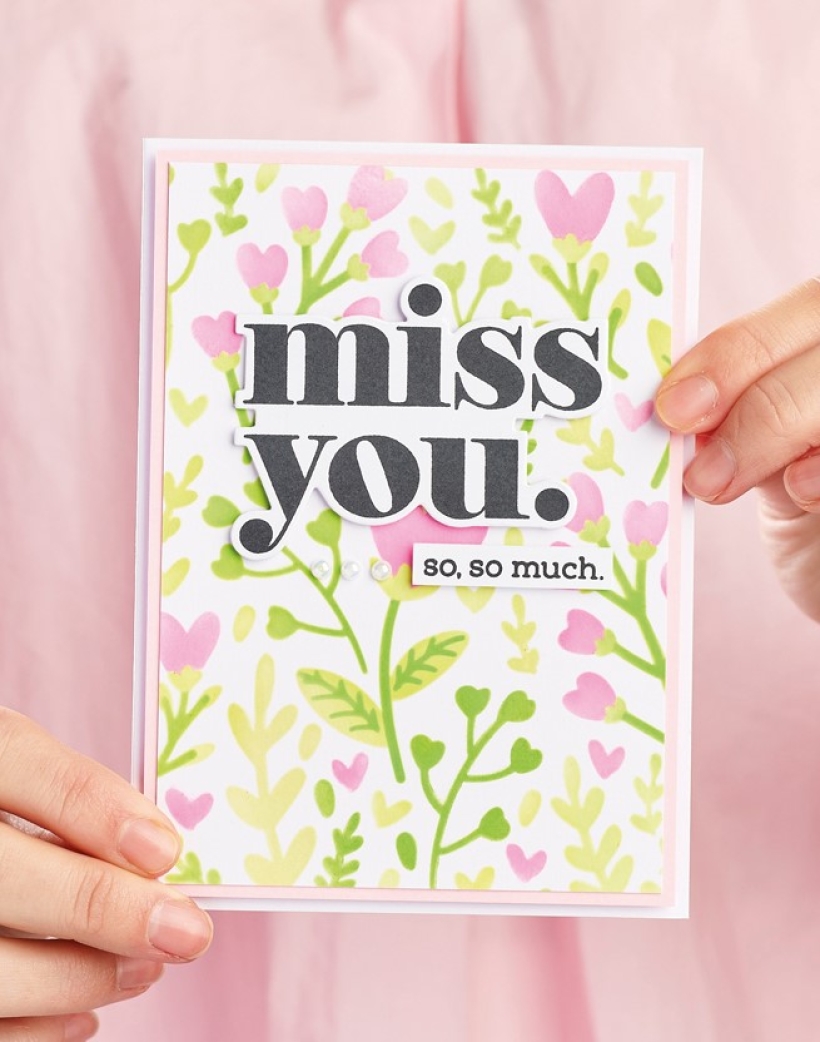
For her ‘Miss you’ card, Kitty has used the Heart Blooms Stencil Trio from Waffle Flower. Each of the three stencils can be used to add another colour to the motifs to create a complete multicoloured print. Choose three to four distress oxide inks in different hues and away you go. We recommend using a set of blending brushes for this technique to achieve an even coverage of ink and be sure to use a different brush for each colour so the pigments don’t mix.
Embossing with stencils
Swap out your embossing folders for your stencils. A mixed media multi-tasker, your stencils can also be used for the dry embossing method. Run the stencil through your die-cutting machine along with lightweight cardstock, an embossing mat and plate. Roll it back and forth a few times to get a nice impression. Depending on how thick your stencils and cardstock are, and how much pressure your machine gives, you may need to play around and figure out what works best for you and your supplies.
Five-star finishes
Once you’ve applied your chosen inks through your stencils, consider Kitty’s final finishing layers to create two different effects. Apply clear glitter paste for a sheer, glitzy look as shown on Kitty’s ‘Hello’ card opposite. You can use coloured pastes, but just make sure they coordinate with the coloured inks below. Kitty has also opted for a simple splash of water for her ‘Thanks’ card. Simply brush water through a stencil and watch the inks below oxidise to create an easy watercolour effect.
YOU WILL NEED:
Dies: Birch Press Design Sugar Script Hello, Sugar Script Thanks; circle; stitch-edged circle frame
Stamps and dies, Concord & 9th Big On You
Stencils: Heffy Doodle Circles of Life, Waffle Flower Heart Blooms, Simon Says Stamp Tumbling Hearts, Altenew Sketched Lines, My Favorite Things Watercolor Wash Rectangle
Ink pads: Ranger Distress Oxide Cracked Pistachio, Salvaged Patina, Peacock Feathers, Wilted Violet, Picked Raspberry, Mustard Seed, Mowed Lawn, Twisted Citron, Kitsch Flamingo; black
Glitter paste
Cardstock; white, pinks
Pearls
Tools: palette knife, ink blending, paint brush
Adhesives: glue, 3D foam pads, low-tack tape
Die-cutting machine
Layered Floral Stencilled Card
1. Cut white card to 9.5cm x 13.5cm. Using floral layering stencils, attach the first stencil on top and blend inks through the stencil. Repeat this with the remaining stencils, removing each one in between and allowing the ink to dry.
2. Mount onto pink card and fix onto a white blank. Stamp a sentiment in black, die cut using the coordinating die and secure to the greeting with 3D foam pads. Stamp another sentiment onto white, trim into a strip and fix below. Add three pearls to finish.
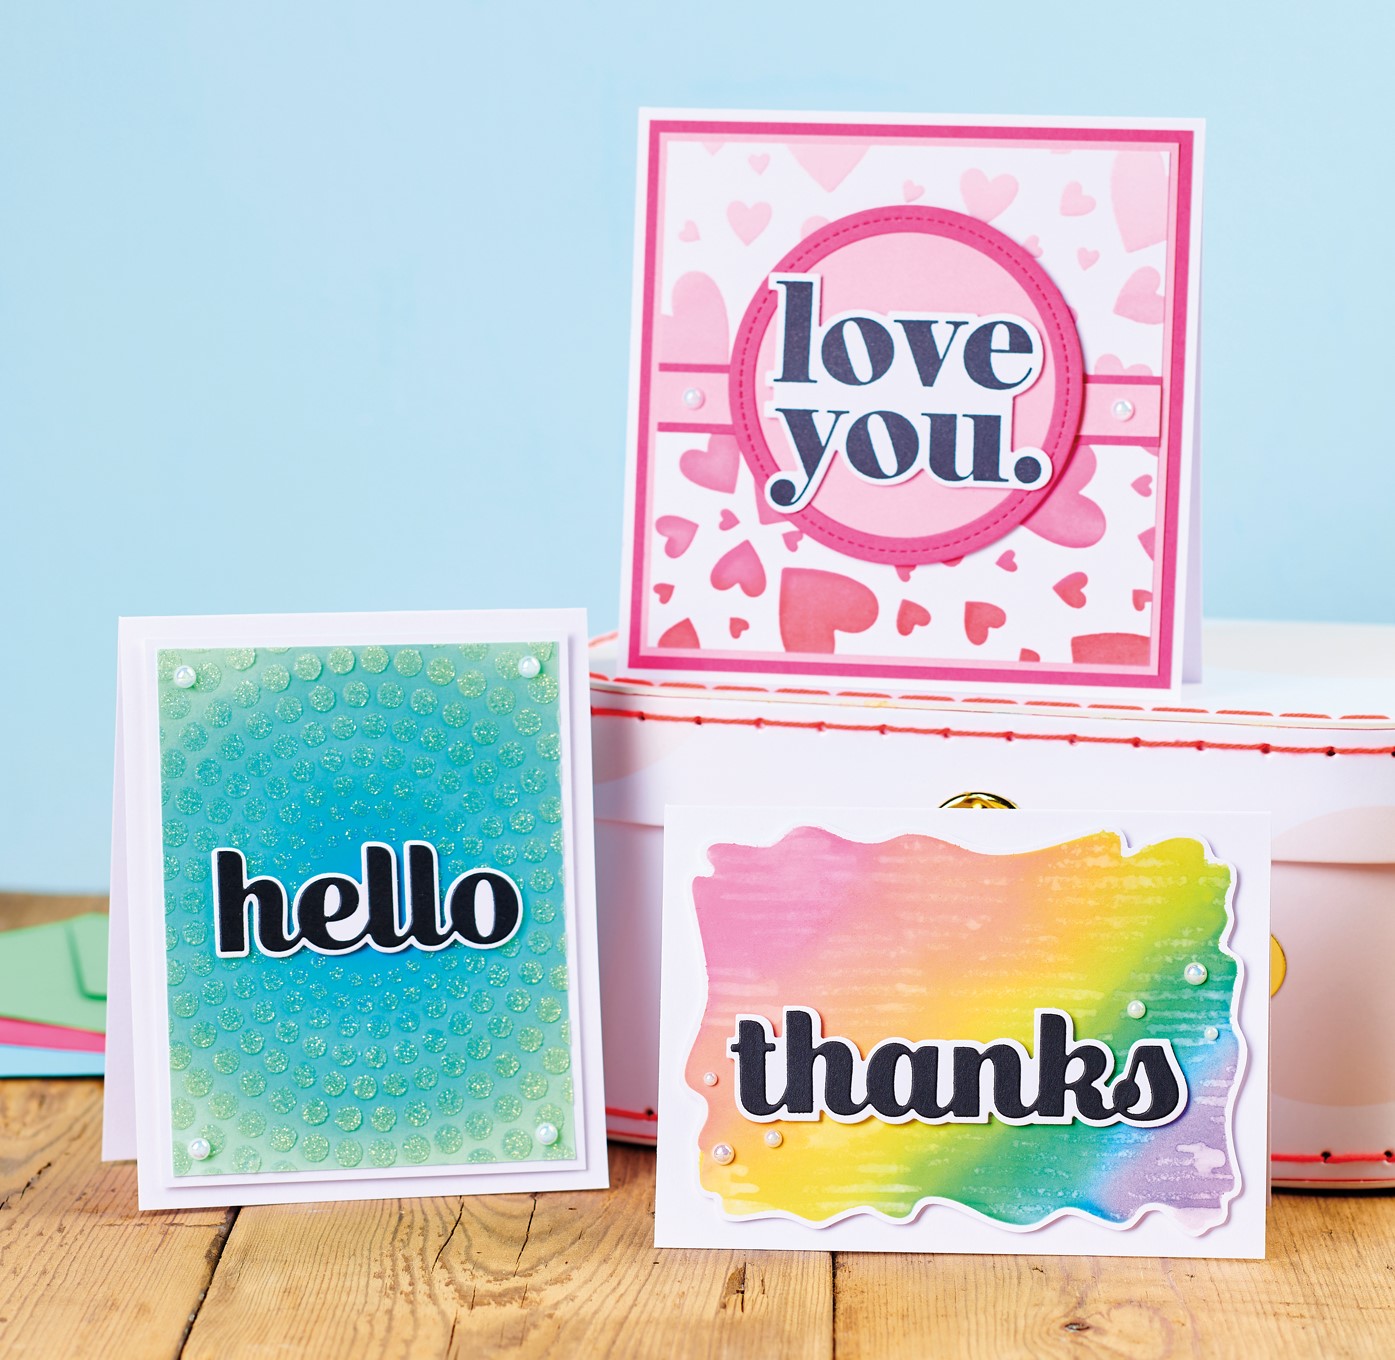
Glitter Paste Stencilled Card
1. Cut white card to 9cm x 11.5cm. Gently blend blue and turquoise distress oxide inks onto the panel, applying the darker colour in the centre and the lighter colour as you work your way out. Attach a dotty stencil over the top with low-tack tape.
2. Using a palette knife, smooth glitter paste over the stencil so it fully covers the panel. Scrape off the excess and leave to dry. Once dry, mount onto white card and secure onto a white blank. Die cut a sentiment and its outline from white and black card, layer together, then glue to the card. Embellish each corner with pearls.
Watercolour Stencilled Card
1. Secure a watercolour wash stencil onto white card. Blend distress oxide inks through the stencil to create a rainbow effect. Fix a sketchy lines stencil over the top and brush water through it.
2. Once dry, trim the panel and layer onto a white blank. Die cut a sentiment and its outline white and black card, layer together, then add to the card with 3D foam pads. Fix gems around the sentiment.
Embossed Stencilled Card
1. Cut white card to 11.5cm square. Fix a heart stencil on top of the panel and run through a die-cutting machine to create an embossed finish. With the stencil attached, blend pink and red distress oxide inks over the top.
2. Double mount the panel onto light and dark pink card, then layer onto a white blank. Mount a strip of light pink card onto dark pink, then adhere across the middle of the greeting.
3. Die cut a circular stitch-edged frame from dark pink and a circle from light pink. Layer together and fix to the card with 3D foam pads. Stamp a sentiment in black ink, die cut using the coordinating die and glue onto the circular panel. Finish with pearls.
TOP TIPS
- Apply glitter paste through your stencils using a palette knife
- For more prominent embossed impressions, add some extra shims to your sandwich
- When adding water to your inked backgrounds, leave the water on for a few seconds to allow the inks to oxidise, then blot dry

YOU WILL NEED:
Old books
Die, circle
Wooden skewer
Binder clips
Alcohol marker, orange
Adhesives: PVA glue, glue stick
Die-cutting machine

METHOD:
1. Use a circle die to cut lots of discs from book pages. Fold each circle in…
Halloween crafts Home decor Home decorations How to Papercraft Papercrafter Revamping Techniques Projects

Whilst this may look like a paper cutting that took hours to create, it really couldn’t be any easier. Our talented designer Corinne Bradd has created 15 templates for you to…
Die cutting Home decor Home decorations How to Papercraft Papercrafter Projects

You Will Need:
Templates or SVG files
Brother ScanNCut SDX1200 (optional)
Strong card
Cardstock, various colours
Jute yarn
PVA glue
Autumnal Display
1. Draw a 25cm wide circle on strong card, then draw a concentric 17cm wide circle…
Home decor Home decorations Papercraft Papercrafter Techniques

Shadow box cards, otherwise known as tunnel greetings or diorama cards, are designed to transport the recipient to picture-perfect backdrops in an instant. In this case, PaperCrafter designer Francesca Vignoli…
Birthday crafting Card making Die cutting How to Stamping Techniques Card Making


