

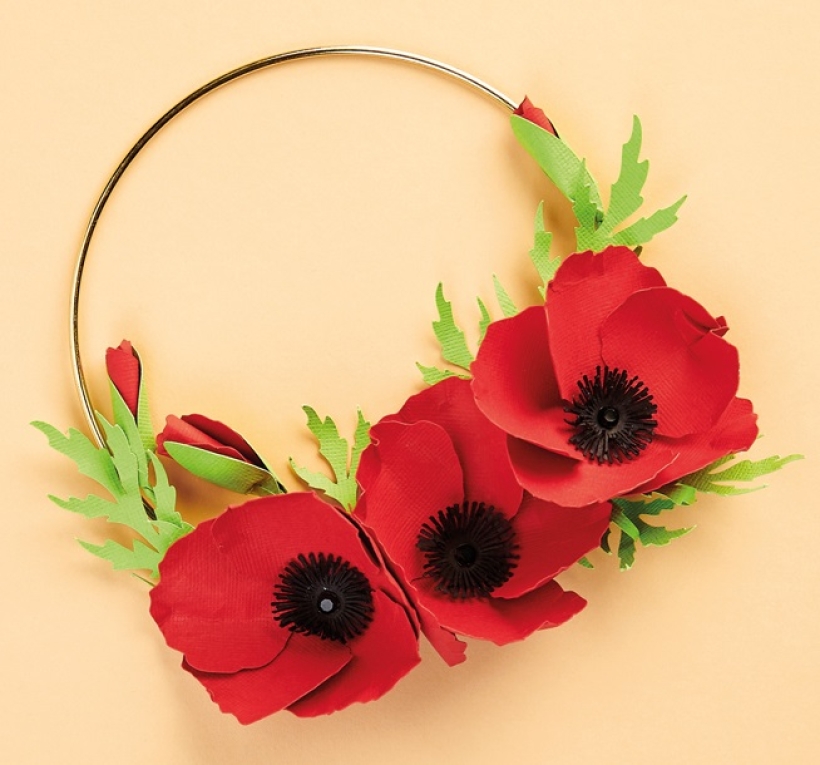


Commemorate those involved in the D-Day landings with our commemorative poppy display
You Will Need:
Templates or PNG files
Cardstock: red, green, black
Gold metal macramé ring, 6”
Flat-backed gems, black
Tools: hot glue gun, quilling tool, moulding ball tool
Silhouette Cameo 4 digital cutting machine (optional)
Paper Poppy Wreath
1. If trimming by hand, print and cut out the elements using scissors. If cutting digitally, upload the PNG files into your design studio, trace the images and set the machine to cut. You will need three sets of five large red petals, three sets of three black centres, six of the small red petals, six of the green bud leaves, three strips for the stems, and two sets of three large green leaves.
2. Shape the petals and leaves on a foam surface to give them shape and curl the small red petals. If cutting the black centres by hand, create a fringed effect with scissors. To make the stem, curl from the wider corner of the thin strip diagonally on itself. Use a hot glue gun to adhere the curled buds to the stem and add the two green bud leaves on each side.
3. Assemble the poppy flowers with the layered black centres and embellish the centres with a small black gem. Wrap a couple of strips of the leftover green cardstock around one half of the gold ring and secure the ends with hot glue. Adhere the flowers and leaves over the wrapped paper.
“Don’t have a quilling tool? Use a round pencil for curling the petals instead”
Ingrid Vichova, designer

YOU WILL NEED:
Old books
Die, circle
Wooden skewer
Binder clips
Alcohol marker, orange
Adhesives: PVA glue, glue stick
Die-cutting machine

METHOD:
1. Use a circle die to cut lots of discs from book pages. Fold each circle in…
Halloween crafts Home decor Home decorations How to Papercraft Papercrafter Revamping Techniques Projects

Whilst this may look like a paper cutting that took hours to create, it really couldn’t be any easier. Our talented designer Corinne Bradd has created 15 templates for you to…
Die cutting Home decor Home decorations How to Papercraft Papercrafter Projects

You Will Need:
Templates or SVG files
Brother ScanNCut SDX1200 (optional)
Strong card
Cardstock, various colours
Jute yarn
PVA glue
Autumnal Display
1. Draw a 25cm wide circle on strong card, then draw a concentric 17cm wide circle…
Home decor Home decorations Papercraft Papercrafter Techniques

Shadow box cards, otherwise known as tunnel greetings or diorama cards, are designed to transport the recipient to picture-perfect backdrops in an instant. In this case, PaperCrafter designer Francesca Vignoli…
Birthday crafting Card making Die cutting How to Stamping Techniques Card Making


