


Card making Home decorations Papercrafter Paper Flowers
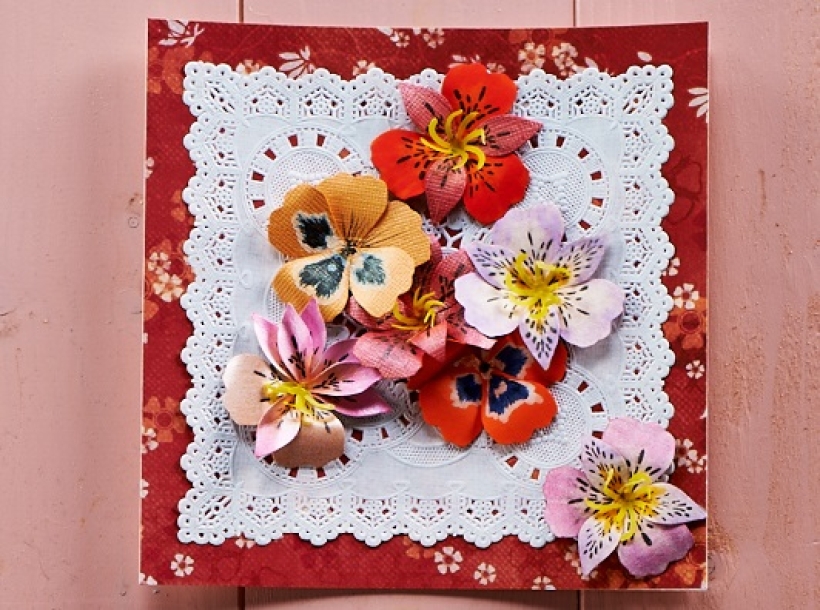
We love all things floral at PaperCrafter HQ and adore the fragility of beautiful paper blossoms. So, when we saw Tonic Studios’ Pick of the Bunch Punch and Stamp Set, we couldn’t wait to get our hands on it and get making! We’ve used the kit to embellish a thrift-store frame and created some delightful blooms for a super sophisticated feminine greeting. Here’s how we made our flowers…
TIP 1! Experiment with flower shapes and combinations of petal size and colour. Use a fine line black permanent pen to add different details to your flowers, turning them into pansies, black eyed susans, etc.
TIP 2! Try wrapping petal shapes around a skewer or quilling tool to create 3D roses. Use a hot glue gun to fix the petals together quickly and securely.
And, if you subscribe to PaperCrafter today – you’ll get this fab set as a gift. Click here to find out more…
• Select a good quality paper or thin card. Either opt for pale shades that can be tinted with brush markers for realistic blooms or use a selection of bright tones that complement each other well for a colourful display. A smooth or pearlised surface is the best for blending inks together seamlessly.
• Using the petal or leaf punch, cut several shapes from card and line up on a work surface. Choose the corresponding detailing stamp and cling to an acrylic block. Ink up with a black, permanent pigment ink pad and stamp the design centrally on your punched shape. Re-ink the stamp for each impression to ensure the depth of colour is uniform.
• Allow the ink to dry before colouring each petal to prevent smudging. Use two colours of brush marker, one for the tips of the petal and the other for the base. Blend the colours together while the ink is still wet, using a damp paintbrush if necessary.
• Punch a sepal shape from green card to use as a base for mounting your petals. Glue petals down with a dab of PVA glue, curling the petals over the blade of a pair of scissors first and making sure the base of each petal is securely stuck down.
• Use the stamen punch to cut a shape from yellow vellum or thin paper. Fold the individual stamens up and glue the centre to the middle of the flower.

YOU WILL NEED:
Old books
Die, circle
Wooden skewer
Binder clips
Alcohol marker, orange
Adhesives: PVA glue, glue stick
Die-cutting machine

METHOD:
1. Use a circle die to cut lots of discs from book pages. Fold each circle in…
Halloween crafts Home decor Home decorations How to Papercraft Papercrafter Revamping Techniques Projects

Whilst this may look like a paper cutting that took hours to create, it really couldn’t be any easier. Our talented designer Corinne Bradd has created 15 templates for you to…
Die cutting Home decor Home decorations How to Papercraft Papercrafter Projects

You Will Need:
Templates or SVG files
Brother ScanNCut SDX1200 (optional)
Strong card
Cardstock, various colours
Jute yarn
PVA glue
Autumnal Display
1. Draw a 25cm wide circle on strong card, then draw a concentric 17cm wide circle…
Home decor Home decorations Papercraft Papercrafter Techniques

Shadow box cards, otherwise known as tunnel greetings or diorama cards, are designed to transport the recipient to picture-perfect backdrops in an instant. In this case, PaperCrafter designer Francesca Vignoli…
Birthday crafting Card making Die cutting How to Stamping Techniques Card Making


