


Card making How to Papercraft Papercrafter Stamping Techniques Wedding crafts Card Making
Want more from your stamps? Recreate the pro’s look with Laura Bradley’s tricks. For a flawless layered look, use different shades of the same coloured inks. This will create a lovely ombré effect.
YOU WILL NEED:
Stamps: Wplus9 Freehand Florals; Honey Bee Stamps Foxy Sentiments; Avery Elle Simply Said Amazing; My Favorite Things Aim For The Clouds
Dies: Wplus9 Freehand Florals; Lawn Fawn Everyday Banner
Ink pads: Memento Angel Pink, Rose Bud, Love Letter, Rhubarb Stalk, Lady Bug, Desert Sand, Toffee Crunch, Espresso Truffle, Rich Cocoa, Pear Tart, Olive Grove, Sweet Plum, Elderberry; Ranger Distress Oxide Worn Lipstick, Twisted Citron; black
Tool, heat gun
Acetate
Adhesives
Die-cutting machine
METHOD:
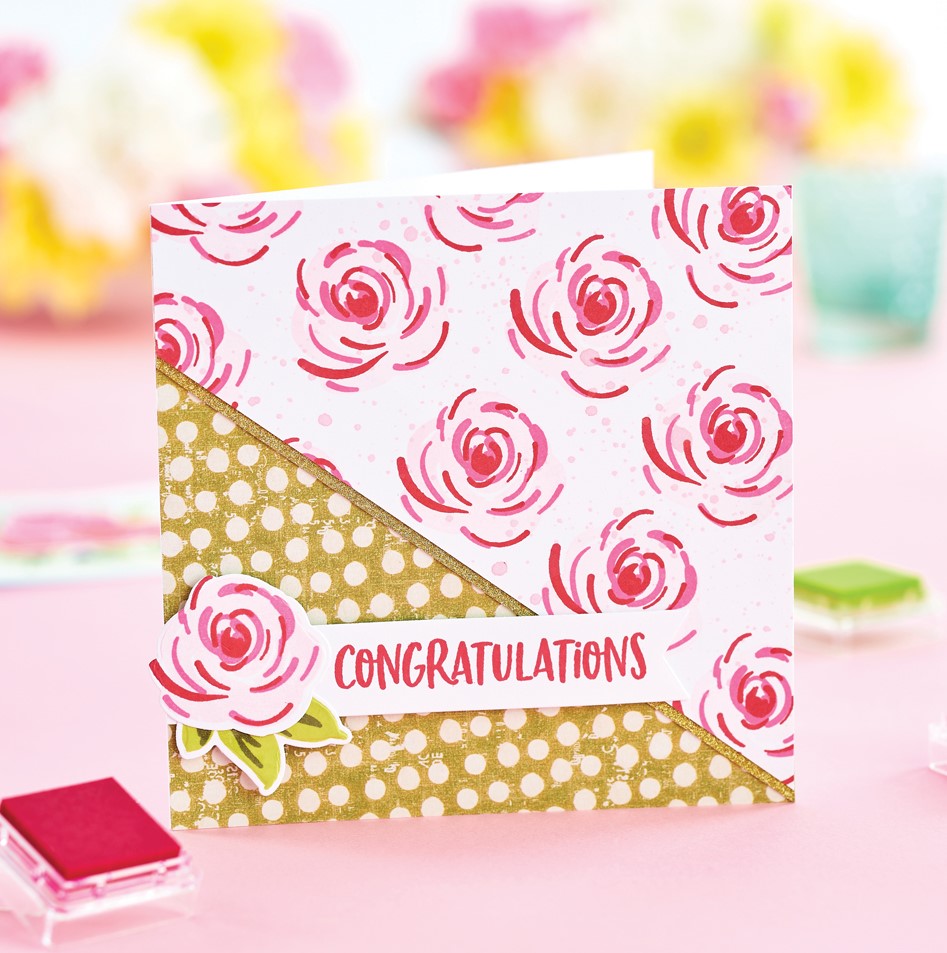
Tiered Florals
1. Trim white card to 13cm square and layer your stamps over the entire piece using the step-by-step guide provided. Apply Worn Lipstick distress ink onto an acrylic block and spritz with water.
2. Flick the colour onto the stamped panel to create faint dots over the background. Dry off with a heat tool. Cut diagonally and add a strip of gold glitter card along the bottom edge.
3. Take a 13cm square white blank and matt green spotty paper to the bottom-left corner. Apply the stamped panel to the card front using double-sided tape.
4. Die cut a banner from white and stamp ‘Congratulations’ using red ink. Secure to the card with 3D foam pads. Stamp a flower and leaf, layering up each motif. Die cut with the coordinating dies, then adhere to the card.

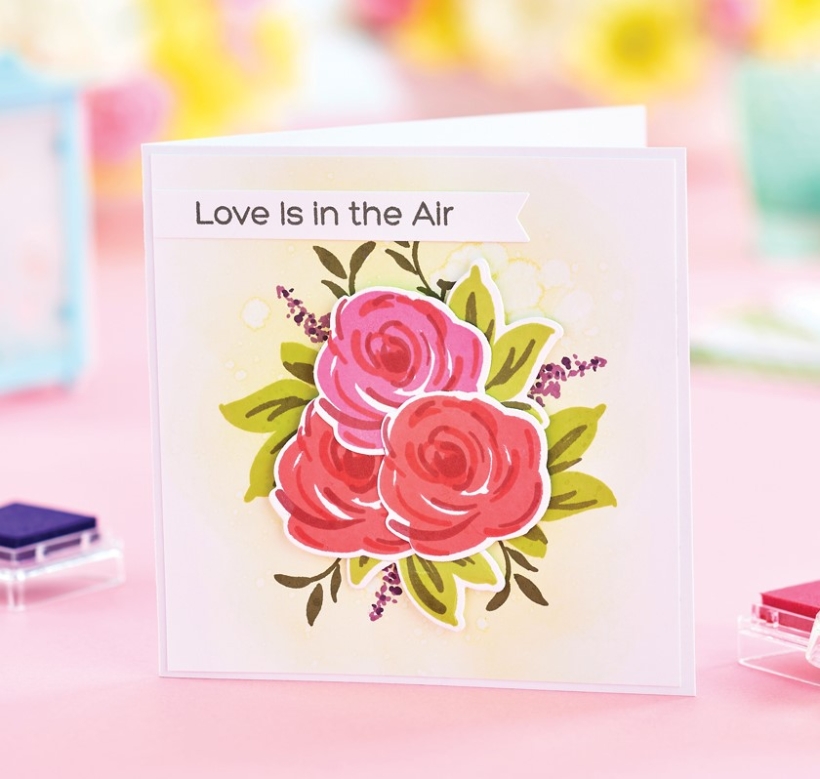
Statement Centrepiece
1. Take a 10cm square panel of white card and blend Twisted Citron distress ink from the centre outwards. Spritz the inked area with water, dabbing off the excesswith a clean paper towel. Dry off with a heat tool.
2. Mount the panel onto a slightly larger blank with double-sided tape. Stamp three flowers and two leaves onto white, layering up the motifs using the step-by-step as a guide. Die cut the images and arrange them into a cluster.
3. Using the cluster as a guide, stamp leaves and floral sprays in the centre of the card front. Secure the die-cut flowers on top. Stamp a sentiment in black onto a die-cut banner, then fix to the top of the card with double-sided tape.

YOU WILL NEED:
Old books
Die, circle
Wooden skewer
Binder clips
Alcohol marker, orange
Adhesives: PVA glue, glue stick
Die-cutting machine

METHOD:
1. Use a circle die to cut lots of discs from book pages. Fold each circle in…
Halloween crafts Home decor Home decorations How to Papercraft Papercrafter Revamping Techniques Projects

Whilst this may look like a paper cutting that took hours to create, it really couldn’t be any easier. Our talented designer Corinne Bradd has created 15 templates for you to…
Die cutting Home decor Home decorations How to Papercraft Papercrafter Projects

You Will Need:
Templates or SVG files
Brother ScanNCut SDX1200 (optional)
Strong card
Cardstock, various colours
Jute yarn
PVA glue
Autumnal Display
1. Draw a 25cm wide circle on strong card, then draw a concentric 17cm wide circle…
Home decor Home decorations Papercraft Papercrafter Techniques

Shadow box cards, otherwise known as tunnel greetings or diorama cards, are designed to transport the recipient to picture-perfect backdrops in an instant. In this case, PaperCrafter designer Francesca Vignoli…
Birthday crafting Card making Die cutting How to Stamping Techniques Card Making


