


Christmas crafts Home decor Home decorations How to Papercraft Papercrafter Techniques Video tutorial
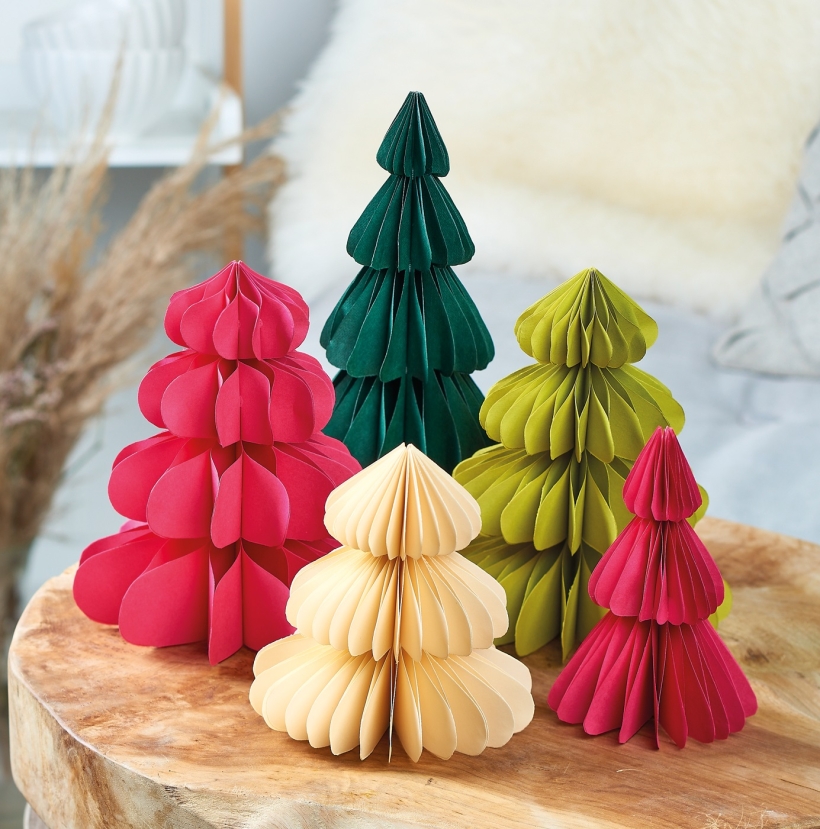
Learn how to make honeycomb Christmas trees on a budget with Corinne Bradd’s incredible project
Please login to download. Sign in here
As much as we love decorating our trees each year, we’re getting more and more into giving the rest of our homes a festive glow-up. Trailing garlands up the banister, placing sentimental ornaments on the mantel, creating displays for the coffee table… you get the idea. And these 3D honeycomb trees, beautifully clustered together, are exactly what we have in mind for this year’s festivities. Aren’t they terrific?
YOU WILL NEED:
Templates
Coloured paper
Coloured card
Paperclips
Fine point PVA glue applicator
Sharp scissors
METHOD:
1. Fold coloured paper in half and draw your chosen tree template and size onto it, lining the fold of the template up with the fold on the paper. Fold two other pieces of paper in the same way and stack underneath, securing in place on the fold with paperclips. Use sharp scissors to cut around the template through all the layers. Repeat this several times until you have at least 15 folded trees.
2. Open out each fold and dot glue on the inner points of each scallop on one side, before refolding and pressing down on the glue to secure. Stack the glued, folded trees together,
lining up the spines, and clip together before pasting the spine with PVA glue. Allow the adhesive to dry fully before removing the clips.
3. Fan out the trees to ensure they are all held at the spine. Place the tree on a flat surface and flip over the glued pages one by one, adding dots of glue to the tip of each scallop
this time and pressing down to secure. Leave to dry. Cut two half tree shapes from card and glue to the top and bottom of the stack. Carefully open out the stack to reveal the honeycomb-effect tree. Secure at the back with a paperclip slipped over the centre scallops of the card-stiffened paper.
TOP TIPS
- Save paper by measuring the width of your chosen tree and folding an A4 sheet accordingly. Once your first trees are cut out, the paper can be folded again and the template flipped over to utilise the waste effectively
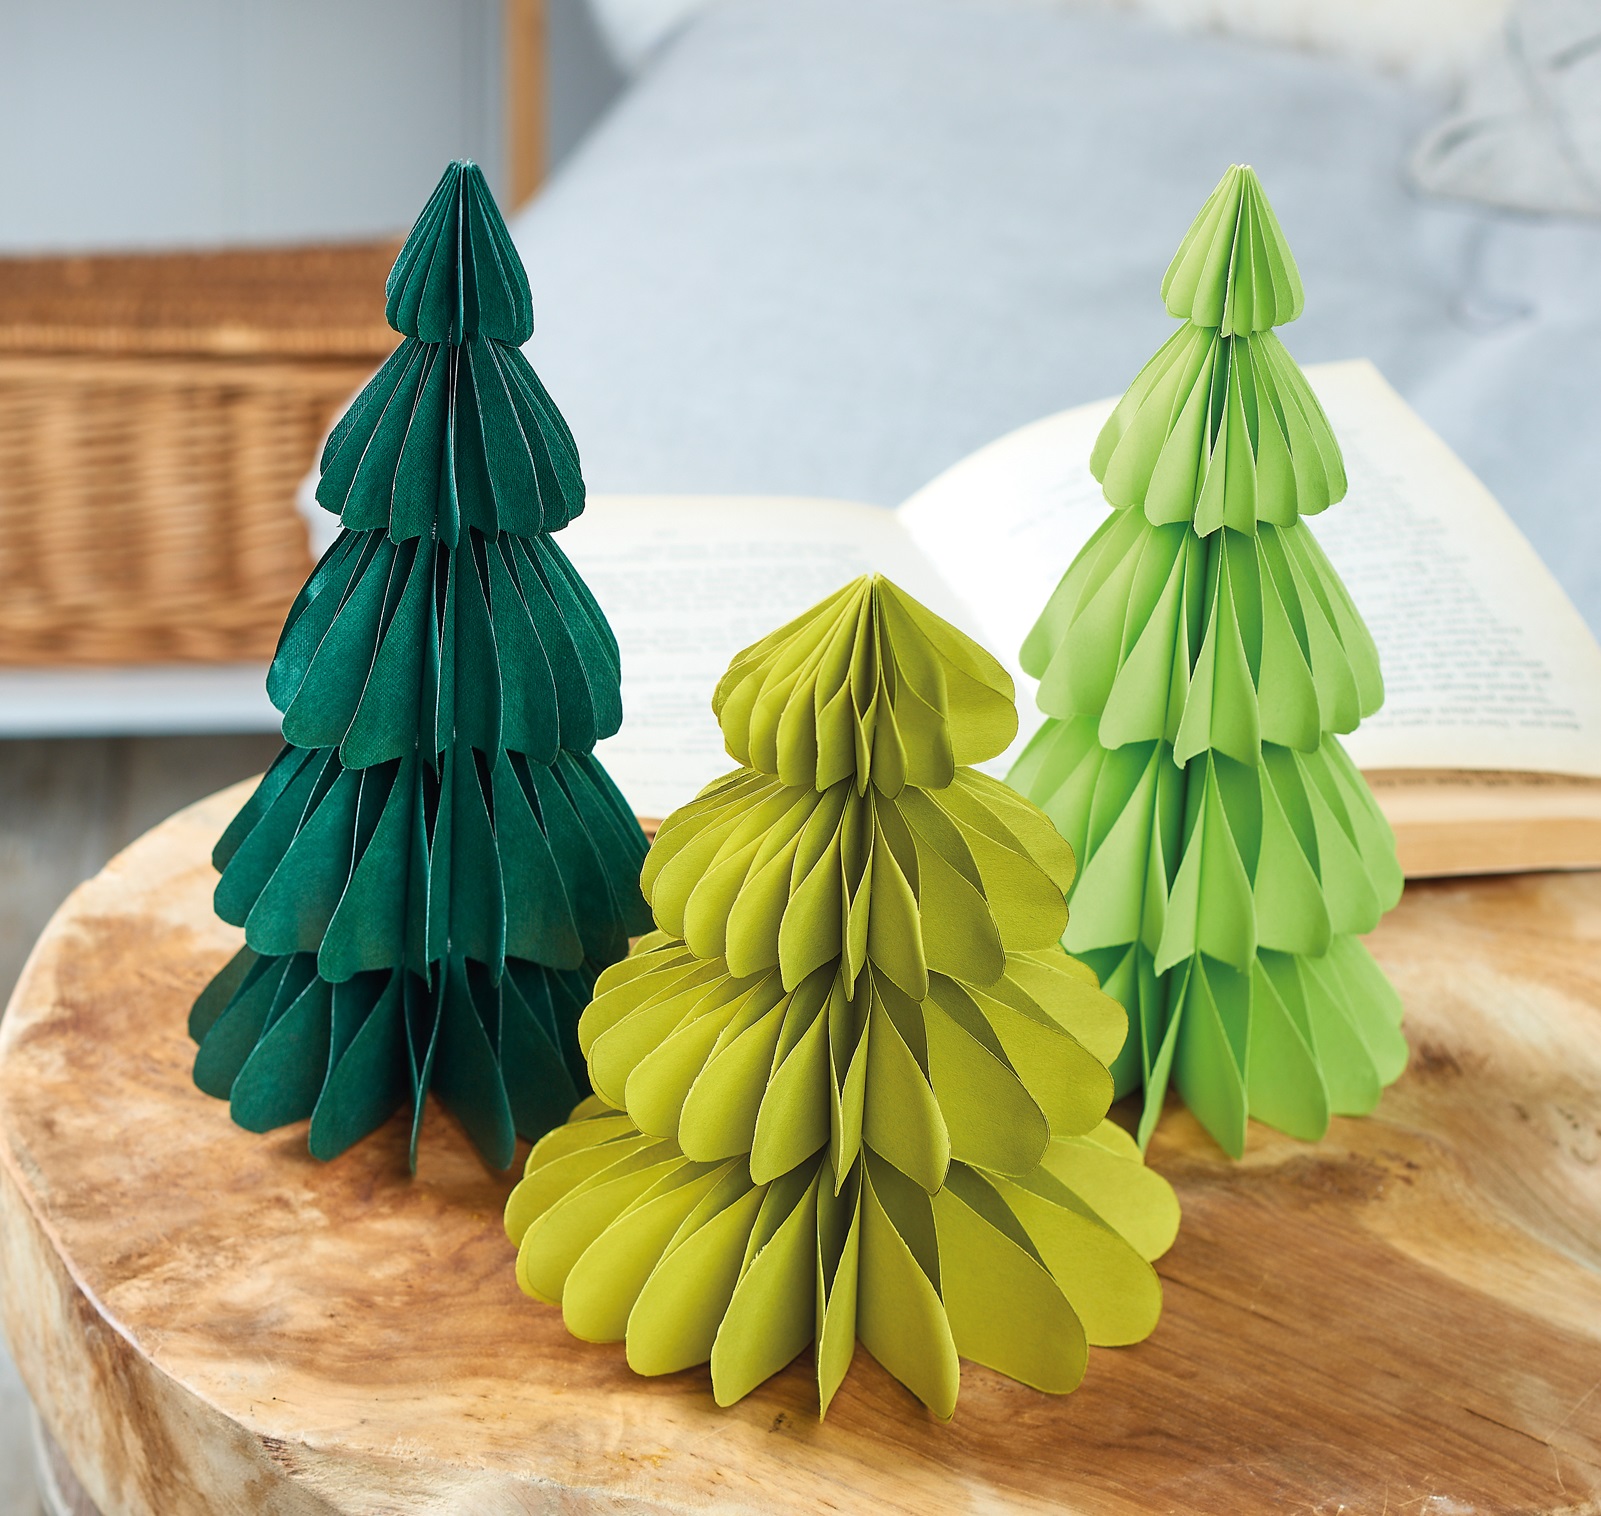
- Go tonal with various shades of green or choose a unique colour combo
- Don’t try cutting more than three sets of folded paper at once; the cuts will become ragged and the finished result will be disappointing
- Adding more folded trees to your stack will make the finished piece plumper – any less than 15 folded trees will make your tree impossible to open fully without tearing the glued pieces too

YOU WILL NEED:
Old books
Die, circle
Wooden skewer
Binder clips
Alcohol marker, orange
Adhesives: PVA glue, glue stick
Die-cutting machine

METHOD:
1. Use a circle die to cut lots of discs from book pages. Fold each circle in…
Halloween crafts Home decor Home decorations How to Papercraft Papercrafter Revamping Techniques Projects

Whilst this may look like a paper cutting that took hours to create, it really couldn’t be any easier. Our talented designer Corinne Bradd has created 15 templates for you to…
Die cutting Home decor Home decorations How to Papercraft Papercrafter Projects

You Will Need:
Templates or SVG files
Brother ScanNCut SDX1200 (optional)
Strong card
Cardstock, various colours
Jute yarn
PVA glue
Autumnal Display
1. Draw a 25cm wide circle on strong card, then draw a concentric 17cm wide circle…
Home decor Home decorations Papercraft Papercrafter Techniques

Shadow box cards, otherwise known as tunnel greetings or diorama cards, are designed to transport the recipient to picture-perfect backdrops in an instant. In this case, PaperCrafter designer Francesca Vignoli…
Birthday crafting Card making Die cutting How to Stamping Techniques Card Making


