


Birthday crafting Card making How to Papercraft Papercrafter Stamping Techniques
Use masking paper and Distress Oxide inks to create these colourful greetings cards
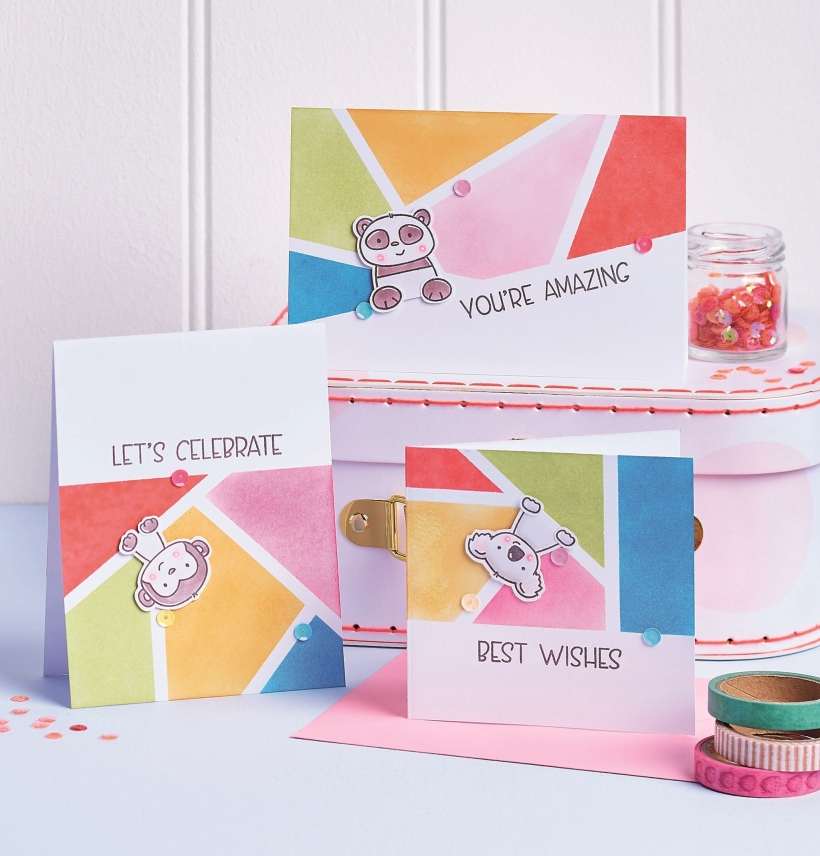
Five Distress Oxide inks, four masking paper strips, three coordinating sequins, two-word sentiments, one cute critter… it’s all in the numbers with these happy cards by Francesca Vignoli. Want to create the colourful geometric look for yourself? We’d be only too happy to share our secrets on the next page. You’ll also uncover some fine-tuning advice – because that’s what turns a greeting from primitive to professional. Fussy cutting guidance, anyone?
Five is the magic number
To get started with this project, you’ll need to choose five different Distress Oxide ink pads – and that’s half the fun. Play about with lots of combinations until you’re happy, or copy Francesca Vignoli’s summery assortment because who could blame you? You’ll then be cutting thin strips of masking paper to mask off five geometric shapes, which can be done in any way you choose. We’re showcasing four options to get you on your way.
The finer details
Once you’ve blended your inks and allowed them to dry, you’ll be stamping some cute critters. We’ve paired the Peek-A-Boo Pals stamps with Memento Espresso Truffle ink, then coloured them in with Copics. To cut them out neatly, make sure you leave a narrow border – that way you won’t distort the outline. Make sure you take your time too, because there’s nothing worse than jagged edges. Finish with white gel pen accents: we’ve gone for the ears, nose, paws and cheeks predominantly.
More than one way to do it
You may have noticed a magic touch – the coordinating sequins. Just three of them. Isn’t that lovely? There are other things you can do to add a bit of pizzazz too. Apply texture by coating the ink-blended sections with a clear glitter paste or opt for a simple clear paste for a stained-glass effect. You could even draw little patterns onto each geometric shape with a white gel pen if you’re nifty at illustrations. Be sure to share what you try with us!
You Will Need:
Stamps: Avery Elle Peek-A-Boo Pals, Banner Bits
Inks: Distress Oxide Abandoned Coral, Shabby Shutters, Picked Raspberry, Spiced Marmalade, Salty Ocean; Memento Espresso Truffle
Cardstock, white
Masking paper or tape
Pens: Copic W2, W0, RV13, RV10, C2, C0, E71, E51; white gel
Sequins
Adhesives: liquid glue, 3D foam pads
Geometric Inked Monkey Card
1. Make a top-folding 10.5cm x 14cm white blank. Stamp a monkey onto white cardstock, colour in with Copics and cut out. Add some details with a white gel pen.
2. Use masking strips as before to create five geometric sections, this time with a horizontal line just above the middle of the blank. Ink each section with distress oxides, leaving the top of the greeting white. Remove the masking strips and let everything dry.
3. Stamp a sentiment at the top. Fix the monkey to the card with 3D foam pads, so it’s upside-down on one of the white strips. Add sequins to complete.
Geometric Inked Panda Card
1. From white card, make a top-folding 10.5cm x 15.5cm blank. Adhere the first masking strip onto the front panel diagonally and towards the bottom. Apply more strips to create five geometric sections on the top half of the blank.
2. Colour each section with distress oxide inks, then gently peel off the masking strips and leave to dry. Stamp a panda onto white cardstock. Colour in with Copics, cut out and fix to the greeting with 3D foam pads so it’s sitting at the base of the coloured sections. Stamp a sentiment at the bottom and add sequins.
Geometric Inked Koala Card
1. Create a side-folding 10.5cm x 10.5cm white blank. Stamp a koala onto white cardstock, colour in and cut out. Adhere the first masking strip onto the blank, horizontally and just below the centre of the card. Add more strips above to create five geometric sections.
2. Colour each section with a different distress oxide section, remove the masking strips, then leave to dry. Stamp a sentiment below and add the koala with 3D foam pads. Finish with white gel pen details and sequins.
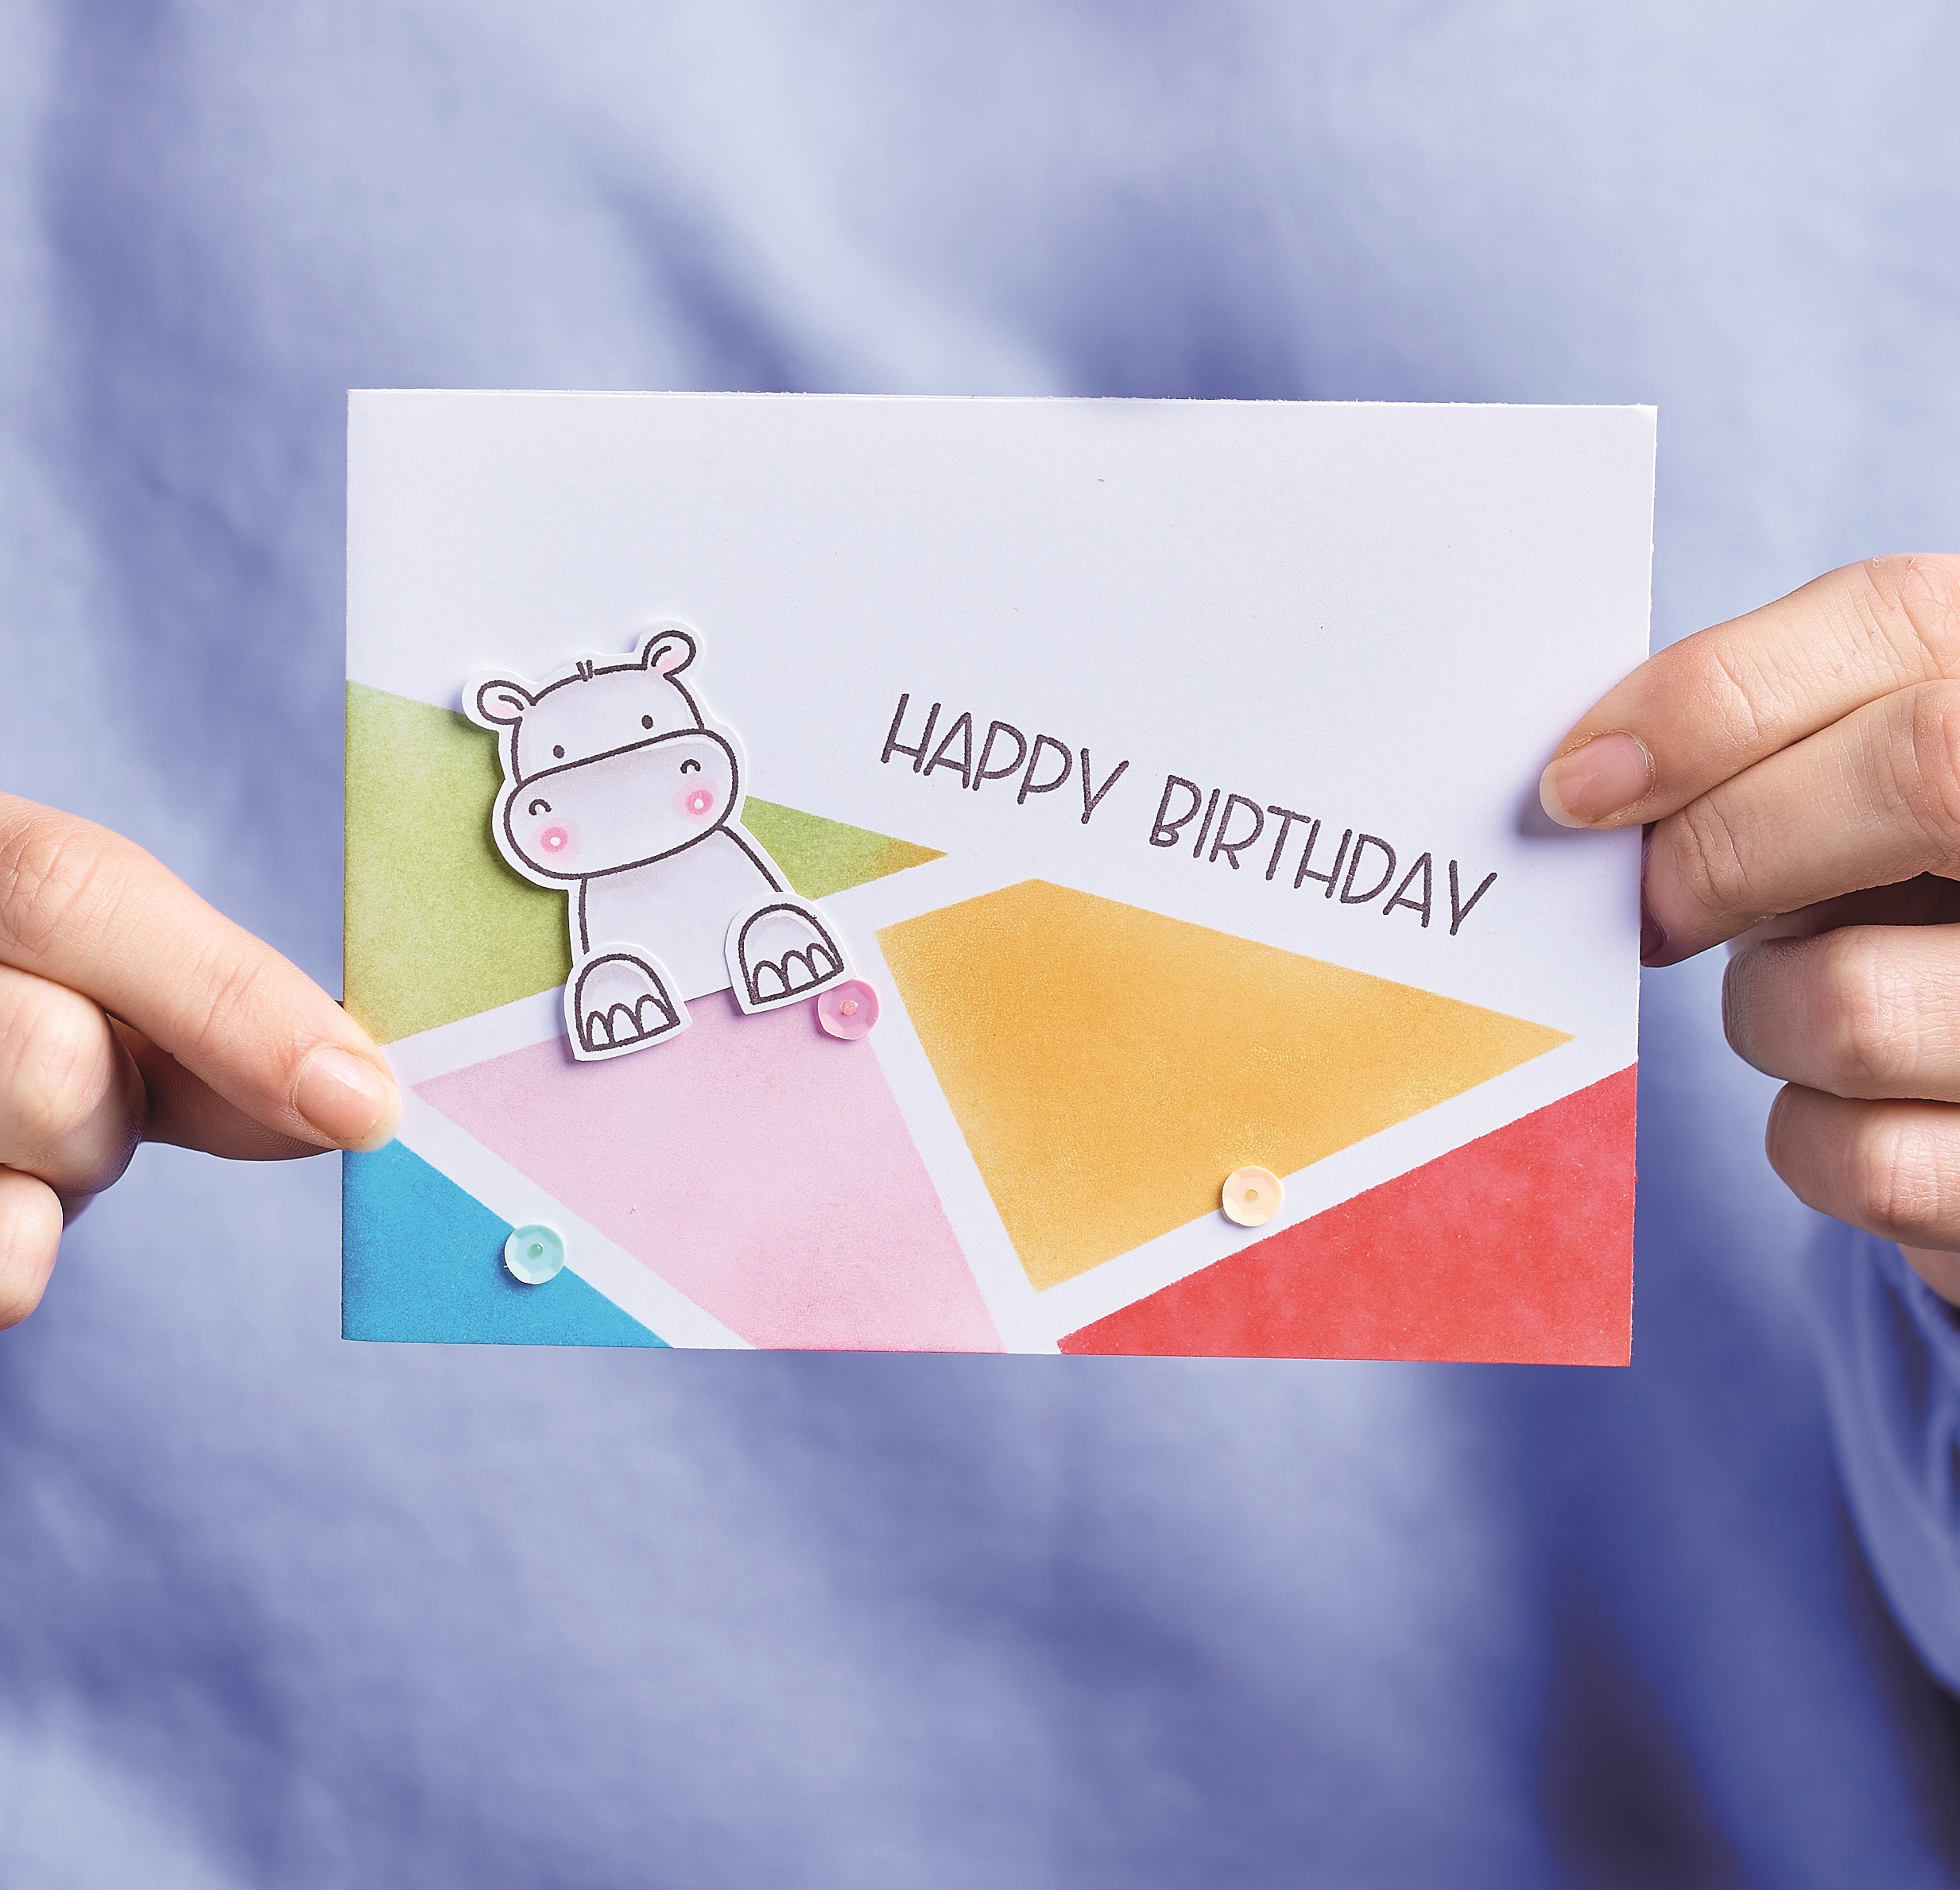
Geometric Inked Hippo Card
1. Create a side-folding 10.5cm x 14cm white blank. Cut masking paper into strips, approximately 5mm wide and 15cm long. Adhere the first strip onto the front panel diagonally across the middle, then add more on the bottom to create five geometric sections.
2. Ink each section with five shades of distress oxide inks, leaving the uppermost section on the greeting white. Gently remove all the masking strips and leave to dry completely.
3. Stamp a hippo onto white Copic-friendly cardstock, then colour in and cut out. Add the hippo with 3D foam pads, so it’s sitting neatly along one of the white lines. Stamp a sentiment onto the card. Finish the greeting with sequins and white gel pen accents.
TOP TIPS
- Sit the characters neatly within the white strip sections
- No masking paper? Use Post-it notes instead!
- Don’t overdo the colours on your critters, because they’ll fight with the background too much

YOU WILL NEED:
Old books
Die, circle
Wooden skewer
Binder clips
Alcohol marker, orange
Adhesives: PVA glue, glue stick
Die-cutting machine

METHOD:
1. Use a circle die to cut lots of discs from book pages. Fold each circle in…
Halloween crafts Home decor Home decorations How to Papercraft Papercrafter Revamping Techniques Projects

Whilst this may look like a paper cutting that took hours to create, it really couldn’t be any easier. Our talented designer Corinne Bradd has created 15 templates for you to…
Die cutting Home decor Home decorations How to Papercraft Papercrafter Projects

You Will Need:
Templates or SVG files
Brother ScanNCut SDX1200 (optional)
Strong card
Cardstock, various colours
Jute yarn
PVA glue
Autumnal Display
1. Draw a 25cm wide circle on strong card, then draw a concentric 17cm wide circle…
Home decor Home decorations Papercraft Papercrafter Techniques

Shadow box cards, otherwise known as tunnel greetings or diorama cards, are designed to transport the recipient to picture-perfect backdrops in an instant. In this case, PaperCrafter designer Francesca Vignoli…
Birthday crafting Card making Die cutting How to Stamping Techniques Card Making


