


Birthday crafting Card making Die cutting Embossing How to Papercraft Papercrafter Party makes Techniques Card Making Embossing
Easily achieve tantalising textures and visually stunning designs with Keren Baker’s embossing expertise.
Embossing folders are really useful for a whole variety of techniques. Not only can you use them to create embossed and debossed papers, you can ink both sides of the folder to produce different textured effects. Plus, you can emboss die-cut sentiments, cut out embossed elements and scatter embossing powder to achieve a beautiful effect.
YOU WILL NEED:
Embossing folder, Stampin’ Up! Layered Leaves
Embossing powder, Tonic Studios Nuvo, white
Dies: Tonic Studios stitched dot square; My Favorite Things Hooray, Wish
Inks: Catherine Pooler Sauna, Party Dress, It’s A Girl, Tutti Frutti, Fiesta Blue, Lime Rickey, Grass Skirt; Tsukineko Versamark
Embossing heat tool
Small ink roller
METHOD
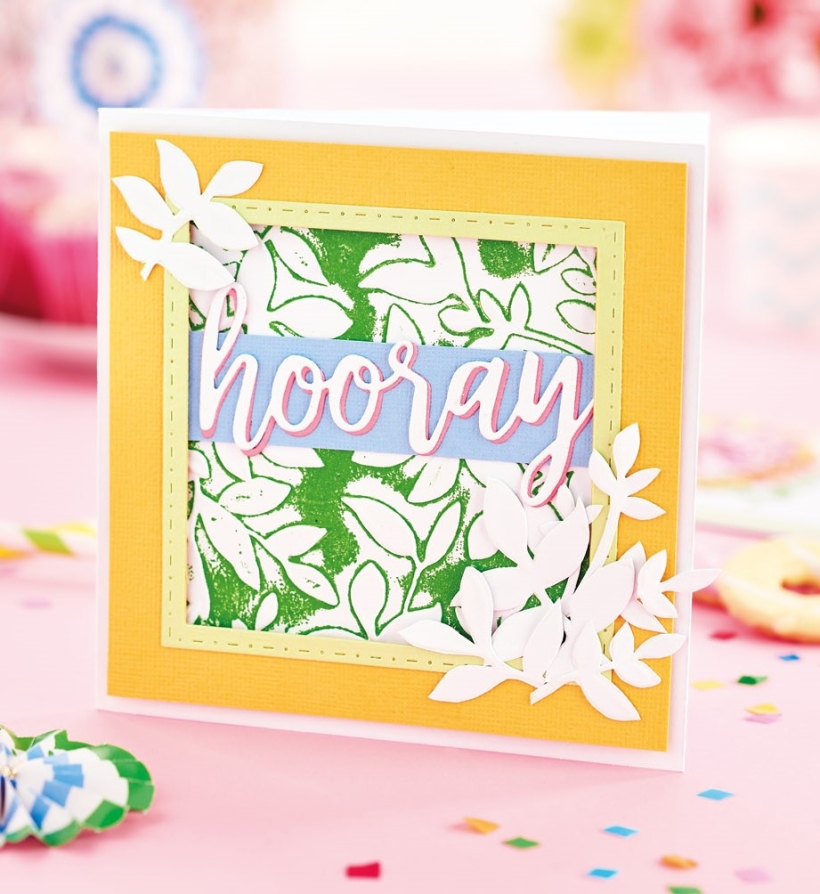
1 Die cut a square frame from the centre of yellow card, 12.5cm square. Create a thin light green frame the same size as the yellow aperture. Die cut a sentiment from white card, then pink, and layer together, slightly offset.
2 Apply green ink to the flat side of an embossing folder, add a piece of white cardstock and run it through a die-cutting machine. Remove from the folder and allow it to dry, then stick to the blank.
3 Adhere the thin and thicker aperture together and fix to a 13cm square white blank with 3D foam pads. Using the embossing folder, emboss another piece of cardstock. Trim some of the leaves and add to the edges of the frame. Add a strip of blue cardstock to the centre and add the sentiment on top.

YOU WILL NEED:
Old books
Die, circle
Wooden skewer
Binder clips
Alcohol marker, orange
Adhesives: PVA glue, glue stick
Die-cutting machine

METHOD:
1. Use a circle die to cut lots of discs from book pages. Fold each circle in…
Halloween crafts Home decor Home decorations How to Papercraft Papercrafter Revamping Techniques Projects

Whilst this may look like a paper cutting that took hours to create, it really couldn’t be any easier. Our talented designer Corinne Bradd has created 15 templates for you to…
Die cutting Home decor Home decorations How to Papercraft Papercrafter Projects

You Will Need:
Templates or SVG files
Brother ScanNCut SDX1200 (optional)
Strong card
Cardstock, various colours
Jute yarn
PVA glue
Autumnal Display
1. Draw a 25cm wide circle on strong card, then draw a concentric 17cm wide circle…
Home decor Home decorations Papercraft Papercrafter Techniques

Shadow box cards, otherwise known as tunnel greetings or diorama cards, are designed to transport the recipient to picture-perfect backdrops in an instant. In this case, PaperCrafter designer Francesca Vignoli…
Birthday crafting Card making Die cutting How to Stamping Techniques Card Making


