


How to Papercraft Video tutorial
Make a paper town with our step-by-step tutorials and templates
Please login to download. Sign in here
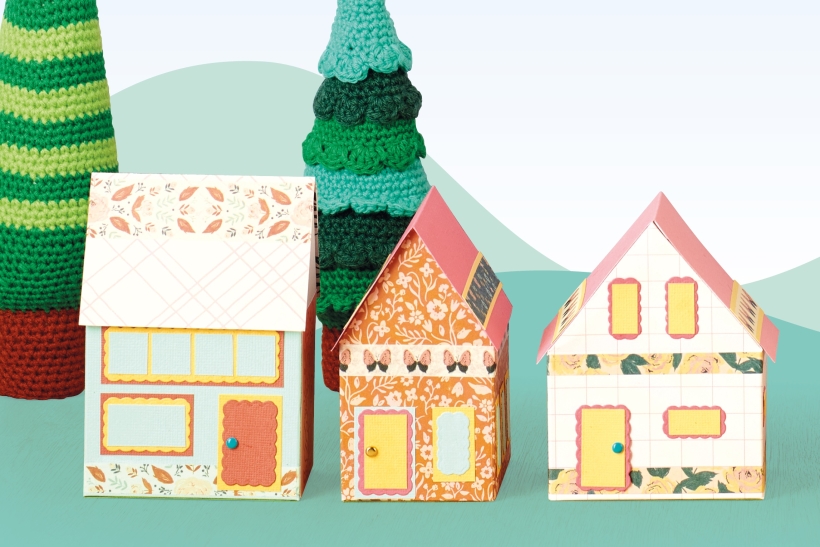
Corinne Bradd has entered the world of miniatures with her paper town – isn’t it completely, utterly marvellous? Using a few basic craft supplies and a bucketload of creativity, we’re sure she’s made you eager to get started. Corinne has created handy templates for you to use as a guide to cutting and scoring, and the height of the buildings can easily be adjusted to suit your requirements. The width can also be altered, but take into account that the pitch and size of the roof will change. What are you waiting for? Let’s craft!
You Will Need:
Templates
Patterned papers – we used Crate Paper Fresh Bouquet
Plain cardstock, 12” x 12”
Dies: mini rectangle, mini scalloped rectangle
Paper fastener
Washi tape
Scoring tool
Adhesives: PVA glue
Die-cutting machine
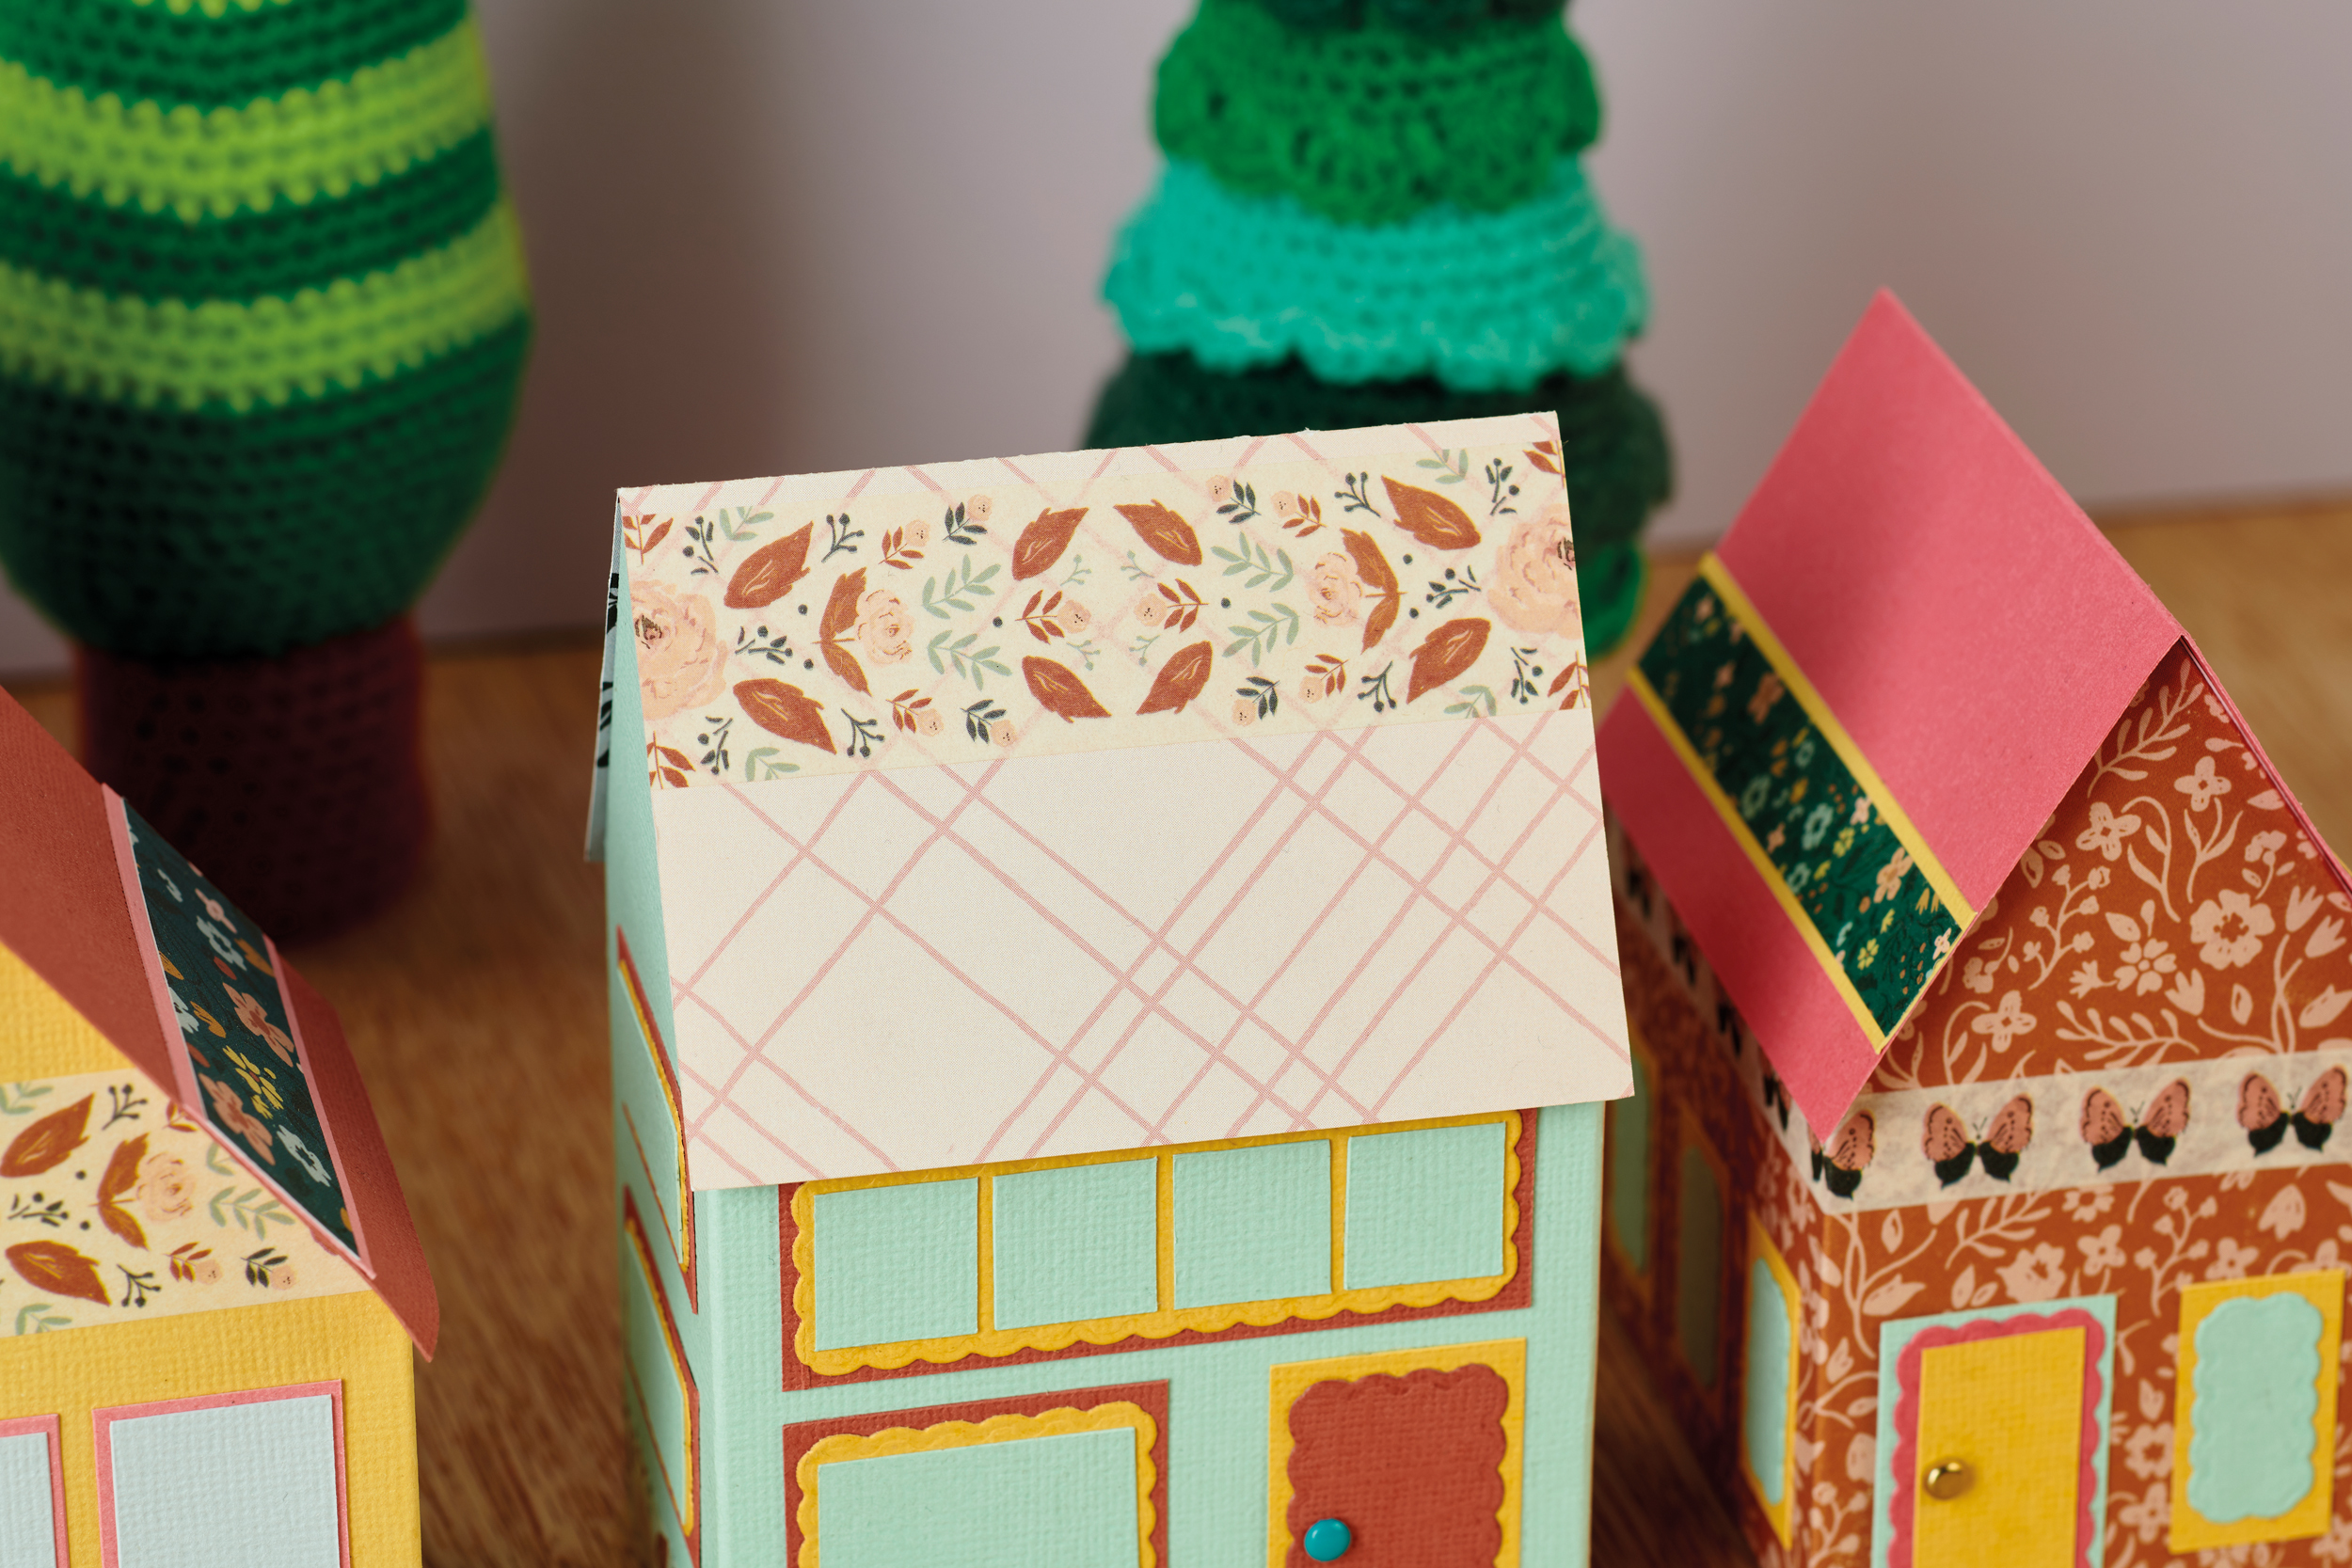
Town House
1. Using the House 2 template, cut and fold the building from pale green cardstock, increasing the height of the walls to 8cm. Decorate with floral washi tape. Create triple layered panels to represent windows from contrasting shades of cardstock, using mini rectangle dies. Add a coordinating door to one of the wider sides.
2. Cut a roof from pink checked paper, score in half, then fold. Decorate the ridge of the roof with wide washi tape and glue to the tabs at the top of the building. Snip a rectangle of card to fit the base of the building and glue to the bottom tabs to keep the house square.
Bungalow
1. Using the House 2 template, cut and fold the building from floral paper, decreasing the height of the walls to 6cm. Create layered windows and a door from various shades of cardstock using mini rectangle dies. Add single rows of the windows to both long sides, then place a small door and one window on one gable end. Decorate the top of the walls with washi tape.
2. Trim a roof panel from pink cardstock and score in half. Embellish both sides of the roof with washi tape layered onto coloured card, then fix the roof to the bungalow using the top tabs. Hold the building square with a corresponding rectangle of card glued to the bottom tabs.
Gable End Cottage
1. Using the House 1 template, cut and fold the building from pink checked paper and decorate with floral washi tape whilst flat. Make layered windows from yellow and pink cardstock using mini rectangle dies, then apply to all sides of the cottage. Create and place a door on one of the wider sides.
2. Cut out a roof panel to fit. Decorate both sides with washi tape layered onto strips of card. Adhere the roof in place using the tabs on the top edges of the cottage. Add a panel of card to the base of the structure to finish.
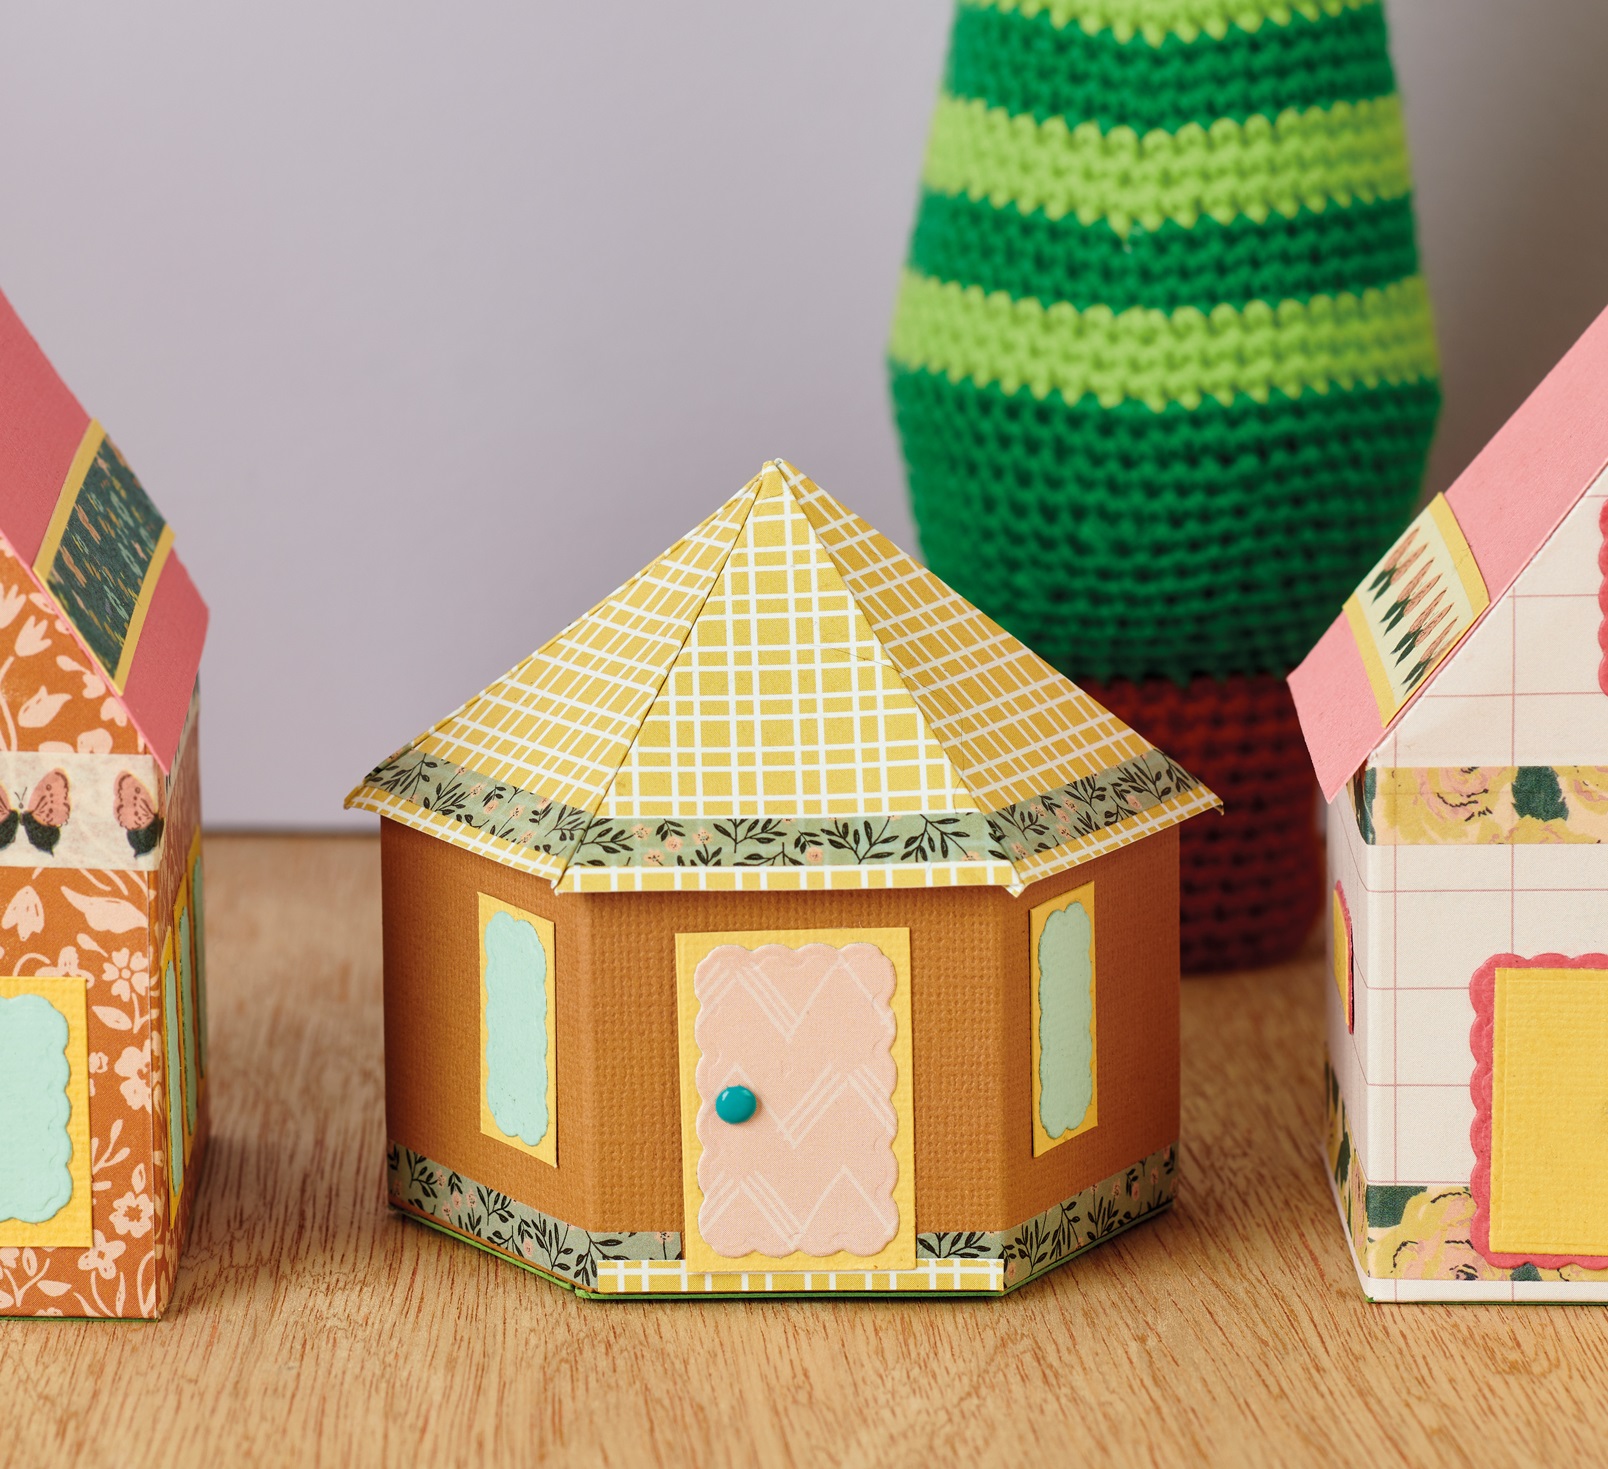
Hexagon Cottage
1. Using the template, cut and fold a hexagon cottage from brown cardstock, then decorate the bottom edge with washi tape. Create a layered door from yellow cardstock and pink patterned paper using mini rectangle dies. Secure to the centre of one face of the cottage. Add a paper fastener for a door handle, then apply a narrow strip of card below to represent a doorstep.
2. Die cut and assemble five small layered windows and fix to the remaining faces of the bungalow, before glueing the building into a hexagon. Add a corresponding hexagon to the base to keep the model straight.
3. Using the template, cut six roof panels from yellow checked paper and decorate the bottom edge with washi tape. Glue the panels to each other using the side tabs. Place over the bungalow to check the fit, before glueing in place with the tabs around the top of the building.
TOP TIPS
- Decorate your building before complete assembly, as it’s much easier to get a good adhesion on a flat surface
- Making the layered windows and doors is a great way to use up scraps of cardstock and patterned paper
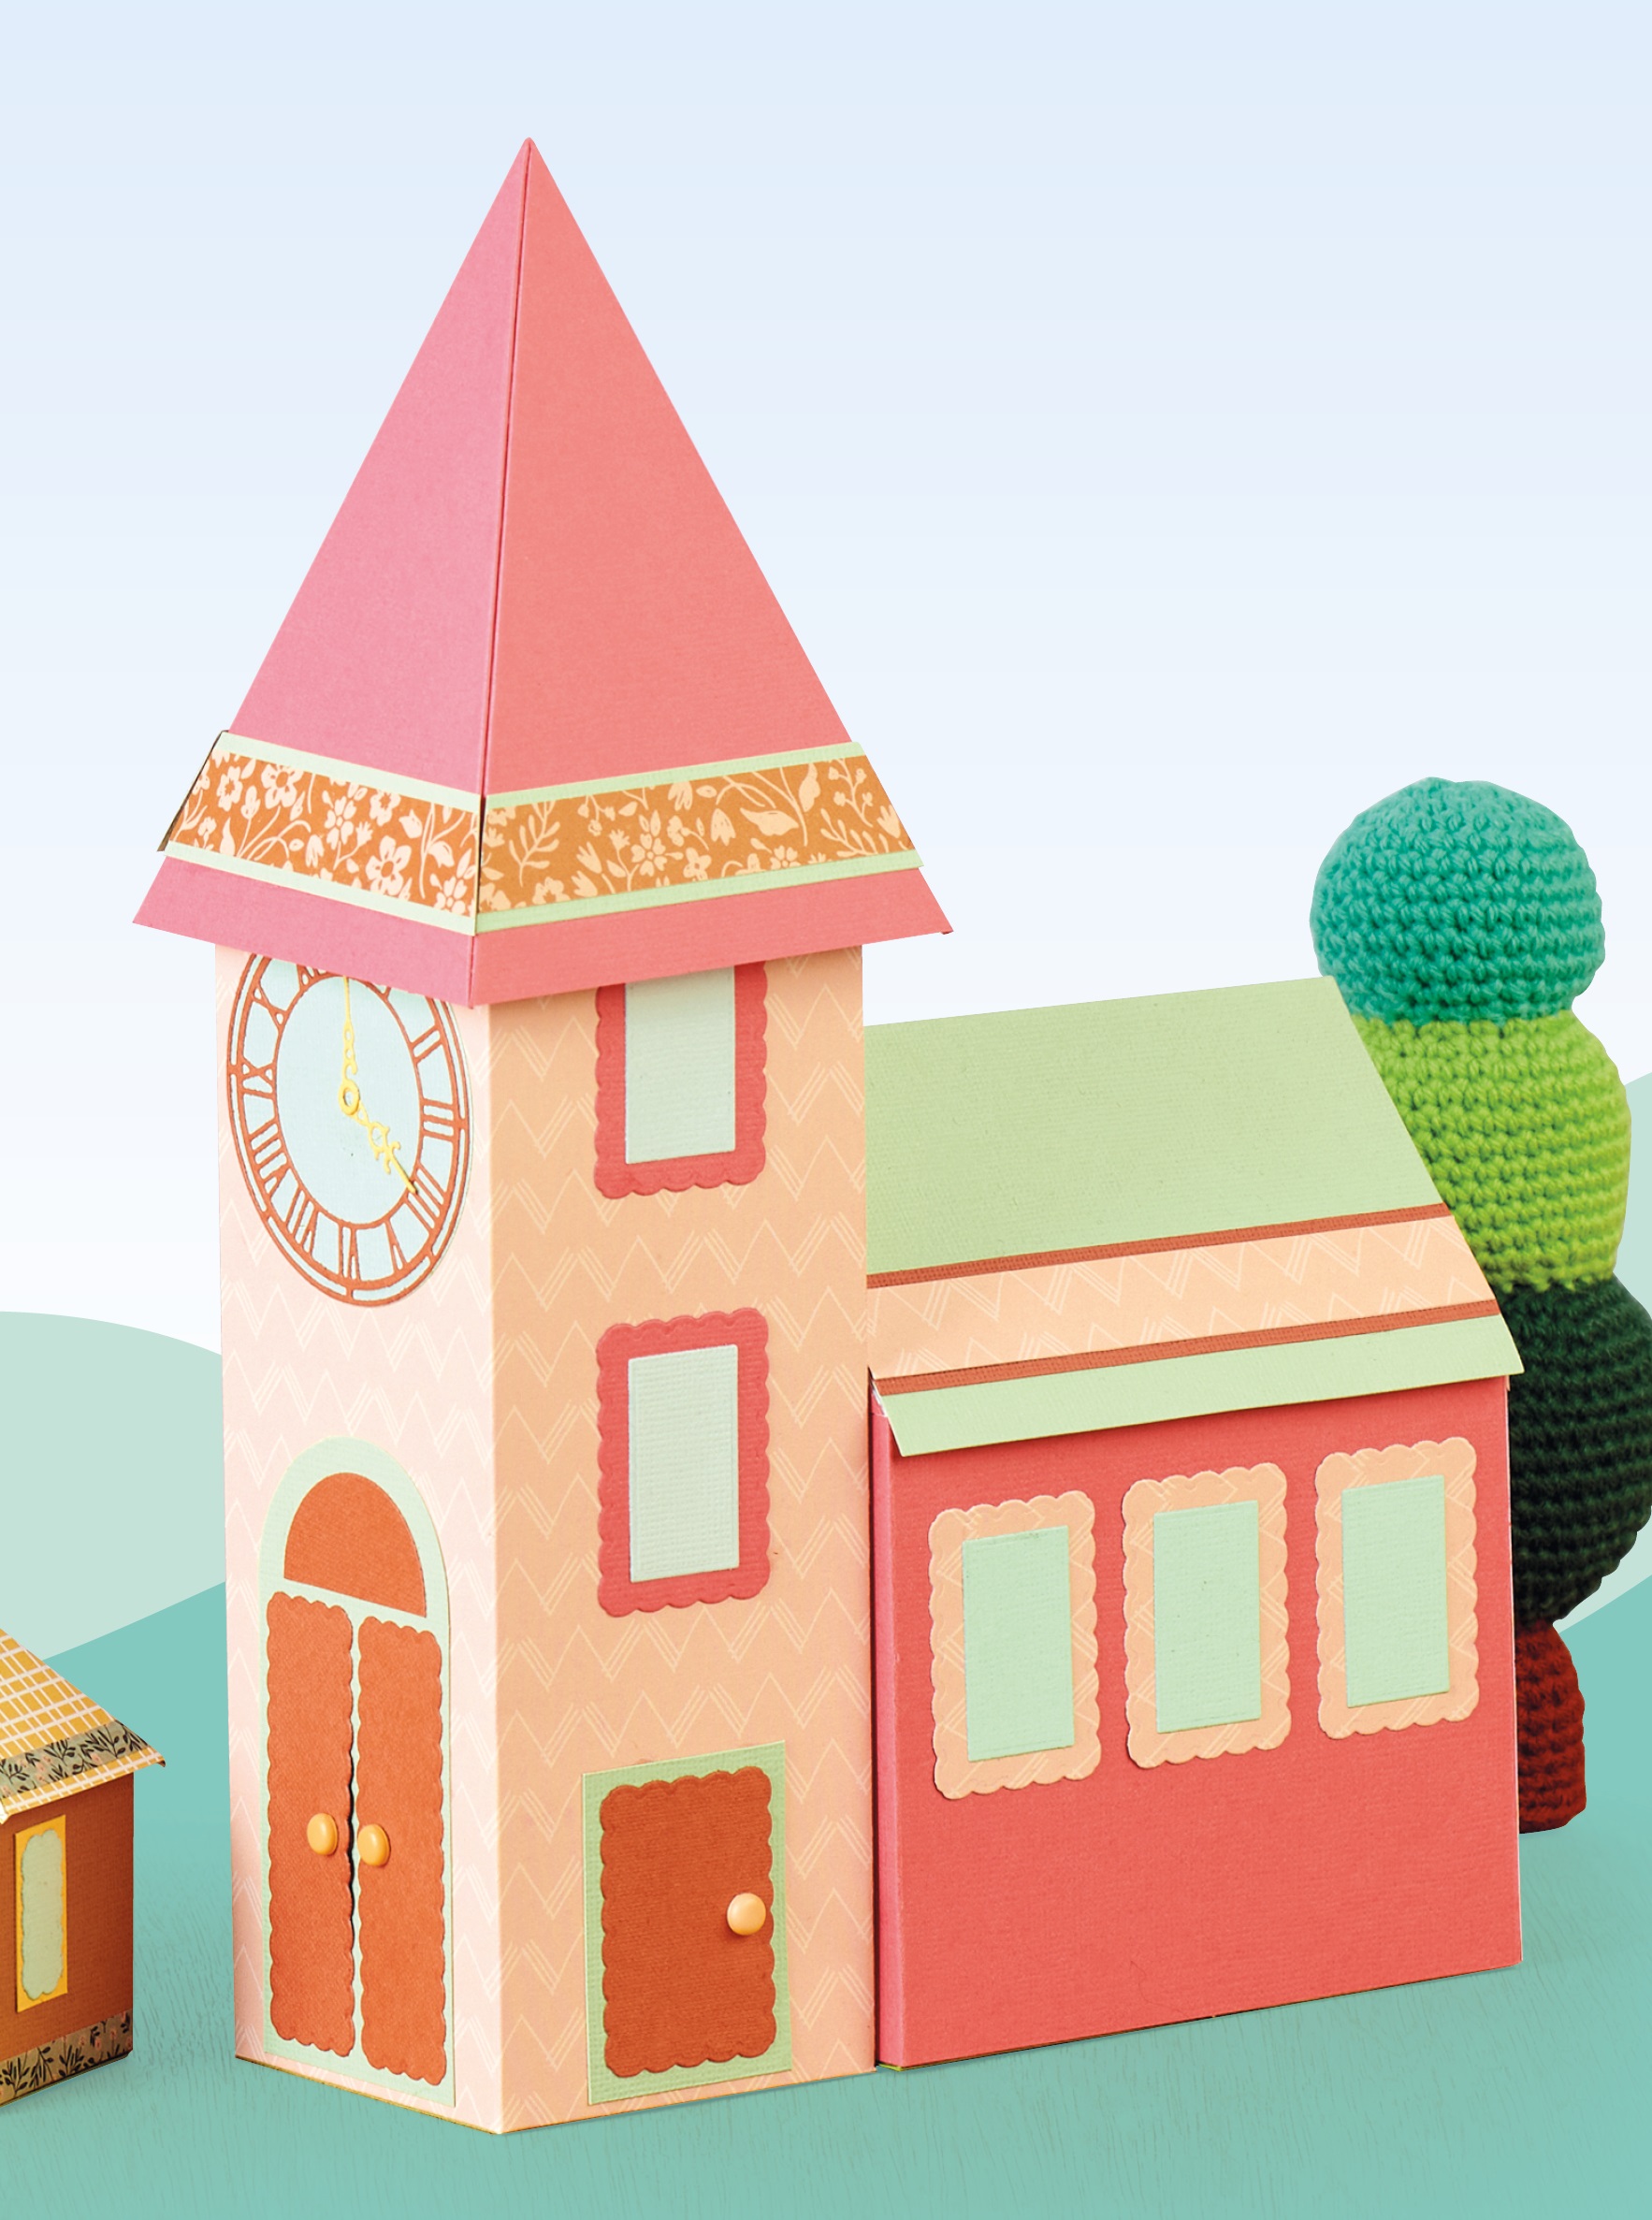
COMING SOON!
Learn to make a church and pub next time…

YOU WILL NEED:
Old books
Die, circle
Wooden skewer
Binder clips
Alcohol marker, orange
Adhesives: PVA glue, glue stick
Die-cutting machine

METHOD:
1. Use a circle die to cut lots of discs from book pages. Fold each circle in…
Halloween crafts Home decor Home decorations How to Papercraft Papercrafter Revamping Techniques Projects

Whilst this may look like a paper cutting that took hours to create, it really couldn’t be any easier. Our talented designer Corinne Bradd has created 15 templates for you to…
Die cutting Home decor Home decorations How to Papercraft Papercrafter Projects

You Will Need:
Templates or SVG files
Brother ScanNCut SDX1200 (optional)
Strong card
Cardstock, various colours
Jute yarn
PVA glue
Autumnal Display
1. Draw a 25cm wide circle on strong card, then draw a concentric 17cm wide circle…
Home decor Home decorations Papercraft Papercrafter Techniques

Shadow box cards, otherwise known as tunnel greetings or diorama cards, are designed to transport the recipient to picture-perfect backdrops in an instant. In this case, PaperCrafter designer Francesca Vignoli…
Birthday crafting Card making Die cutting How to Stamping Techniques Card Making


