

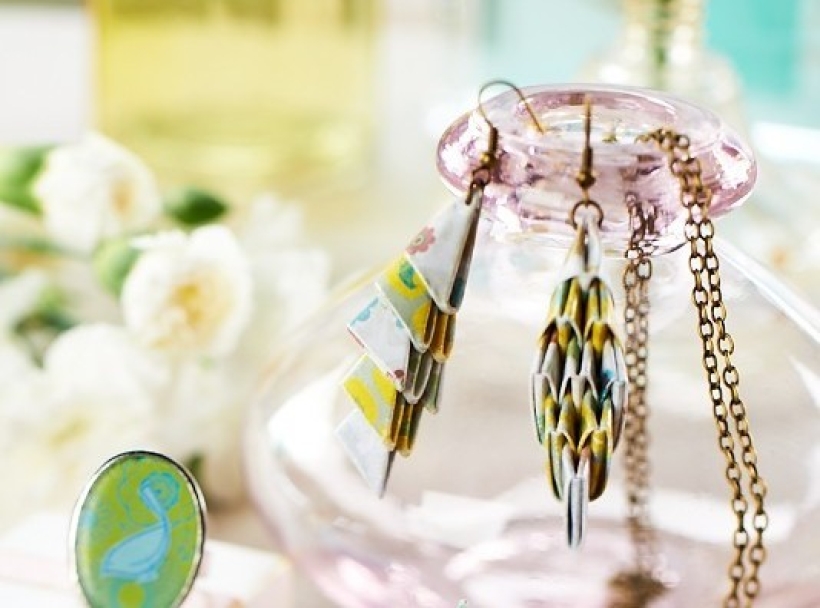


Have you ever tried making jewellery from paper? This issue, PaperCrafter designers Corinne Bradd and Elizabeth Moad gave the unusual craft a go and the results were stunning. Here’s a bonus project for all our lovely blog readers – follow the step-by-step guide to learn how to make a pair of paper earrings
• Cut paper rectangles sized 3cm x 5cm. You will need two of paper A and eight each of B and C. Fold each rectangle into a triangle following the picture guide in PaperCrafter issue 62 (find it in page 34).
• All triangles are assembled the same way round to give a flat back and ridged top surface. Start by pushing both points of a C triangle into one sleeve of a B triangle. Push another C triangle into the other sleeve.
• Make the third row by pushing a B triangle into the two inner sleeves of the C triangles. Push both points of a B triangle into both the outer sleeves of the C triangles.
• Start decreasing the width of the rows by fitting two C triangles into the centre sleeves of row three, leaving the two outer sleeves empty. Take a single triangle A and push into the inner sleeves of row four, leaving the outer sleeves empty as before.
• Make the second of your paper earrings in the same way and coat each one with two coats of PVA or decoupage glaze. Pierce a hole in the top point of the first triangle and fit jump rings and earwires through these.

Busy lives often involve a lot of memos and reminders, and it can sometimes be hard to keep track. Luckily, we’ve got a sophisticated solution to keep your desk tidy and…

If you’re having a quiet Valentine’s with your beloved at home this year, make the place look a little more special with a speedy-to-make hearts frieze. Papercrafting doesn’t get much easier than…
Home decor Home decorations How to Papercraft Papercrafter Techniques Projects

1. Using a 3.5cm circle die, cut eight discs from chipboard and sixteen circles from patterned paper. Glue the patterned circles to either side of the discs and punch a…

Craft essentials
1. Cut a 5cm x 15cm strip of double-sided patterned paper and fold in half lengthways. Draw parallel pencil lines at 1.5cm and 2cm from the…


