

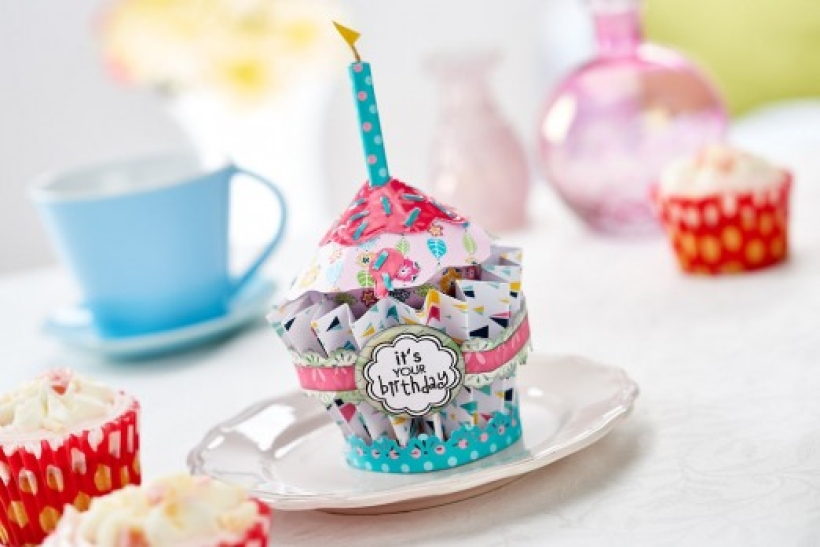


Surprise someone on their birthday by hiding their gifts inside this cute paper cupcake box. Simply lift the lid off and reveal the treats inside!. This adorable cake was designed by the talented Louise Collins.
Craft Essentials, Birthday sentiment, Twine
• Cut two 6cm x 28cm strips of white patterned paper and stick their short ends together to make one long strip. Concertina fold this all the way along at 1cm intervals. Stick the other two ends together to make a cylindrical loop.
• Trim a 6cm circle from card and adhere to the bottom of the loop. Fan the concertina out while the glue is drying to give it shape.
• To make the lid, cut a 10cm circle from pale pink paper. Make a snip from the edge into the centre point and overlap the cut edges to make a cone shape. Add a wavy edge, then glue in place.
• Cut a 2.5cm x 7cm strip of paper and make a fringe in one side. Stick the short ends together to form a loop, flatten the fringing down and stick inside the cone so that the lid fits snugly inside the cupcake base.
• Make a smaller cone in a darker paper and stick on the top of the cake. Add a few more splodges of this paper around it, then cover in glossy varnish if you wish. Push a hole through the top of the two cones and place a piece of rolled paper inside as a candle. Glue a small piece of twine in the top and add a small yellow triangle.
• Trim tiny strips of paper and stick to the top of the cake as sprinkles. Then punch two decorative strips of paper. Wrap one around the bottom of the cake case and the other round the middle. Finish with a ribbon of paper around the centre and a sentiment on the front.

Busy lives often involve a lot of memos and reminders, and it can sometimes be hard to keep track. Luckily, we’ve got a sophisticated solution to keep your desk tidy and…

If you’re having a quiet Valentine’s with your beloved at home this year, make the place look a little more special with a speedy-to-make hearts frieze. Papercrafting doesn’t get much easier than…
Home decor Home decorations How to Papercraft Papercrafter Techniques Projects

1. Using a 3.5cm circle die, cut eight discs from chipboard and sixteen circles from patterned paper. Glue the patterned circles to either side of the discs and punch a…

Craft essentials
1. Cut a 5cm x 15cm strip of double-sided patterned paper and fold in half lengthways. Draw parallel pencil lines at 1.5cm and 2cm from the…


