


Birthday crafting Card making Die cutting How to Papercraft Papercrafter Techniques
Save money and make your die stash go further by using basic dies in unexpected ways!
There are always new ways of looking at your stash, and Keren Baker has set out to prove it with these wonderfully inventive cards that have ‘cost-effective crafting’ written all over them. She’s taken existing dies from her collection (many of them floral) and used them in different, yet brilliant, ways. You see a leaf – Keren sees petals. You see a flower centre – Keren sees an abstract background. Follow her lead and you too can unleash your full creative power on a budget.
You Will Need:
Dies: Altenew Craft-A-Flower Sunburst Azalea, You Matter, Craft-A-Flower Cistus, Mini Delight Winsome Bloom; Concord & 9th All The Hellos; The Greetery Birthday Blooms; Mama Elephant
Foliage Frame; My Favorite Things Cocktail Hour; circles
Stamps, The Greetery Birthday Blooms
Ink pad, black
Cardstock: various colours, silver glitter
Grafix Dura-Lar Matt Film or vellum
Gel pen, white
Punches, circles
Adhesives: 3D foam pads, glue
Die-cutting machine
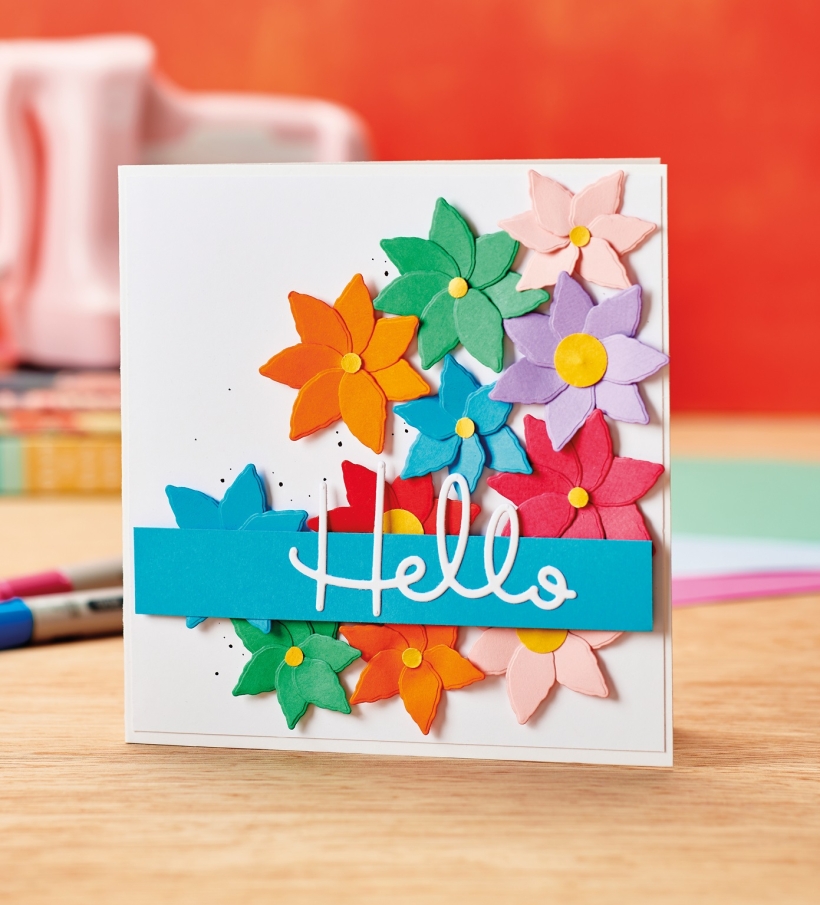
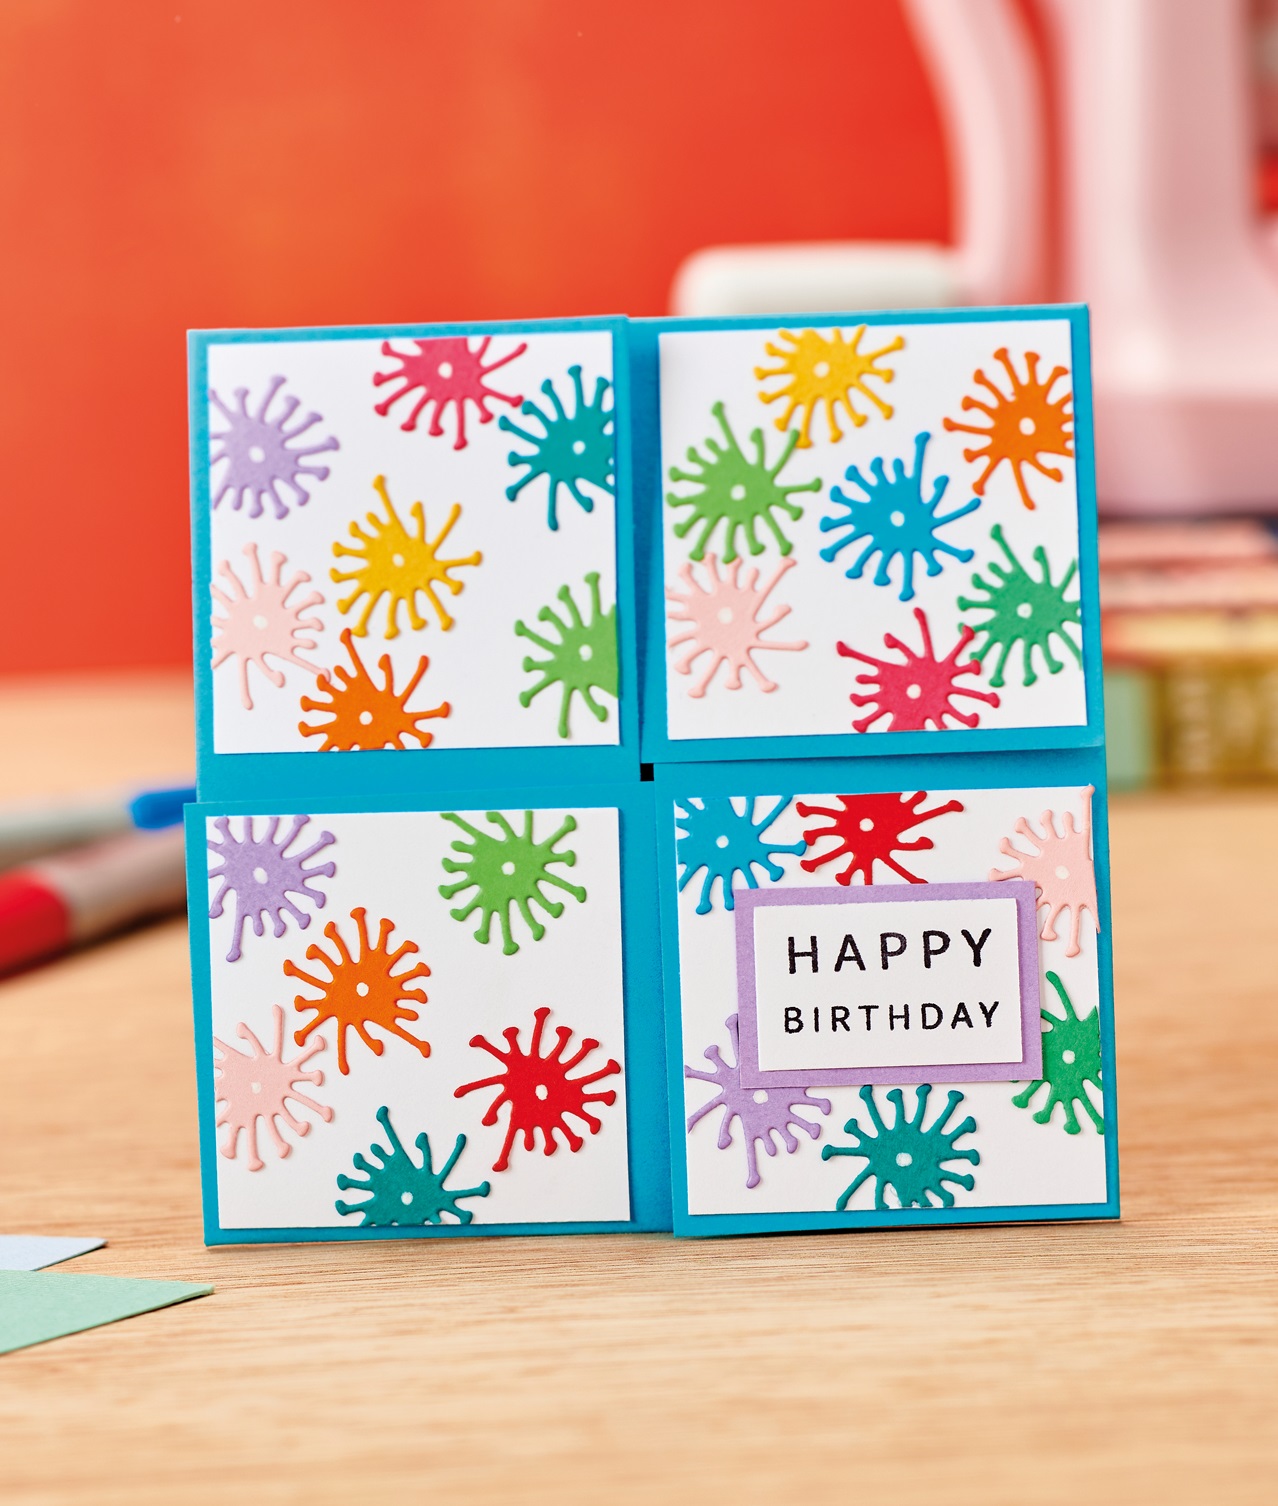
Hello Flower Card
1. Create a 13.5cm x 14cm white blank and cut white cardstock slightly smaller. Splatter the panel with black ink. Die cut a selection of leaves in two sizes and multiple colours. You’ll need 6-8 leaves of the same size and colour to make up one flower.
2. Attach the leaves to the white panel using a 3D foam pad at the pointed end, and a dot of glue at the rounded end. Overlap the leaves when adhering, so that they form flowers. Keep doing this until you have enough flowers, then punch out a small yellow circle for the centre of each one.
3. Die cut a sentiment from white card and glue to a blue strip. Secure on top of the flowers, then adhere the panel to the blank to finish.
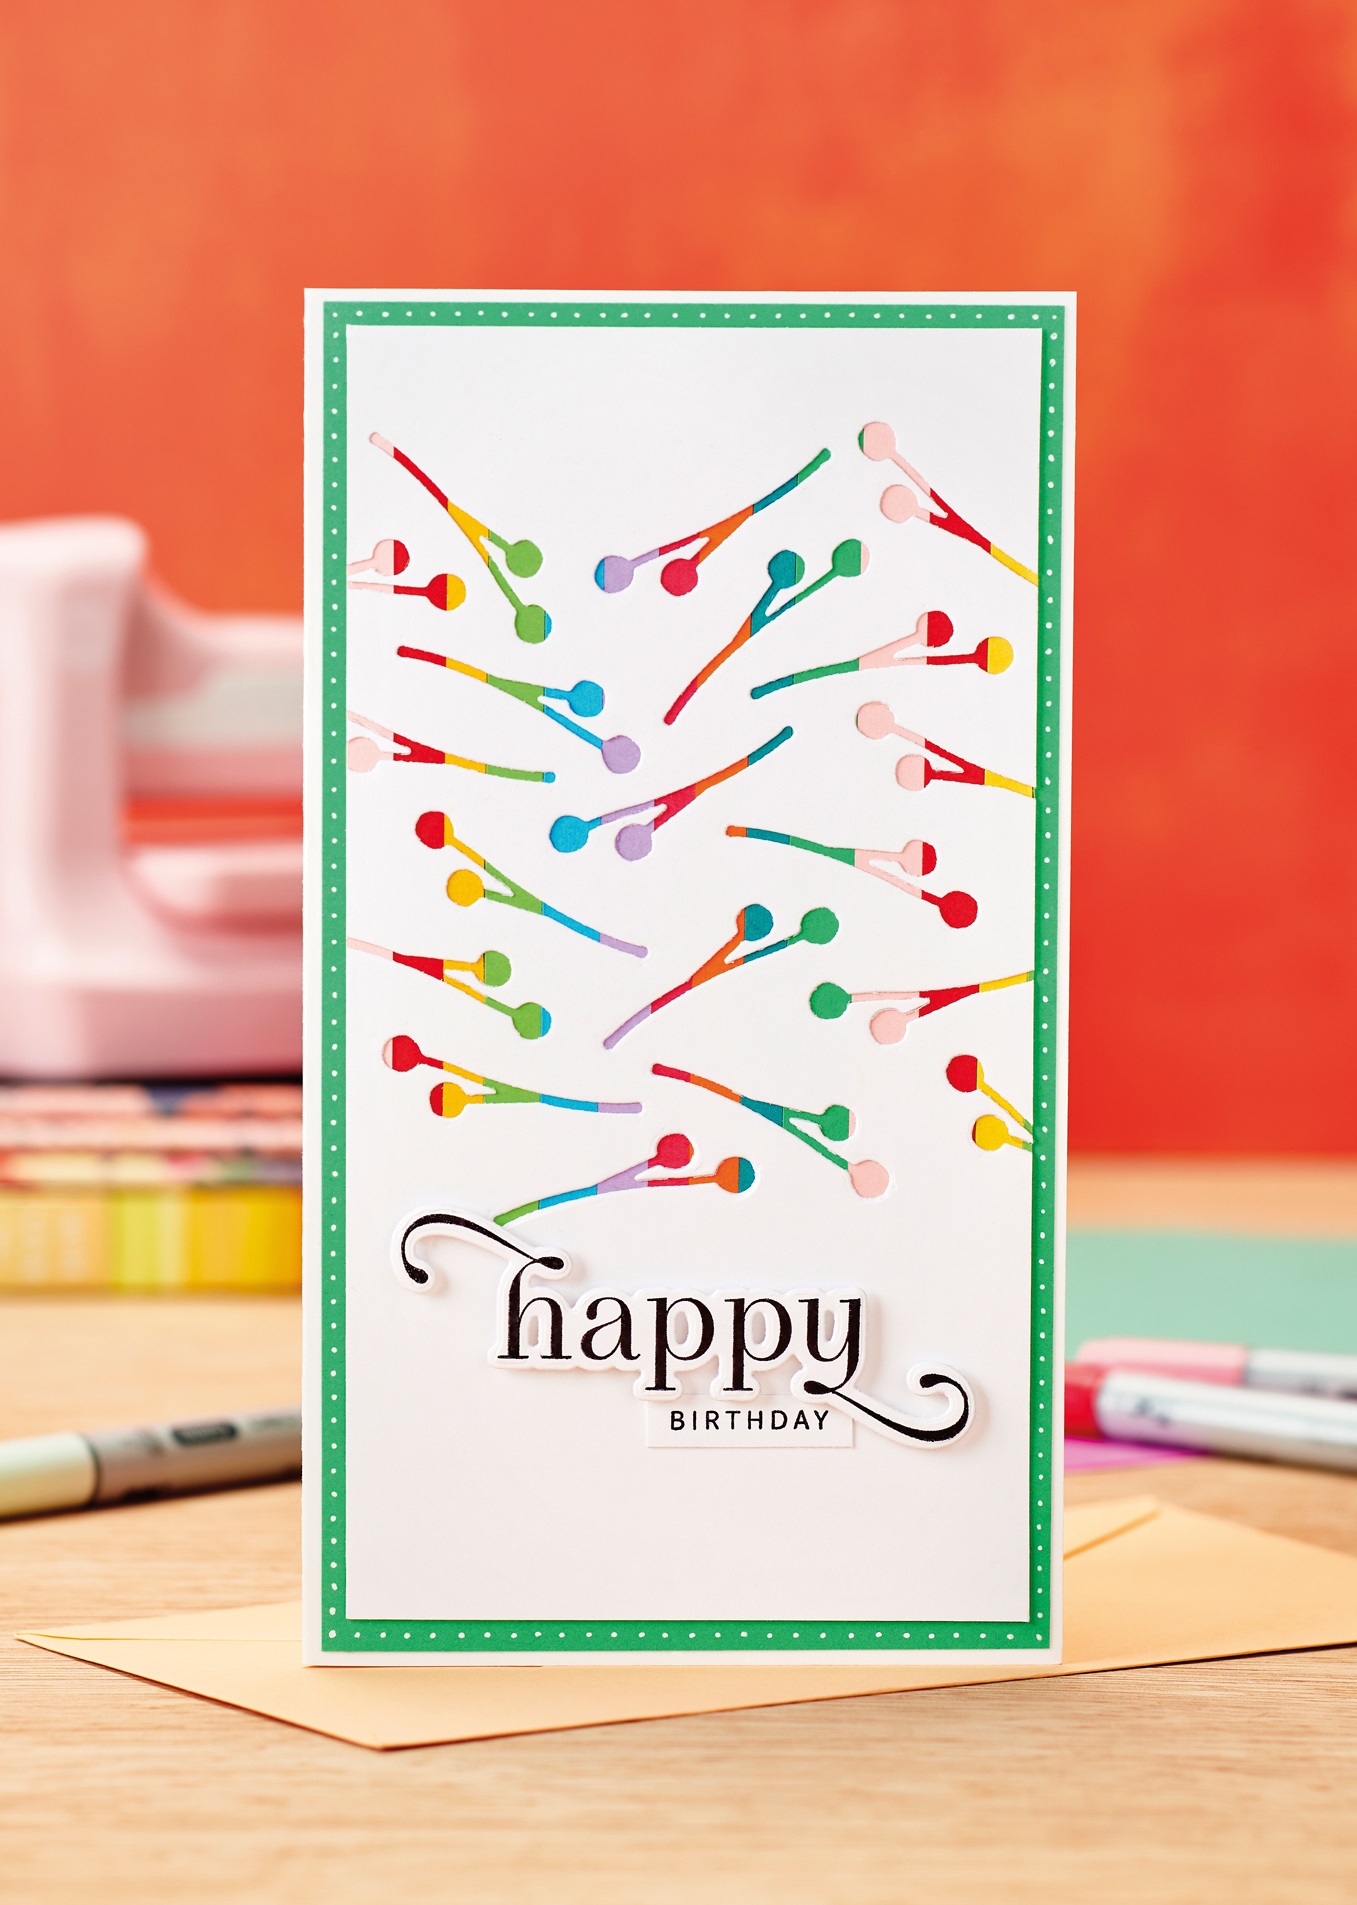
Happy Birthday Card
1. Matt the front of a white 11.5cm x 20.5cm blank with green card. Snip white cardstock slightly smaller than the green, then die cut flower buds from it in a random arrangement.
2. Adhere strips of coloured card to the reverse of the die-cut panel. Stamp and die cut a sentiment, then fix towards the bottom using 3D foam pads. Adhere the panel to the card front, then embellish the green border with white gel pen dots.
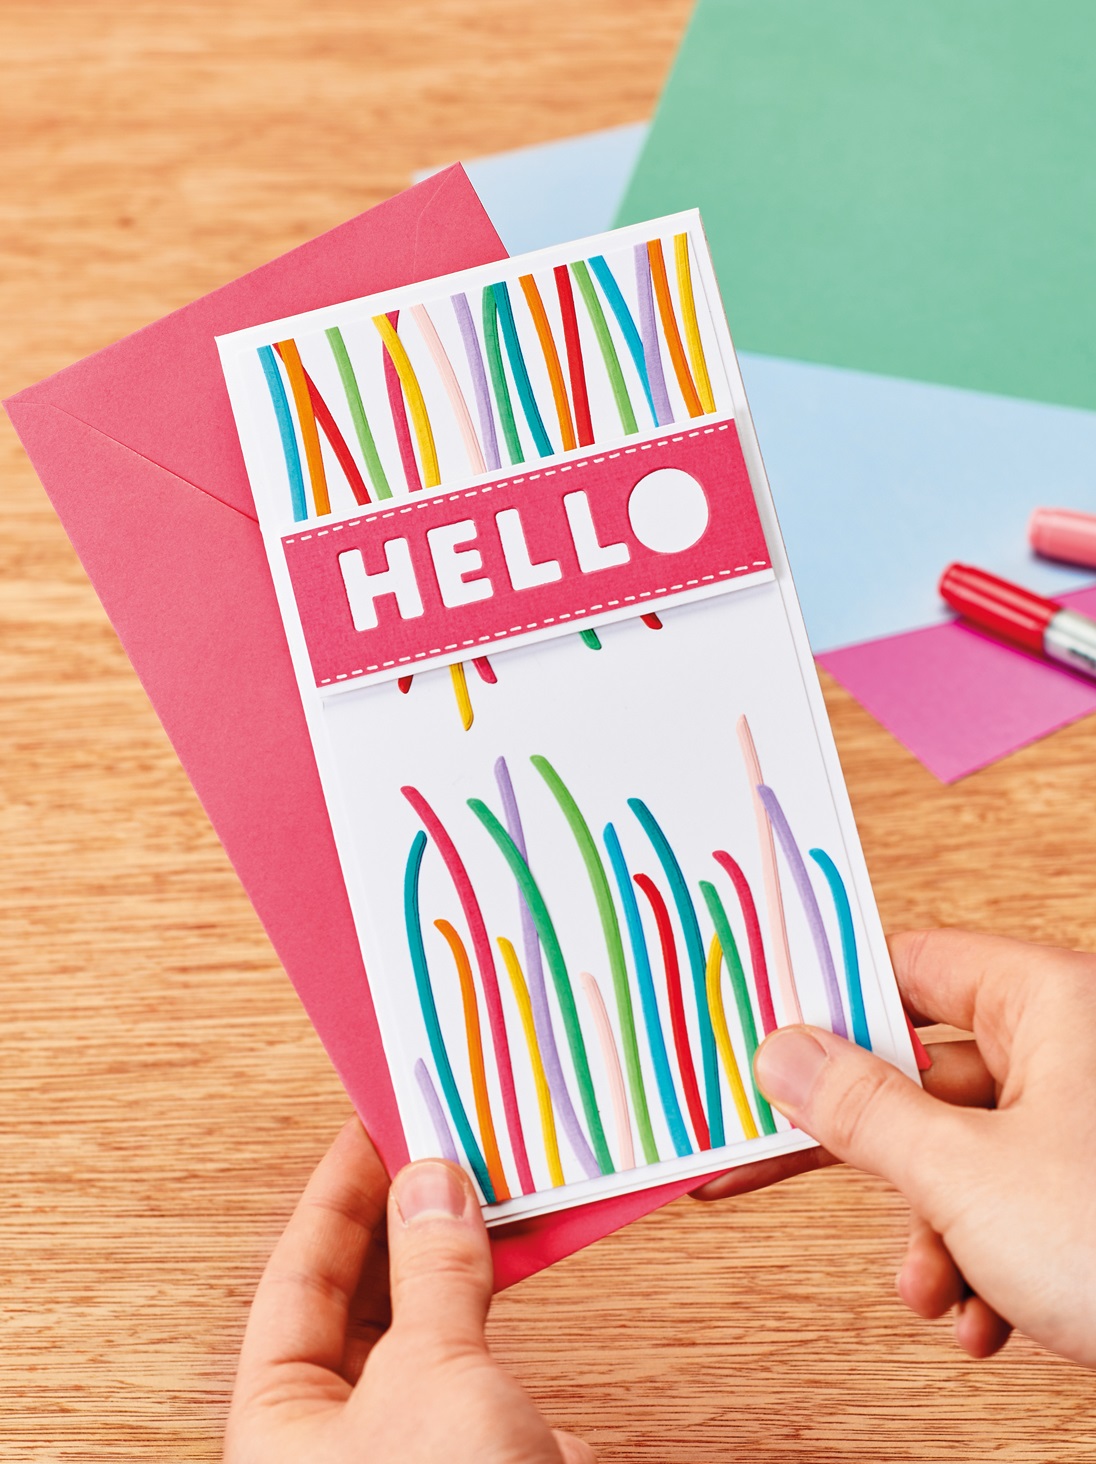
Hello Slimline Card
1. Make a 10.5cm x 20cm white blank, then trim white card slightly smaller. Die cut lots of flower stems from a range of colours. Fix to the top and bottom of the panel at varying heights, overlapping occasionally, then trim the excess.
2. Die cut a sentiment from a pink cardstock strip, then layer the negative die-cut onto white and attach to the panel using 3D foam pads. Fix to the blank with 3D foam pads. Finish by drawing white gel pen dashes above and below the sentiment.
TOP TIP
Save the letters from your die-cut sentiment to make our landscape ‘Hello’ card

Colourful Hello Card
1. Take a top-folding 12cm x 15.5cm white blank and snip white card slightly smaller. Trim thin cardstock strips of various colours and adhere to the white panel in a mirrored pattern, leaving a gap in the middle.
2. Glue leftover die-cut letters to white card, then trim and add white gel pen dots. Die cut multiple floral layers from Dura-Lar film or vellum, then fix to the reverse of the sentiment strip. Attach to the panel with 3D foam pads and secure to the blank.
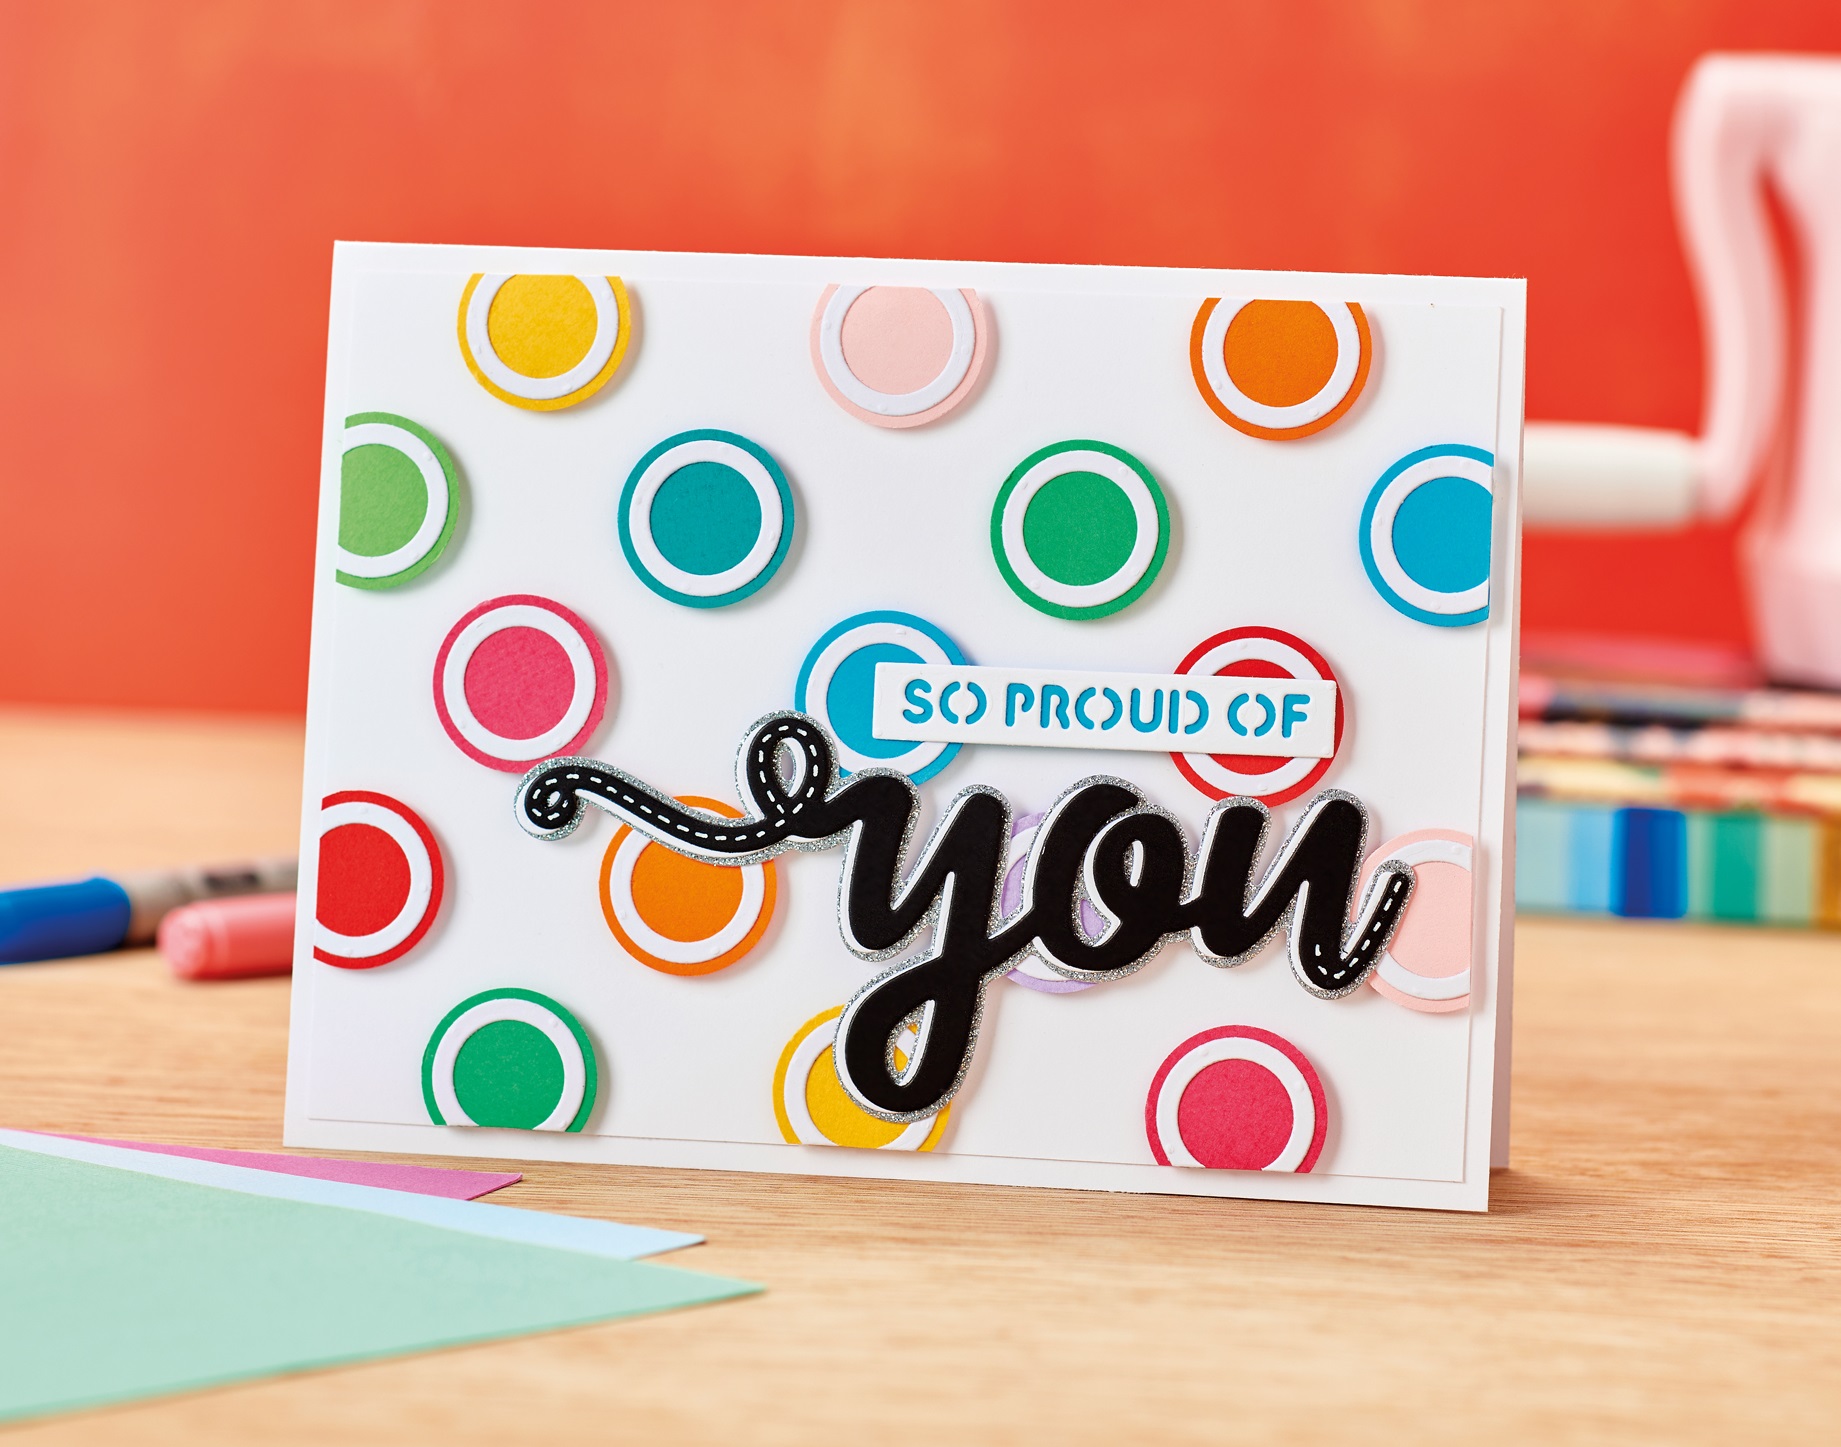
Proud Of You Card
1. Create a 13cm x 17cm top-folding white blank and snip white card slightly smaller. Die cut several white rings, then make coloured circles a little larger using a circle die or
punch. Fix the rings to the coloured circles and attach to the white panel with 3D foam pads. Trim any overhanging circles so they’re flush with the edges.
2. Die cut ‘You’ from black, white and silver glitter cardstock, using the silver glitter for the larger outline piece. Adhere the black and white sentiments together, slightly offset, then fix to the silver glitter. Die cut ‘So proud of’ from white card and trim. Secure turquoise card behind.
3. Glue the circles panel to the blank, then attach the two sentiments on top. Add a 3D foam pad to the areas of the sentiment with no circle behind. Finish with white gel pen dashes on the black part of the sentiment.
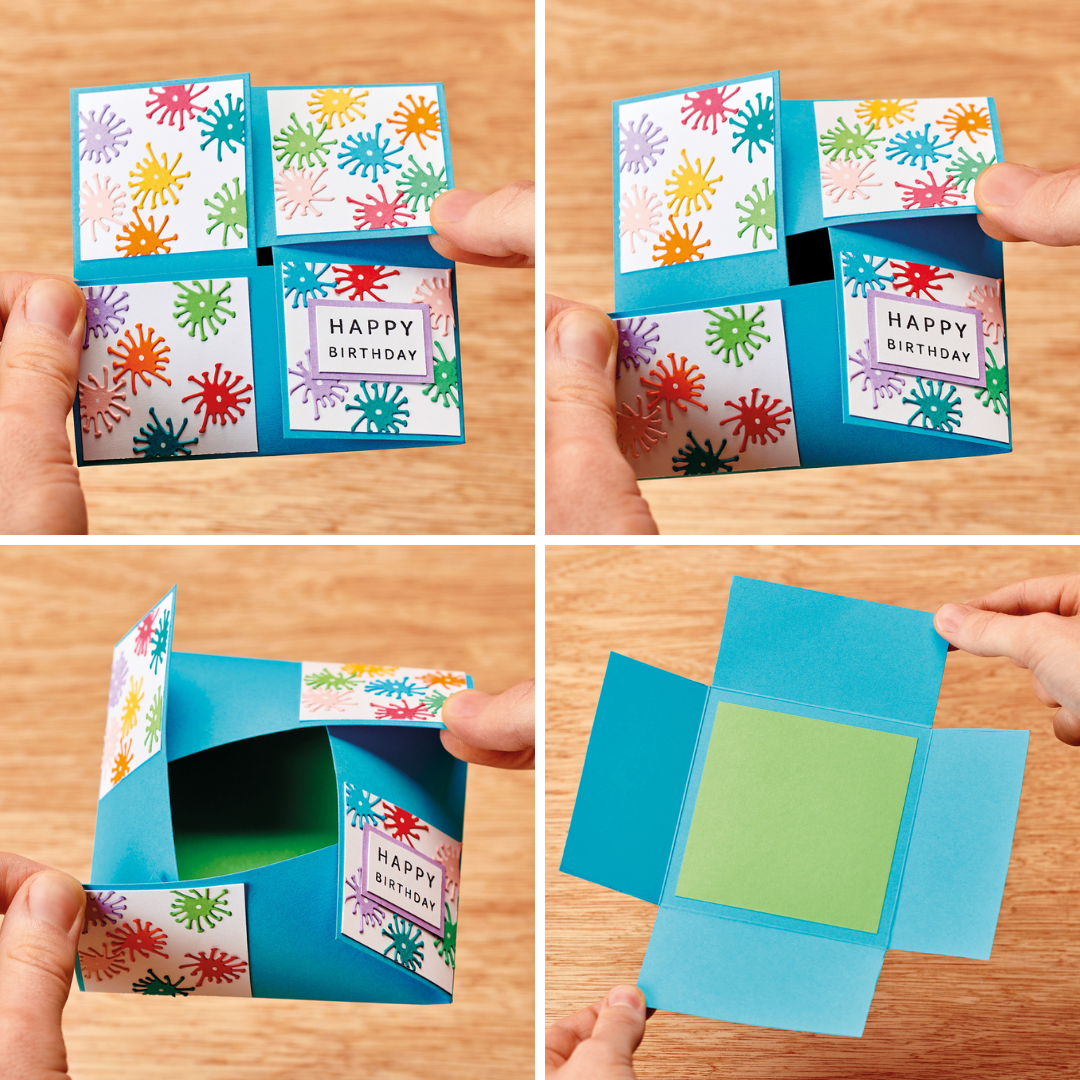
Four-Fold Card
1 Trim blue card to 20cm square, then score a line 5cm in from each edge. Snip away each corner square. Fold the flaps inwards, as if folding a box top so that each flap is secured under another.
2. Cut four 4.5cm square white panels. Take a flower centre die from one of the layering sets and cut in several different colours. Adhere onto the white squares in a random pattern, then snip off the excess. Glue each square to one of the flap areas still showing after being folded. Stamp a sentiment in black ink onto white card. Trim and layer onto lilac, then
fix to the greeting.

You will need:
Templates or SVG files
Stencil, Inkylicious Sunbeam 6”
Ink pad, Ranger Distress Oxide Salvaged Patina
Cardstock, various colours
Gems, clear
Faber Castell Polychromos coloured pencils
Pens: shimmer pen, black fineliner, white gel pen
Hampton Art Action…
Card making How to Papercraft Papercrafter Techniques Projects

YOU WILL NEED:
Craft essentials
FREE PaperCrafter patterned papers
Dies: circle, scalloped circle
METHOD
1 Create a 13cm x 17cm white blank then cover the front with orange card. Cut tennis racket paper, 12cm…
Card making Decoupage Die cutting How to Papercraft Papercrafter Card Making

You will need:
Templates
Coloured paper or thin cardstock, various colours
Wooden skewers or thin garden canes
Tools: scoring board, scoring tool, clips, small hole punch
Glue
Concertina Fold & Bind Method
1. Take a sheet of landscape…
Home decor Home decorations How to Papercraft Papercrafter Techniques Video tutorial Projects Make it Today

Stencils: Altenew Doily Frame, Watercolor Bouquet; My Favorite Things Basic Shapes Triangles
Stamps: Avery Elle Simple Sentiments, Simply Said Hugs
Die, Altenew Mega You
Ink pads: Ranger Distress…
Card making Die cutting How to Papercraft Papercrafter Techniques Card Making Die cutting Projects


