


Birthday crafting Card making Die cutting How to Mother’s Day cards Mother’s Day crafts Papercraft Papercrafter Techniques Card Making
*ADVERTORIAL*
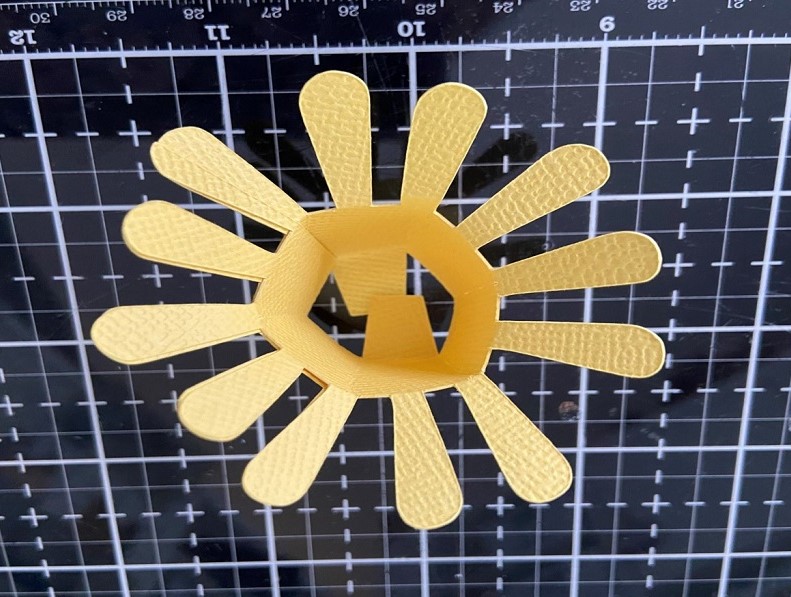
What better way to celebrate the first signs of spring than with Sharon Nettleship’s statement pop-up greeting using the Silhouette Cameo 4? Easy to post, this interactive design would make for a lovely surprise to send to someone special – it’ll certainly make them smile as they open the card. Simply cut out the required elements and assemble… job’s a good’un! Want to customise it? Tailor the colour scheme by cutting the floral layers from your chosen cardstock.
YOU WILL NEED:
Silhouette Cameo 4
Digital images: Lori Whitlock 5×7 Pop Up Flower Card #326447
Cardstock, various colours
Adhesives: glue, double-sided tape
METHOD:
1. Add the required digital images onto the design page on your Silhouette Cameo 4. Group the same file colours together and bring each group into the cutting space. Fold a yellow blank in half, then cut out all of the pieces.
2. Take the two main flowers and leave the rest to one side. Valley fold along the dotted lines, then bring the open sides together and glue. Alternatively, just press together if you’re using the Silhouette adhesive card. Fold the lines again and bring the two sides together. Fold into a circle, then glue to secure. Gently bend the petals backwards.
3. Take the biggest flower, fold in half and adhere the tab to one side of the blank in the centre using double-sided tape. Secure the tape to the other tab and close the greeting to create the first pop-up layer. Repeat with the remaining three flowers.
4. Close and open your card to make sure everything has stuck well. Arrange extra leaves and smaller flowers around the centrepiece. Cut out the two card front panels from yellow and white. Tuck the background panel into the decorative corners, then glue to the front of the greeting to finish.
.jpg)

Get your hands on the Silhouette Cameo 4 and much more at graphtecgb.shop

You will need:
Templates or SVG files
Stencil, Inkylicious Sunbeam 6”
Ink pad, Ranger Distress Oxide Salvaged Patina
Cardstock, various colours
Gems, clear
Faber Castell Polychromos coloured pencils
Pens: shimmer pen, black fineliner, white gel pen
Hampton Art Action…
Card making How to Papercraft Papercrafter Techniques Projects

YOU WILL NEED:
Craft essentials
FREE PaperCrafter patterned papers
Dies: circle, scalloped circle
METHOD
1 Create a 13cm x 17cm white blank then cover the front with orange card. Cut tennis racket paper, 12cm…
Card making Decoupage Die cutting How to Papercraft Papercrafter Card Making

You will need:
Templates
Coloured paper or thin cardstock, various colours
Wooden skewers or thin garden canes
Tools: scoring board, scoring tool, clips, small hole punch
Glue
Concertina Fold & Bind Method
1. Take a sheet of landscape…
Home decor Home decorations How to Papercraft Papercrafter Techniques Video tutorial Projects Make it Today

Stencils: Altenew Doily Frame, Watercolor Bouquet; My Favorite Things Basic Shapes Triangles
Stamps: Avery Elle Simple Sentiments, Simply Said Hugs
Die, Altenew Mega You
Ink pads: Ranger Distress…
Card making Die cutting How to Papercraft Papercrafter Techniques Card Making Die cutting Projects


