


Christmas crafts Home decor Home decorations How to Papercraft Papercrafter Techniques Projects
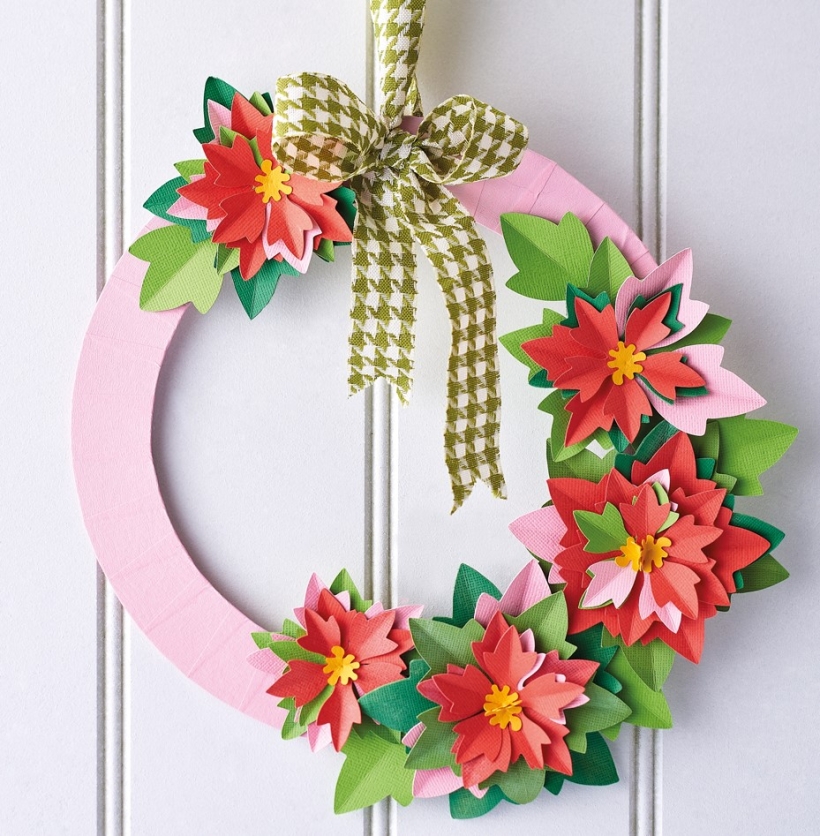
This poinsettia wreath is guaranteed to take your Christmas crafts to a new level. Utilising a simple cereal box as her wreath base, Corinne Bradd has fashioned something truly special with her colourful poinsettia wreath. It’s super-easy to make too, thanks to Corinne’s downloadable templates - they do most of the work for you! If you have a digital cutting machine such as the Brother ScanNCut, then it’s even simpler with our poinsettia SVG files. The perfect finishing touch? On-trend gingham ribbon, of course.
Please login to download. Sign in here
YOU WILL NEED:
Templates or poinsettia SVG files
Brother ScanNCut SDX1200
Cardstock: greens, coral, pale pink, yellow
Wide tape, coloured
Wide ribbon, gingham
Thin card or cereal box
Ball-ended tool
Adhesives: PVA glue, glue dots
METHOD:
Poinsettia Flowers
1. Scan the poinsettia templates into the ScanNCut following the manufacturer’s instructions. To save any wastage, resize, rotate and flip the individual shapes to fit as many into a 6” square on the layout screen. Cut larger flower shapes in different shades, the smaller motifs from coral and pale pink, then the centres for the poinsettias in yellow.
2. Flip each shape over to the smooth side, then use a ball-ended tool to score from the centre out to the tip of each petal. Turn over and crease along the score line to add dimension to each flower. Stack the shapes up, arranging so the petals are staggered, then glue together.
3. Tuck some single petals in at random in other colours. Use a ball-ended tool to press against the flower centres in the palm of your hand to bring the edges up, then secure with a dab of PVA glue in the middle of each poinsettia.
Wreath
1. On thin card or a cereal box, mark out two concentric circles, 15cm and 20cm, two or three times. Cut out the circular frames, then glue together to make a stiff wreath base. Cover the ring with a wide coloured tape, ribbon or strips of paper, folding the ends to the back and overlapping on the slant to cover the whole wreath base.
2. Fix several poinsettias to the bottom-right of the ring using glue dots. Tie a length of wide gingham ribbon around the top of the wreath to make a hanging loop and bow. To keep the wreath level when it’s hanging, fix a 2p coin on the reverse of the wreath on the left, opposite the poinsettia cluster. You may need to experiment to get the positioning right. Add another smaller flower to the left of the ribbon and tuck individual green leaf shapes between each poinsettia.

You will need:
Templates or SVG files
Stencil, Inkylicious Sunbeam 6”
Ink pad, Ranger Distress Oxide Salvaged Patina
Cardstock, various colours
Gems, clear
Faber Castell Polychromos coloured pencils
Pens: shimmer pen, black fineliner, white gel pen
Hampton Art Action…
Card making How to Papercraft Papercrafter Techniques Projects

YOU WILL NEED:
Craft essentials
FREE PaperCrafter patterned papers
Dies: circle, scalloped circle
METHOD
1 Create a 13cm x 17cm white blank then cover the front with orange card. Cut tennis racket paper, 12cm…
Card making Decoupage Die cutting How to Papercraft Papercrafter Card Making

You will need:
Templates
Coloured paper or thin cardstock, various colours
Wooden skewers or thin garden canes
Tools: scoring board, scoring tool, clips, small hole punch
Glue
Concertina Fold & Bind Method
1. Take a sheet of landscape…
Home decor Home decorations How to Papercraft Papercrafter Techniques Video tutorial Projects Make it Today

Stencils: Altenew Doily Frame, Watercolor Bouquet; My Favorite Things Basic Shapes Triangles
Stamps: Avery Elle Simple Sentiments, Simply Said Hugs
Die, Altenew Mega You
Ink pads: Ranger Distress…
Card making Die cutting How to Papercraft Papercrafter Techniques Card Making Die cutting Projects


