


Die cutting Home decor Home decorations How to Papercraft Papercrafter Techniques Projects
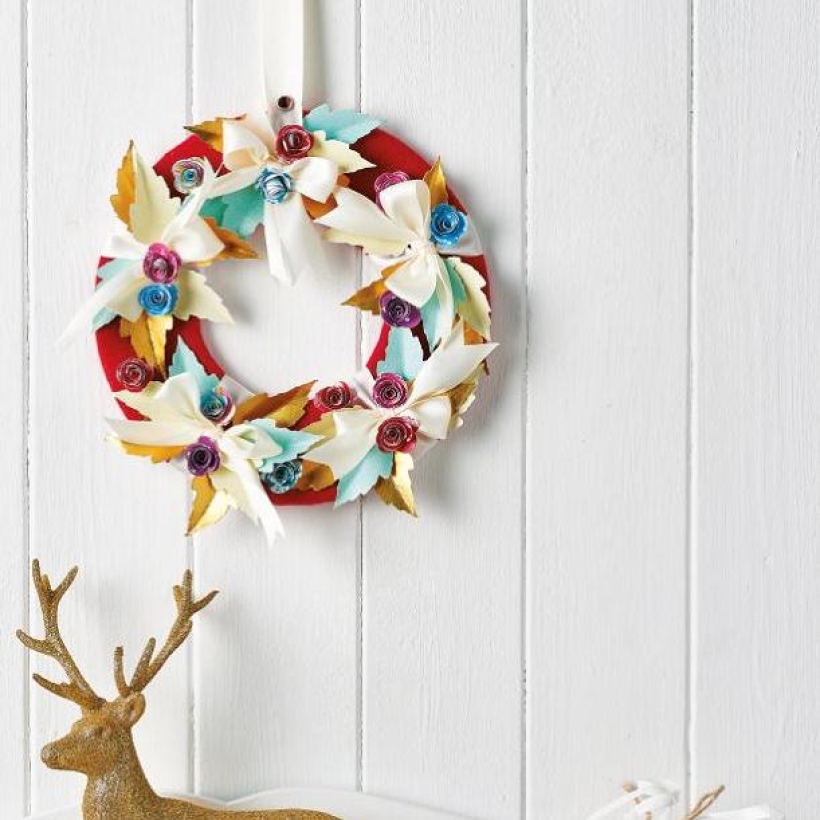
Make an entrance year after year with Corinne Bradd’s thrifty winter display.
Fancy adding some frill to your front door this season? You’re on the right page! If you’ve just enjoyed our guide to wreath making from the comfort of your craft room, then you’re no doubt itching to give it a go. As always, Corinne Bradd has delved into her stash to see what she can save and transform into something magical. Using small flower dies, glitter card and ribbon offcuts, we adore her stash-busting solutions.
Please login to download. Sign in here
Dies, First Edition Layered Flowers
Cardstock: glitter, patterned, mirri
Embellishments: ribbon, brad
Felt, red
Compass
Tool, quilling
Adhesives: double-sided tape; Glue Dots
Die-cutting machine
1. Use a compass and pencil to draw concentric circles of 10cm and 20cm diameter onto scrap card, then cut out. Layer the card up to make a sturdy base ring. Snip red felt, 25cm square, and glue the card ring to the centre. Clip the outer edges of the felt into a wide fringe.
2. Fold the fringe over the edge of the ring and secure with double-sided tape. Clip out the centre of the felt and repeat to fully cover the wreath. Cut ribbon, 60cm, and tie through the ring with a neat reef knot. Position so that the knot is on the inside of the ring, then secure the ribbon loop with a decorative brad.
3. Thread more ribbon around the front of the loop and tie into a neat bow, trimming the ends into a ‘v’ shape. Wrap and tie four more pieces of ribbon equally around the wreath and make bows. Trim several leaf shapes from gold mirri card and two shades of glitter card.
4. Crease each one down the centre and fix to the wreath with Glue Dots, radiating out from the ribbon bows. Die cut flowers from a selection of thin patterned card. 5 Create the bloom by curling the shape around a quilling tool, starting from the outside of the rose and securing the coils with a Glue Dot on the base. Scatter the roses around the wreath and fix them in place.

You will need:
Templates or SVG files
Stencil, Inkylicious Sunbeam 6”
Ink pad, Ranger Distress Oxide Salvaged Patina
Cardstock, various colours
Gems, clear
Faber Castell Polychromos coloured pencils
Pens: shimmer pen, black fineliner, white gel pen
Hampton Art Action…
Card making How to Papercraft Papercrafter Techniques Projects

YOU WILL NEED:
Craft essentials
FREE PaperCrafter patterned papers
Dies: circle, scalloped circle
METHOD
1 Create a 13cm x 17cm white blank then cover the front with orange card. Cut tennis racket paper, 12cm…
Card making Decoupage Die cutting How to Papercraft Papercrafter Card Making

You will need:
Templates
Coloured paper or thin cardstock, various colours
Wooden skewers or thin garden canes
Tools: scoring board, scoring tool, clips, small hole punch
Glue
Concertina Fold & Bind Method
1. Take a sheet of landscape…
Home decor Home decorations How to Papercraft Papercrafter Techniques Video tutorial Projects Make it Today

Stencils: Altenew Doily Frame, Watercolor Bouquet; My Favorite Things Basic Shapes Triangles
Stamps: Avery Elle Simple Sentiments, Simply Said Hugs
Die, Altenew Mega You
Ink pads: Ranger Distress…
Card making Die cutting How to Papercraft Papercrafter Techniques Card Making Die cutting Projects


