


Decoupage Home decor Home decorations How to Decoupage Projects
Utilise the power of decoupage to add a handmade look to your home décor
With the amount of extra time on our hands, it’s as good a time as ever to get our craft on. And while we’ll argue until we’re blue in the face (sometimes quite literally – pesky paint!) that you can’t have too many card projects, we believe time spent learning new avenues of crafting is time well spent. That’s certainly the case with these upcycled gems, which are brilliant opportunities to kit out your interiors for mere pittance. And don’t worry, we’ve snuck a traditional greeting in there too. We couldn’t resist.
Napkins: flamingos, butterflies
Acrylic paints, various colours
Cardstock, various colours
Brushes: decoupage; paint
Wooden pot
Wooden tray
Punch, hole
Ribbon
Sandpaper, fine
Acetate
Adhesives: 3D foam pads, double-sided tape, decoupage glue
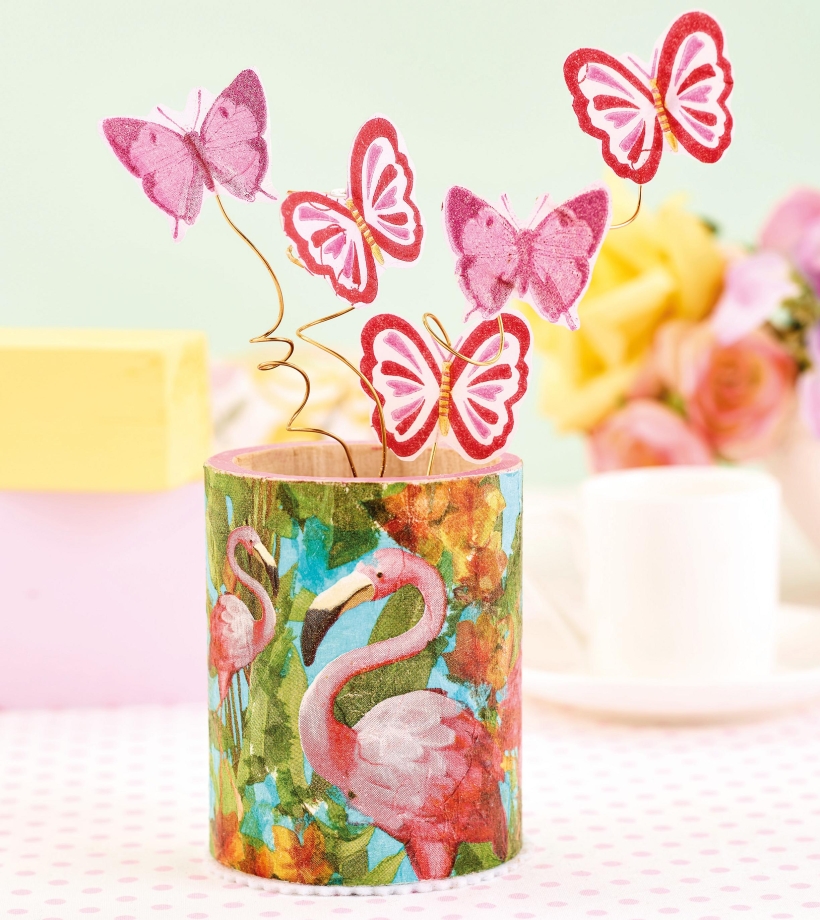
1. Paint the outside of a wooden pot white, then paint the rim pink. Apply another coat of each if necessary. Sand the rim to a distressed texture. Remove the two decorated layers from a flamingo napkin. Carefully tear around both birds on the top layer, leaving a border.
2. Apply a thin, even coat of decoupage glue to a section of the pot, avoiding the rim. Place a piece of napkin onto the sticky area and gently smooth down with a glue-coated brush. Repeat all around the pot.
3. Use torn napkin pieces to fill the gaps. Leave to dry, then apply glue to the bottom edge of the pot. Take the excess napkins over the edge and smooth down on the base. Use a sharp knife to trim around the top edge. Seal with a few coats of decoupage glue.
4. Trim felt slightly larger than the base and secure in place. Snip butterflies from the top layer of a napkin as before. Apply a thin, even coat of decoupage glue to an acetate sheet. Place the butterflies on top and gently smooth down.
5 Leave to dry, then trim around the shapes. Run wire around a pencil to create a coil shape, then glue the butterflies in place. Leave to dry again, then stand them up in the pot to complete.
1. Apply a base coat of white paint all over a plain wooden tray and leave to dry. Paint the outside of the tray yellow, the inside lime green, the rim turquoise and the inner handles pink. Leave to dry, then distress by lightly rubbing with sandpaper.
2. Carefully tear around the images on a flamingo napkin, then stick them onto the tray with decoupage glue. Fill the gaps with torn pieces of napkin. Allow it to dry, then seal the entire tray with multiple coats of decoupage glue.
Glue a butterfly motif onto acetate, leave to dry, then trim. Adhere onto a white tag with 3D foam pads. Matt onto yellow card cut to the same shape, punch a hole through the top, then tie a ribbon through it.
Trim acetate to 6cm x 15cm. Brush with decoupage glue. Place a layer from a flamingo napkin on top, then smooth down with a glue-soaked brush. Leave to dry. Secure onto a slightly larger piece of white card with double-sided tape. Fix to a pink blank, 7.5cm x 18cm. Run ribbon along the base and add a bow in the middle to finish.

You will need:
Templates or SVG files
Stencil, Inkylicious Sunbeam 6”
Ink pad, Ranger Distress Oxide Salvaged Patina
Cardstock, various colours
Gems, clear
Faber Castell Polychromos coloured pencils
Pens: shimmer pen, black fineliner, white gel pen
Hampton Art Action…
Card making How to Papercraft Papercrafter Techniques Projects

YOU WILL NEED:
Craft essentials
FREE PaperCrafter patterned papers
Dies: circle, scalloped circle
METHOD
1 Create a 13cm x 17cm white blank then cover the front with orange card. Cut tennis racket paper, 12cm…
Card making Decoupage Die cutting How to Papercraft Papercrafter Card Making

You will need:
Templates
Coloured paper or thin cardstock, various colours
Wooden skewers or thin garden canes
Tools: scoring board, scoring tool, clips, small hole punch
Glue
Concertina Fold & Bind Method
1. Take a sheet of landscape…
Home decor Home decorations How to Papercraft Papercrafter Techniques Video tutorial Projects Make it Today

Stencils: Altenew Doily Frame, Watercolor Bouquet; My Favorite Things Basic Shapes Triangles
Stamps: Avery Elle Simple Sentiments, Simply Said Hugs
Die, Altenew Mega You
Ink pads: Ranger Distress…
Card making Die cutting How to Papercraft Papercrafter Techniques Card Making Die cutting Projects


