


We test out the Crafter’s Companion machine
Craft Essentials, Crafter's Companion Gemini and accessories, Collall 3D Glue Gel, Alphabet dies
Crafter’s Companion has just launched an electronic die-cutting and embossing machine called the Gemini – and we couldn’t wait to get our hands on it! It has a sleek design and also boasts a few key differences to other electronic machines on the market. Firstly, it’s faster, lighter and quieter than its predecessors, and uses higher pressure to allow you to cut elaborate designs more easily. This means you can also cut heavyweight cardstock, vinyl, foil and even fabric. We love how this opens up so many new possibilities, especially for crafters who also enjoy sewing and quilting. Another great feature is the facility to pause, resume and reverse – great if you make a mistake. The large platform allows for edge-toedge A4 cutting, allowing you to cut multiple dies at once, while the pause and reverse functions means you won’t waste a whole sheet of paper if something goes wrong. The machine comes with a 16-piece cutting die set, including corner and edge dies as well as a variety of handy shapes, plus three embossing folder designs.
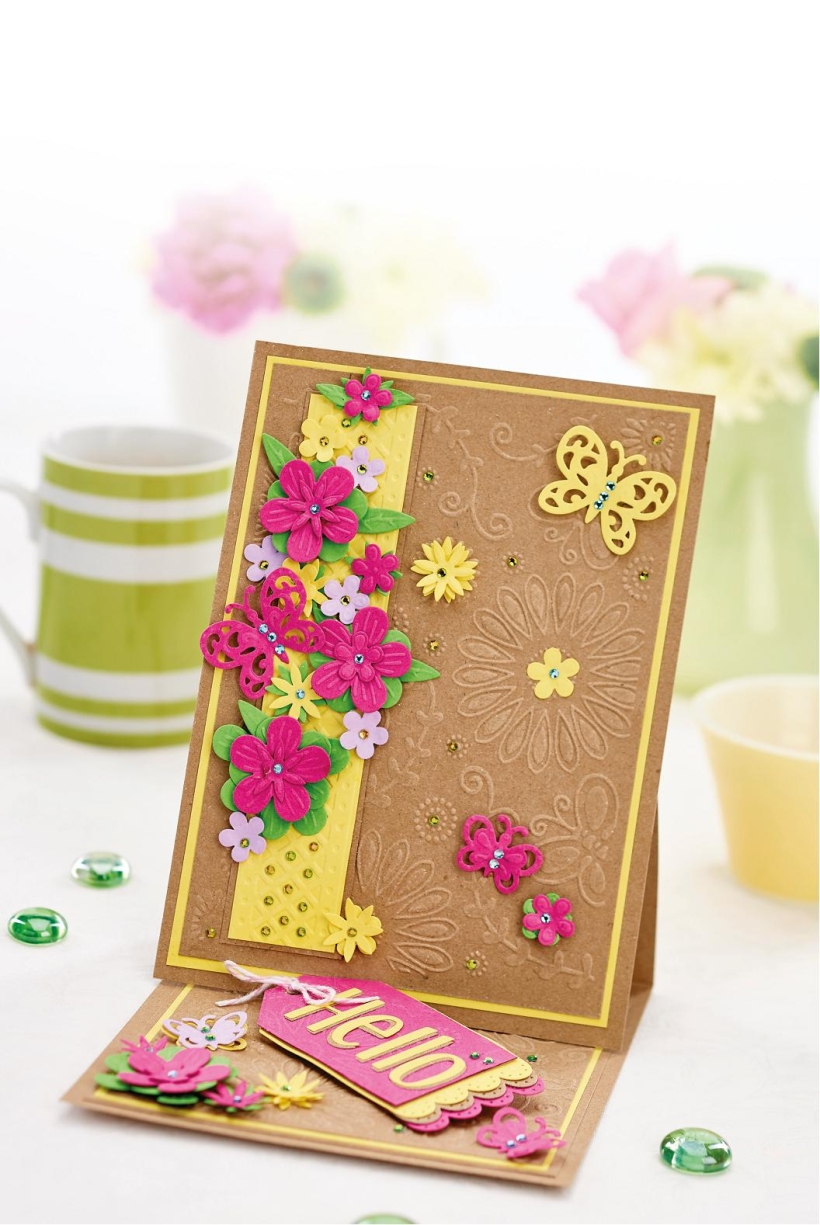
• Trim a portrait sheet of A4 kraft card to 14cm wide. Score and fold two horizontal lines, one at 7.5cm and the other at 15cm.
• Adhere a 14cm x 19cm kraft card panel to the 7.5cm section on the base card. Emboss a floral design onto two pieces of kraft card.
• Trim one to 12.5cm x 17.5cm, layer onto yellow card then fix to the large panel. Cut the second to 12cm x 12.5cm and mount onto yellow. Attach to the base.
• Emboss yellow card with the long narrow embossing folder, trim to 3cm x 16cm and layer onto kraft card. Fix it to the front of the card.
• Cut and emboss a pink card gift tag. Mount it to yellow, brown and pink tag shapes then use 3D glue to adhere it to the base of the card.
• Decorate the card with die-cut embossed flowers and leaves, then add a die-cut 'Hello' sentiment to the tag.

You will need:
Templates or SVG files
Stencil, Inkylicious Sunbeam 6”
Ink pad, Ranger Distress Oxide Salvaged Patina
Cardstock, various colours
Gems, clear
Faber Castell Polychromos coloured pencils
Pens: shimmer pen, black fineliner, white gel pen
Hampton Art Action…
Card making How to Papercraft Papercrafter Techniques Projects

YOU WILL NEED:
Craft essentials
FREE PaperCrafter patterned papers
Dies: circle, scalloped circle
METHOD
1 Create a 13cm x 17cm white blank then cover the front with orange card. Cut tennis racket paper, 12cm…
Card making Decoupage Die cutting How to Papercraft Papercrafter Card Making

You will need:
Templates
Coloured paper or thin cardstock, various colours
Wooden skewers or thin garden canes
Tools: scoring board, scoring tool, clips, small hole punch
Glue
Concertina Fold & Bind Method
1. Take a sheet of landscape…
Home decor Home decorations How to Papercraft Papercrafter Techniques Video tutorial Projects Make it Today

Stencils: Altenew Doily Frame, Watercolor Bouquet; My Favorite Things Basic Shapes Triangles
Stamps: Avery Elle Simple Sentiments, Simply Said Hugs
Die, Altenew Mega You
Ink pads: Ranger Distress…
Card making Die cutting How to Papercraft Papercrafter Techniques Card Making Die cutting Projects


