


Card making Father’s Day cards Card Making
Looking for some last minute Father’s Day card ideas before the big day this Sunday? Relax, we’ve got you sorted! We’ve dug into our archive to bring you three of our favourite designs. Make your dad smile by creating one of the projects below.
Why not pair your home-made Father’s Day card with one of these fun gifts?
If your dad or another male relative has a birthday coming up, he’ll love this cute card design by Kairen Varker from Handy Hippo. Find the step-by-step instructions for this project in issue 63 of PaperCrafter magazine, on sale 12th July!
• Fold and trim a white card blank to 9cm square. Cover the front with spotty patterned paper. Tape ribbon across and down corrugated card 5.5cm square and fix with sticky tabs.
• Glue a heart embellishment in each corner of the card and use a foam pad to fix a sentiment in the centre. Tie ribbon in a knot and glue at the top of the square.
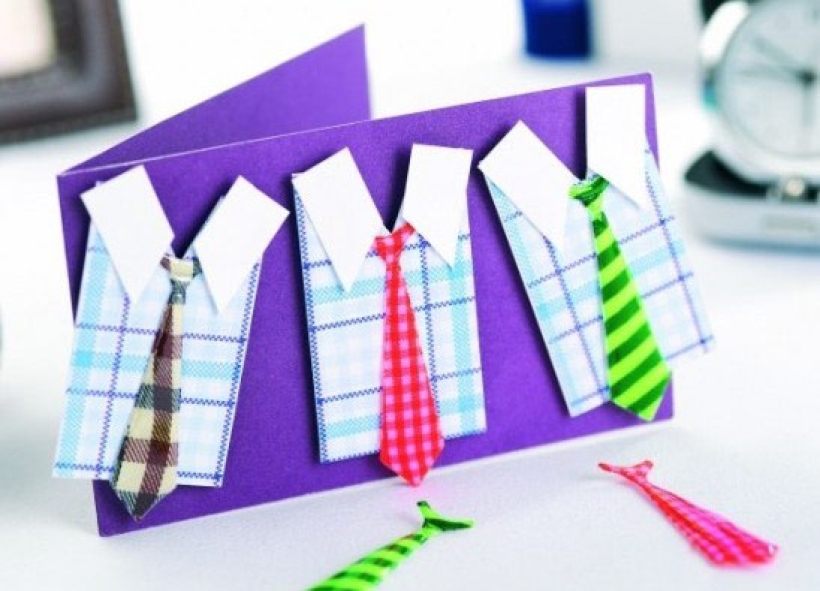
• Trim a card blank to 11.5cm x 8cm. Cut three pieces of scrap card 5.5cm x 3.2cm and cover them with chequered paper. Cut a 'v' shape, 1.5cm deep, from the top, glueing a tie embellishment at the base of each (or make your own!)
• Cut collars from scrap white card and attach in position. Use 3D foam pads to fix a shirt and tie decoration to the centre front of the card blank., then stick the remaining two at an angle on either side.
• Why not make another shirt and tie decoration in the same way and use it as a matching gift tag?
• Draw simple car shape on orange card and cut it out. Use a cutting mat and craft knife to remove the windows. Use dotty paper to decorate the wheels and create lights and a steering wheel. Trim two pieces of white card and glue to the wheels, as shown.
• Secure a length of orange bobble chain to the card. Add a sentiment with 3D foam pads. Take a piece of acetate and trim it to fit behind the windows and secure in place.
• Fold and trim white card to make a greeting that's 12cm x 8cm. Draw a line across, 3.5cm from the bottom, then mark two triangles with 4cm bases in the centre and a half triangle either side. Trim to make the crown shape.
• Cover the bottom 3.5cm of the greeting with orange card. Fix harlequin paper to the top and trim to shape. Stick narrow double-sided tape along the bottom of this and the base of the blank, then add beading. Glue a sentiment in the centre with two stars. Fix more stars to the top of the crown.

You will need:
Templates or SVG files
Stencil, Inkylicious Sunbeam 6”
Ink pad, Ranger Distress Oxide Salvaged Patina
Cardstock, various colours
Gems, clear
Faber Castell Polychromos coloured pencils
Pens: shimmer pen, black fineliner, white gel pen
Hampton Art Action…
Card making How to Papercraft Papercrafter Techniques Projects

YOU WILL NEED:
Craft essentials
FREE PaperCrafter patterned papers
Dies: circle, scalloped circle
METHOD
1 Create a 13cm x 17cm white blank then cover the front with orange card. Cut tennis racket paper, 12cm…
Card making Decoupage Die cutting How to Papercraft Papercrafter Card Making

You will need:
Templates
Coloured paper or thin cardstock, various colours
Wooden skewers or thin garden canes
Tools: scoring board, scoring tool, clips, small hole punch
Glue
Concertina Fold & Bind Method
1. Take a sheet of landscape…
Home decor Home decorations How to Papercraft Papercrafter Techniques Video tutorial Projects Make it Today

Stencils: Altenew Doily Frame, Watercolor Bouquet; My Favorite Things Basic Shapes Triangles
Stamps: Avery Elle Simple Sentiments, Simply Said Hugs
Die, Altenew Mega You
Ink pads: Ranger Distress…
Card making Die cutting How to Papercraft Papercrafter Techniques Card Making Die cutting Projects


