


Christmas crafts Home decorations Papercrafter Techniques
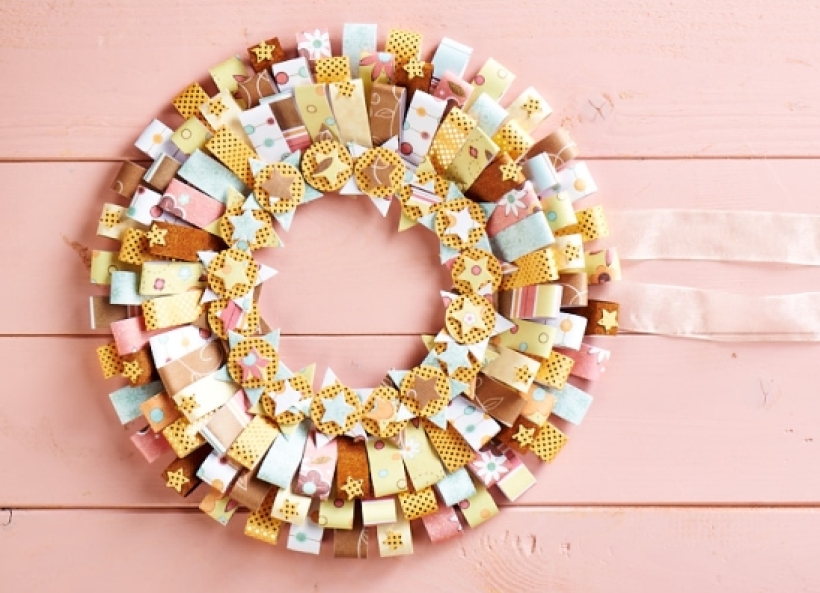
Issue 65 of PaperCrafter was our Christmas extravaganza, which included a fantastic wreath that our in-house Corinne Bradd devised to see in the season. It’s the perfect project for using up odd scraps of papers or alternatively, showing off your favourite ones!
Cardboard, Gold card, Patterned papers, Star punch or die, Circle punch, Stapler, Foam pads
We had such a fabulous response to this project, so we’ve put it online for those who might have missed it. Don’t forget to share your makes with us over on our Facebook page, where you can enter our monthly #CraftChallenge. You can win one of our famous goodie bags!
Why not check out our Pinterest board to see other pretty makes from issue 65?
• Cut a 20cm circle from cardboard and gold card and use a craft knife to cut 12cm circles from the middle of each. Glue together
• Cut several strips of patterned paper, 1.5cm by 10cm. Bend into loops and glue
• Staple a row of loops around the outside of the ring
• Fix a second ring of loops inside the first, spacing them between the first ring
• Add a final row of loops in the same way to completely cover the base ring
• Use punches or a die-cutting machine to cut two sizes of stars and circles from leftover paper
• Layer the stars and circles together with foam pads to create 3D motifs
• Place the star motifs around the inside of the ring using stacks of foam pads
• Punch tiny stars from leftover gold card and glue to a few of the loops around the ring

You will need:
Templates or SVG files
Stencil, Inkylicious Sunbeam 6”
Ink pad, Ranger Distress Oxide Salvaged Patina
Cardstock, various colours
Gems, clear
Faber Castell Polychromos coloured pencils
Pens: shimmer pen, black fineliner, white gel pen
Hampton Art Action…
Card making How to Papercraft Papercrafter Techniques Projects

YOU WILL NEED:
Craft essentials
FREE PaperCrafter patterned papers
Dies: circle, scalloped circle
METHOD
1 Create a 13cm x 17cm white blank then cover the front with orange card. Cut tennis racket paper, 12cm…
Card making Decoupage Die cutting How to Papercraft Papercrafter Card Making

You will need:
Templates
Coloured paper or thin cardstock, various colours
Wooden skewers or thin garden canes
Tools: scoring board, scoring tool, clips, small hole punch
Glue
Concertina Fold & Bind Method
1. Take a sheet of landscape…
Home decor Home decorations How to Papercraft Papercrafter Techniques Video tutorial Projects Make it Today

Stencils: Altenew Doily Frame, Watercolor Bouquet; My Favorite Things Basic Shapes Triangles
Stamps: Avery Elle Simple Sentiments, Simply Said Hugs
Die, Altenew Mega You
Ink pads: Ranger Distress…
Card making Die cutting How to Papercraft Papercrafter Techniques Card Making Die cutting Projects


