


Card making How to Papercraft Stamping Techniques Digi Stamps
Expect sentiments and seasonal icons aplenty in your autumnal printable pack
Please login to download. Sign in here
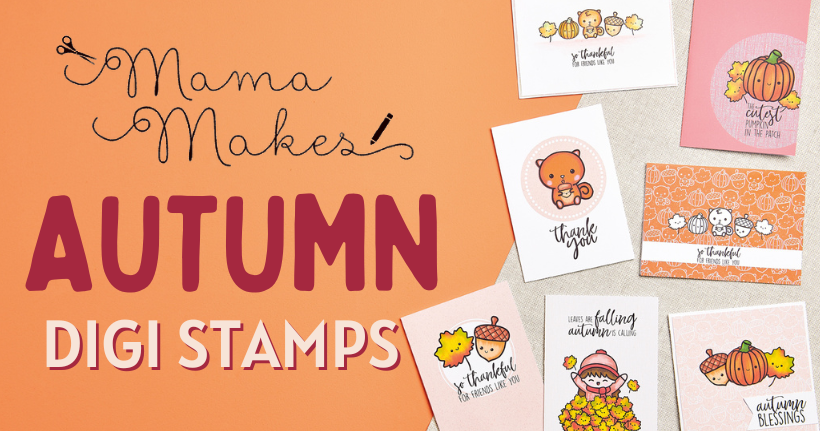
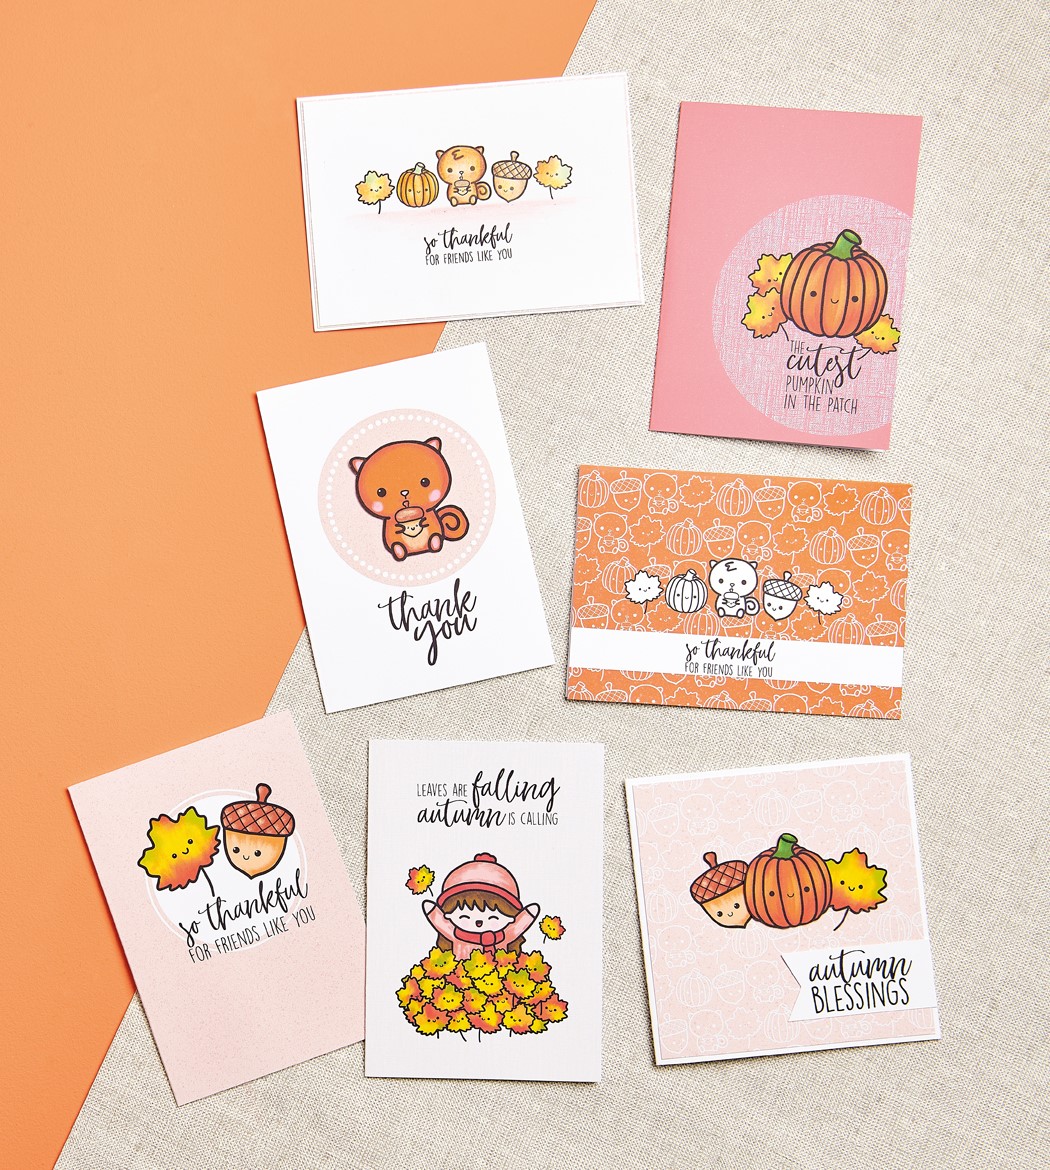
We’re thrilled to have partnered up with Mama Makes again to bring you 11 digi stamps for autumn, including cute motifs and sentiments. Packed with character, we can’t get over how sweet the little facial details are. If you need some inspiration, Ingrid Vichova shows us how it’s done opposite with her digitally-made cards, and we break down the techniques so you can copy and craft with confidence.
Download and print them
1 Press ‘Click here to download now’ then log in – or register if you don’t currently have an account with us.
2 Click ‘Download now’ and you’ll see the download processing at the bottom of your screen.
3 Open the folder, then right-click on the file and select ‘Print’.
Spotlight circles
Ingrid has cleverly considered the layout of her designs to create effective focal points on her cards. Framing the digi stamps inside a circular device really helps to draw the eye. You can either cluster the motifs and sentiments together or separate them – your choice! Copy Ingrid’s designs and have the circle coming from the bottom-right corner, keep it in the centre or overlap the edge of the circle with your digi stamps for a fuller look.
Colour code
To colour or not to colour, that is the question. Ingrid has used pencils to fill in her digi stamps for soft and diffused results, but you’ll notice that she has left the motifs blank on one of her cards. The rule? If you have a busy, coloured background, it’s best to leave the motifs as they are. That way, they’ll stand out so much more. Because they come with a black outline and facial features already, they really do speak for themselves.
Quick crafts
If you’re tight on time or aren’t completely confident with a computer, fear not as you can download Ingrid’s pre-made card designs – result! Ready-to-print and pre-coloured, simply choose from a range of patterned backgrounds and layouts. Customise the design further to make it your own or print onto a blank, write your message and send to your recipient for a quick and easy greeting.
YOU WILL NEED:
Mama Makes Autumn digi stamps
Image editing software (Procreate or Adobe Photoshop)
Fabre-Castell Aquarelle colour pencils
Cardstock, white
Printer
Glue
Pumpkin Patch
1. Download the digi stamps and open in Procreate (or a software of your choice) in an A4 size canvas at 300 DPI. Remove the white backgrounds from the images so you’re left with the black outlines. Use the guides to separate the A4 canvas into quarters which will allow you to create two 10.5cm x 15cm cards.
2. Create a selection in the top-right quarter and fill it in with pink. Create another selection using the ellipse tool on the right-hand side of the pink rectangle and fill or draw a linen textured pattern in white. Arrange the pumpkin, leaves and sentiment into a cluster within the circle. Print and colour in the motifs.
Falling Leaves
Repeat the same process as with the previous card to prepare your A4 size canvas and digi stamps. Create a selection in the bottom-right quarter and fill it with a linen textured pattern in a soft beige colour. Add the little girl in leaves motif and sentiment, then print. Colour in the images.
Autumnal Duo
1. Repeat the same process as with the previous card to prepare your A4 size canvas and digi stamps. Create a selection in the top-right corner of the canvas and fill it in with a soft beige colour. Select a slightly darker shade of the same colour and a speckle pen to create texture all over the background. Reduce the opacity if necessary.
2. Select a white colour and a monoline pen, then draw a circle in the centre of the rectangle and fill it with white. Draw another circle around it and align both. Selecting both, move the circular element towards the top of the rectangle. Arrange the motifs with the sentiment on top of the circle. Print, then colour in the digi stamps.
Autumnal Background
1. Open an A4 size canvas, prepare your images and arrange them into a row. Copy and paste the row until your entire page is filled. Change the colour of the images, then add colour and a speckled texture to the background. Make a selection in A6 size.
2. Copy and paste it into a new A4 size canvas in a landscape orientation using the guides as before to help you line up the rectangle to create the card front. Draw a white strip across using the rectangle shape tool and fill it with white. Place the sentiment on top of the strip. Arrange the images, fill them in with white, then print.
Topper Trio
1. Open your A4 canvas, create a 13cm square and fill it with any colour (this is only a guide to help you scale the images). Remove the backgrounds from the mofits and insert. Colour them in. Temporarily place them onto the square and scale them down. Space them out on the same A4 canvas ready for printing.
2. Remove the temporary square layer. You can now change the colour of your previously made pattern to light pink, then print. Print out the images, trim and snip the patterned paper to 12cm square, then layer onto a white 13cm square blank. Add the motifs and a sentiment banner onto the card front.
Thank You Card
1. Open an A4 size canvas, prepare your images as before and utilise the guides to split your canvas into quarters. Select the top-right quarter with a selection tool and fill it with a light pink colour and add a speckled texture in a slightly darker colour. Use the ellipse selection tool in the top-centre of the panel, then cut and paste onto another layer.
2. Delete or switch visibility off on the outer section to leave you with the textured focal circle. Use a dotted pen in white to draw a circle inside the patterned circle. Colour in your squirrel image and place it elsewhere on the A4 canvas. Scale and place the sentiment under the circle element, then print. Cut and trim the squirrel, then glue it into the card front.
Mini Motifs
1. Open an A4 size canvas, prepare your images as before and utilise the guides to split your canvas into quarters. Place the digi stamps in a row, scale them down and place the sentiment underneath. Select and flip everything by 90 degrees and place them in the centre of the top-right quarter as this will become the card front.
2. Place the light pink previously made pattern onto the other bottom half of the A4 canvas and print. Colour in the images with colouring pencils. Trim the front panel and patterned paper to size, then adhere them onto a 10.5cm x 15cm white blank.

To download our templates, simply click ‘Download Now!’ and it will open in your browser. Why not send us a picture of your project once you’re done? For your chance to be…
Home decor Home decorations Papercraft Papercrafter Party makes Templates

There’s nothing quite so relaxing, or quite so fun, as settling down with a good colouring page. It’s even better if that colouring page happens to include Wallace & Gromit. This duo…
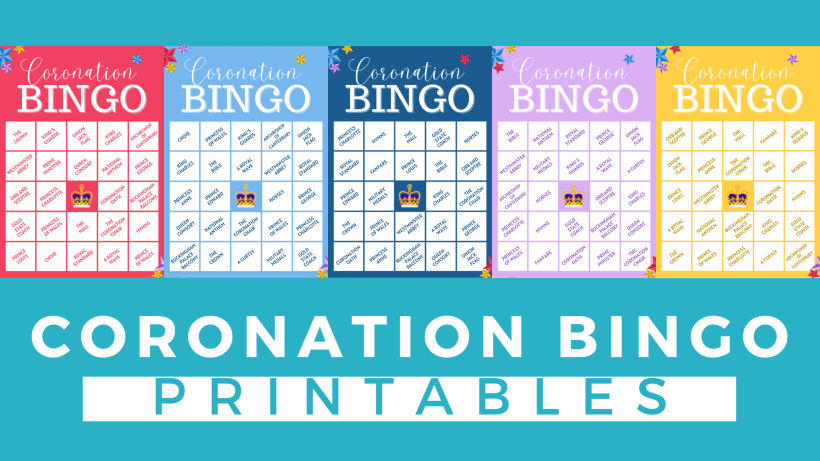
Gather your friends, get the TV on, bring a pen, and play Coronation Bingo! Extra points for prizes.
HOW TO PLAY
1. Each player will need one scorecard and a pile of…
.png)
Featuring motifs full of whimsy and joy, this Clearly Besotted digi stamp set is perfectly suited to wish someone a happy day. Use your nine-piece printable pack as many…
Birthday crafting Card making Papercraft Stamping Techniques


