


#vanlife has 12.2 million posts on Instagram – be part of it with our FREE cardmaking printables
Please login to download. Sign in here
Who watched Sue Perkins’ Big American Road Trip earlier this year? The Channel 4 programme explored the #vanlife phenomenon, and we’re sure you were a little bit tempted to buy the perfect vehicle and set off on your very own extended road trip. These exclusive papers by Millicent Venton celebrate exactly that with campers, gorgeous scenery, a map and on-the-road essentials. Oh, and a ‘honk if you love adventure’ sticker of course!
Craft with our new papers and you’re sure to inspire your next holiday. Got an intrepid pal? They’re perfect for that too! With our tutorials, you’ll learn how to turn A4 prints into three next-level cards, a bespoke gift bag and a wall hanging for caravan enthusiasts. Let’s hit the road…
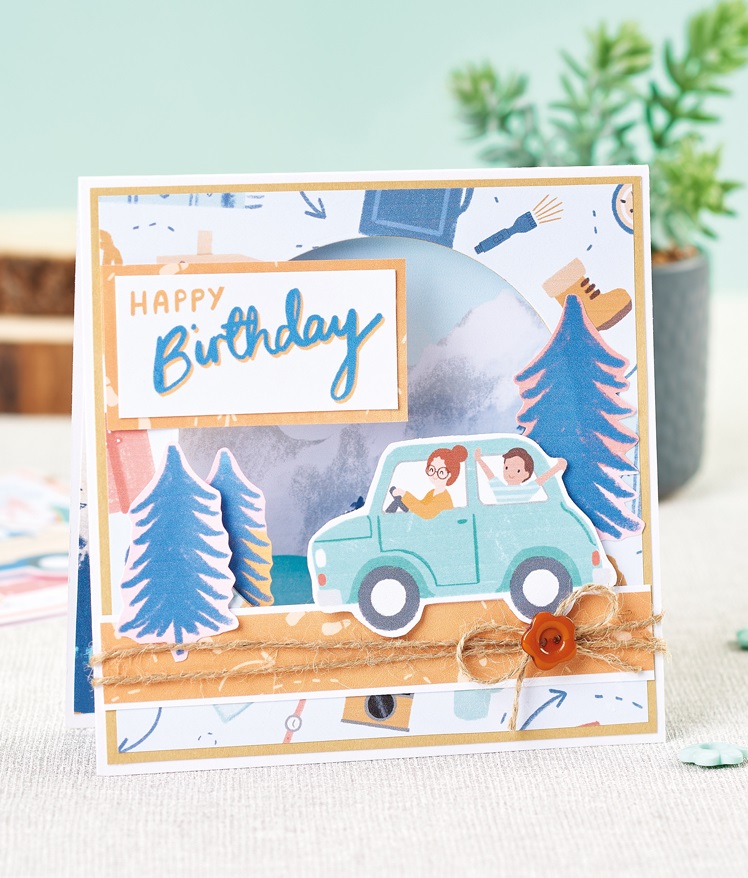
Birthday Road Trip Aperture Card
1. Matt camping paper, 13.5cm square, onto beige card and fix to the front of a 14.5cm square top-folding white blank. Die cut a 10.5cm circle through the front. Adhere scenic paper, 14cm square, inside. Layer footprint paper, 2cm x 14cm, onto white card and fix towards the bottom. Wrap thin jute twice around it twice.
2. Cut out three trees. Secure two either side of the aperture, then the other inside the aperture on the left-hand side. Cut out a sentiment, layer onto beige, then attach towards the top-left corner with 3D foam pads. Trim a car and fix on the right with 3D foam pads. Add a thin jute bow and flower button underneath.
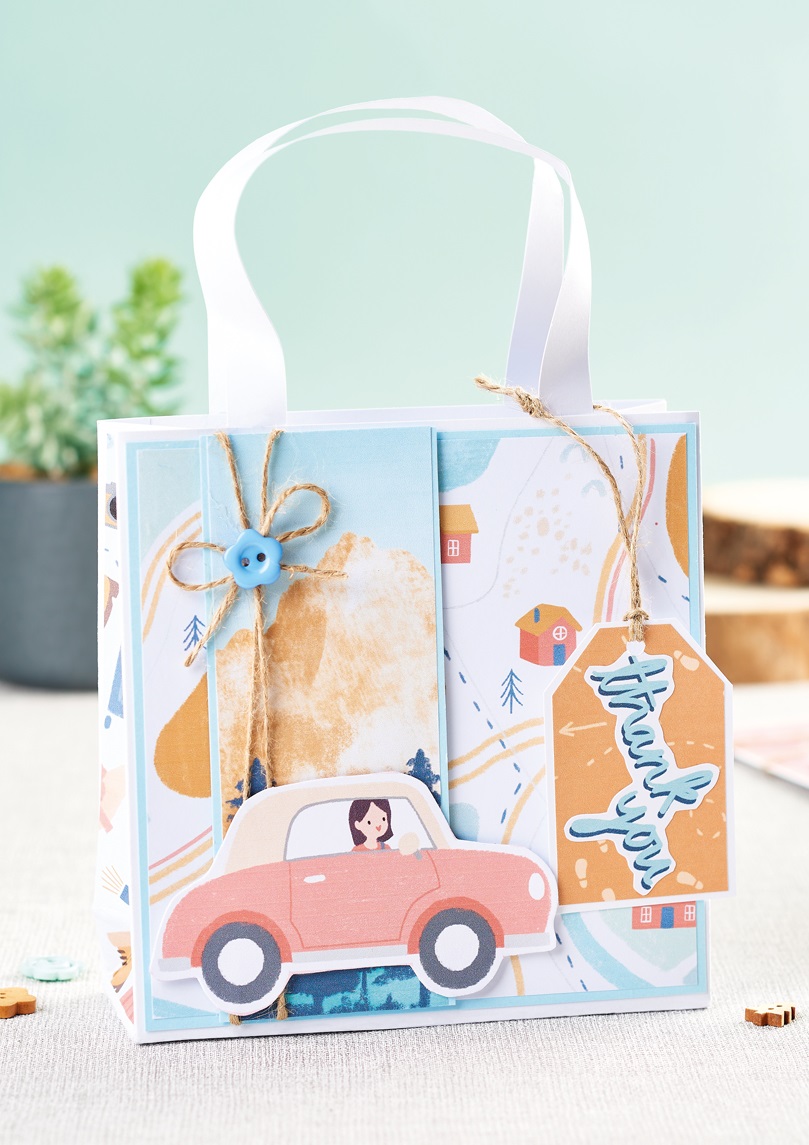
Road Trip Handmade Gift Bag
1. Trim white card to 20cm x 28cm. Score down from the long side at 1.5cm, 6.5cm, 21.5cm and 26.5cm. Turn, then score down at 5cm and score just the sides at 7.5cm.
2. Turn so the original score lines are at the top. Score down the centre of the sides to the first score line, then score a triangle to the second score line. Trim off the bottom two corner pieces, then snip up the vertical score lines to the first score line to create the base. Attach double-sided tape to the side flaps and base.
3. Cut white card to 15cm x 20cm and score down the long side at 5cm. Fold to create a flap for the base, then attach to the side flaps of the other piece of white card to make a gift bag. Fold and secure the base.
4. Matt map paper, 14cm square, onto pale blue card and add to the front. Adhere more patterned paper, 4.5cm x 14.5cm, to the sides. Layer mountain paper, 5.5cm x 14.5cm, onto pale blue. Wrap thin jute around it twice. Fix on the left with 3D foam pads. Add a thin jute bow and flower button at the top and a car towards the bottom.
5. Snip two 1.5cm wide strips of white card to 26cm long, then adhere to the top to create handles. Make a white tag, matt with footprint paper and add a sentiment on top. Punch a hole through the top, thread with thin jute, then tie to a handle.
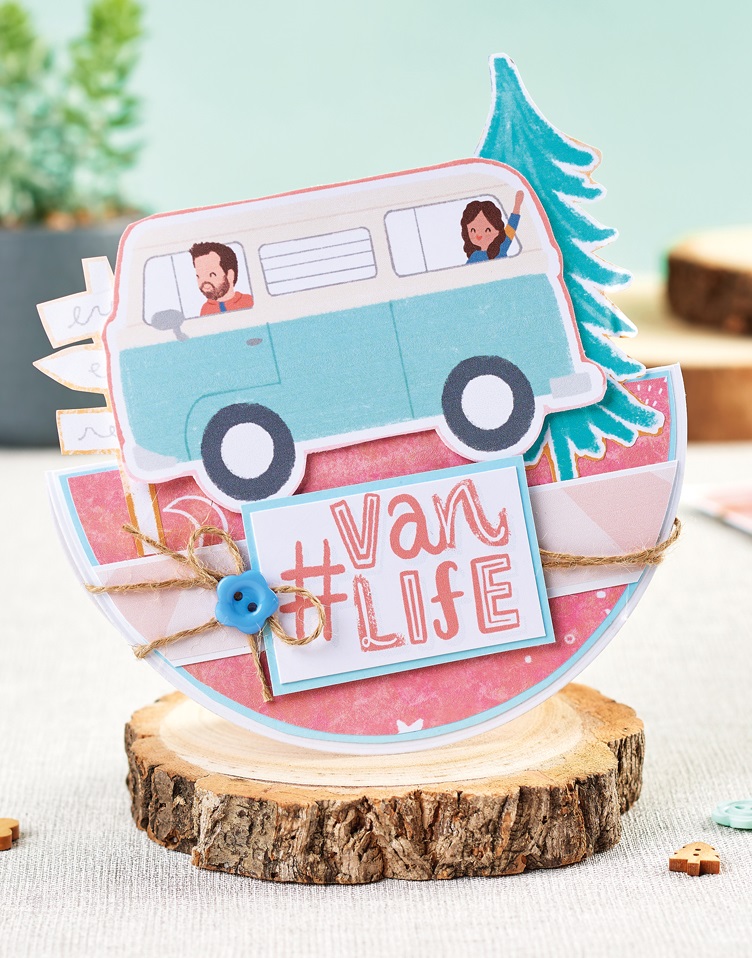
Van Life Rocker Card
1. Die cut a 15cm circle from white card, then score and fold in half to create a rocker card. Die cut a 14cm circle in moon paper and a 14.5cm circle from pale blue card. Cut in half, then matt together and fix to the front.
2. Layer contrasting paper, 2cm x 15cm, onto white card and adhere across the front, trimming each end to fit. Wrap thin jute around it twice. Secure a large tree, sign and campervan to white card to stabilise, then cut out.
3. Adhere the tree and sign above the border, then attach the campervan with 3D foam pads. Cut out ‘#vanlife’ and matt onto pale blue card. Fix below the campervan with 3D foam pads. Add a thin jute bow and flower button on the left-hand side.
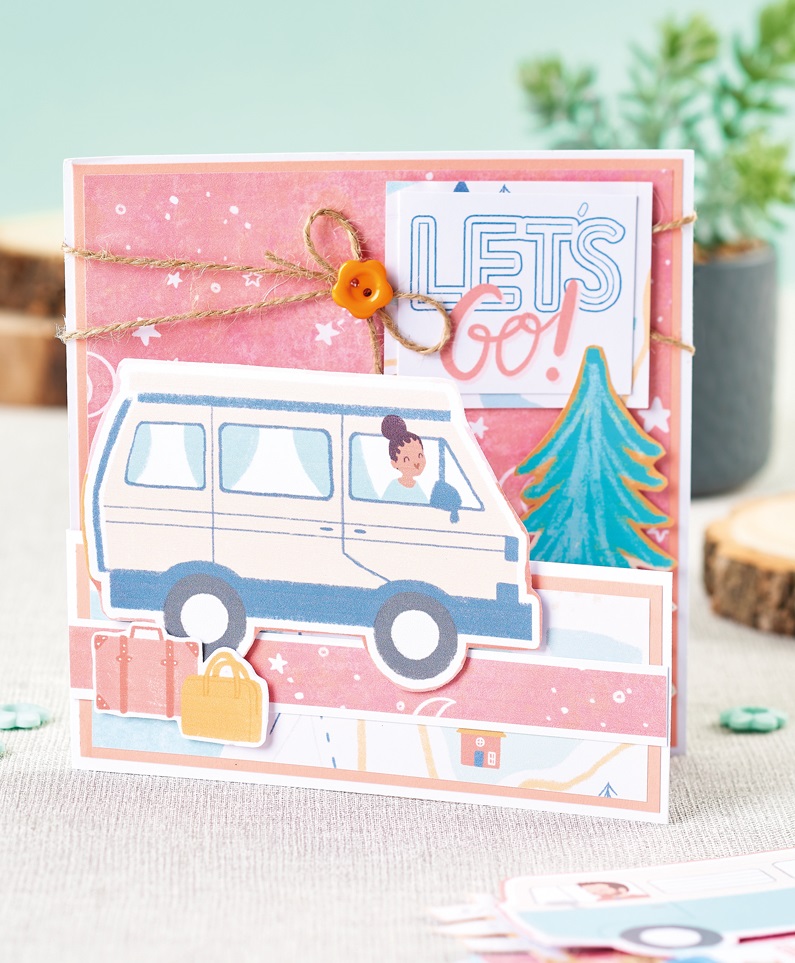
Van Life Half Front Card
1. Create a 15cm square white blank, then cut the front down to 6cm tall. Matt moon paper, 14cm square, onto peach card and adhere inside. Wrap thin jute around twice, towards the top.
2. Layer map paper, 4cm x 14cm, onto peach card, then fix to the front. Adhere a border of moon paper, 2cm x 15cm, onto white card, before securing across the front. Stick a campervan to white card to stabilise, then trim and attach to the front with 3D foam pads.
3. Add luggage toppers in the bottom-left corner. Snip our ‘Let’s go!’ sentiment, layer onto map paper and attach in the top-right corner. Secure a thin jute bow and flower button on the left of the sentiment. Cut out a tree and fix below with 3D foam pads.
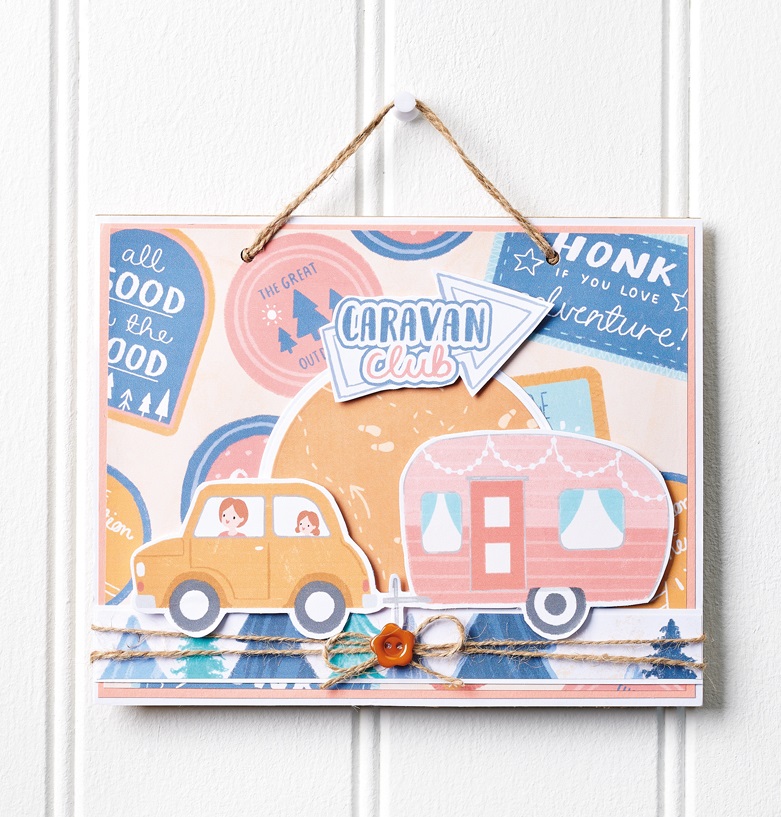
Caravan Club Hanging Sign
1. Trim cardboard to 16cm x 20cm and cover with white card. Layer signage paper, 15cm x 19cm, onto peach card and fix to the front. Die cut a 9.5cm circle from footprint paper, matt onto a white circle, then adhere in the centre. Cut out an arrow and attach to the top of the circle with 3D foam pads.
2. Matt tree paper, 2cm x 20cm, onto white card. Adhere towards the bottom. Wrap thin jute around it twice, then stick a thin jute bow and flower button in the centre. Cut out a car and caravan, then attach towards the bottom with 3D foam pads. Punch two holes through the top and thread with thin jute for hanging.
Loving our free papers? We’ve got lots more for you to enjoy.

To download our templates, simply click ‘Download Now!’ and it will open in your browser. Why not send us a picture of your project once you’re done? For your chance to be…
Home decor Home decorations Papercraft Papercrafter Party makes Templates

There’s nothing quite so relaxing, or quite so fun, as settling down with a good colouring page. It’s even better if that colouring page happens to include Wallace & Gromit. This duo…
Gather your friends, get the TV on, bring a pen, and play Coronation Bingo! Extra points for prizes.
HOW TO PLAY
1. Each player will need one scorecard and a pile of…
.png)
Featuring motifs full of whimsy and joy, this Clearly Besotted digi stamp set is perfectly suited to wish someone a happy day. Use your nine-piece printable pack as many…
Birthday crafting Card making Papercraft Stamping Techniques


