

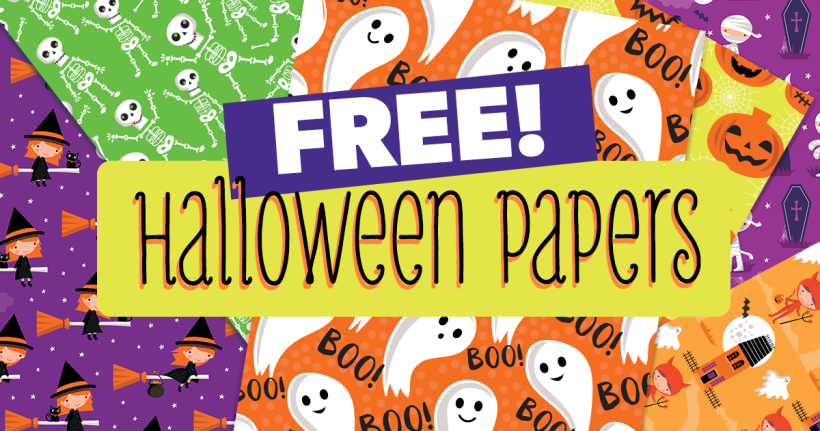


Halloween cards Halloween crafts Papercraft Papers
Celebrate All Hallows' Eve with our spooky (and somewhat kooky) prints!
Please login to download. Sign in here
Jane Farnham’s done it again! She’s designed a paper collection that has us eager to craft at the drop of a witch’s hat. With eerie yet adorable motifs (seriously, when has a red devil been so cute?) as well as ghoulish border strips and sentiments, there’s so much variety for your cardmaking. Not to mention the Halloween decoration possibilities! You must be dying to get going…
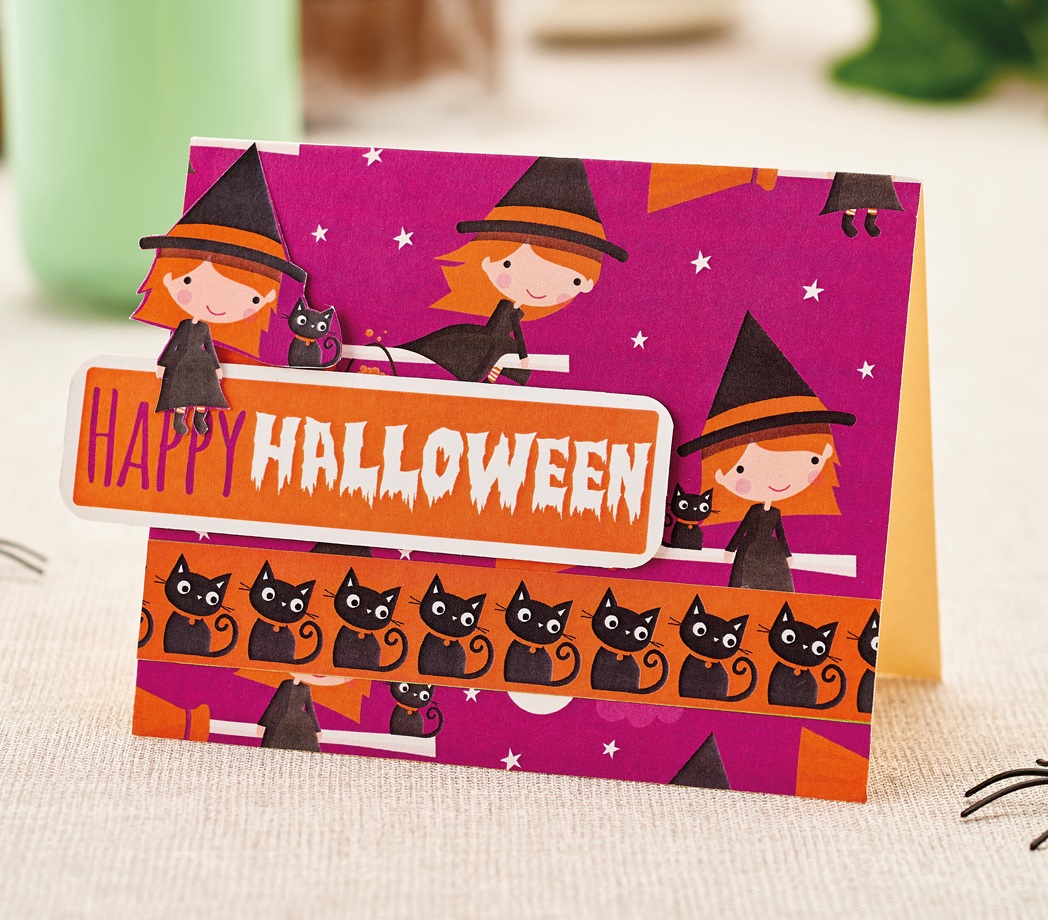
Halloween Witch Card
1. Create a 10.5cm x 13cm landscape blank and cover with witch paper, positioned so full images are in the top-right corner. Fix a cat border strip across the card, 1.5cm up from the bottom.
2. Stick a ‘Happy Halloween’ sentiment and a single witch motif onto thin card and cut out. Place above the border with the witch perched on top.
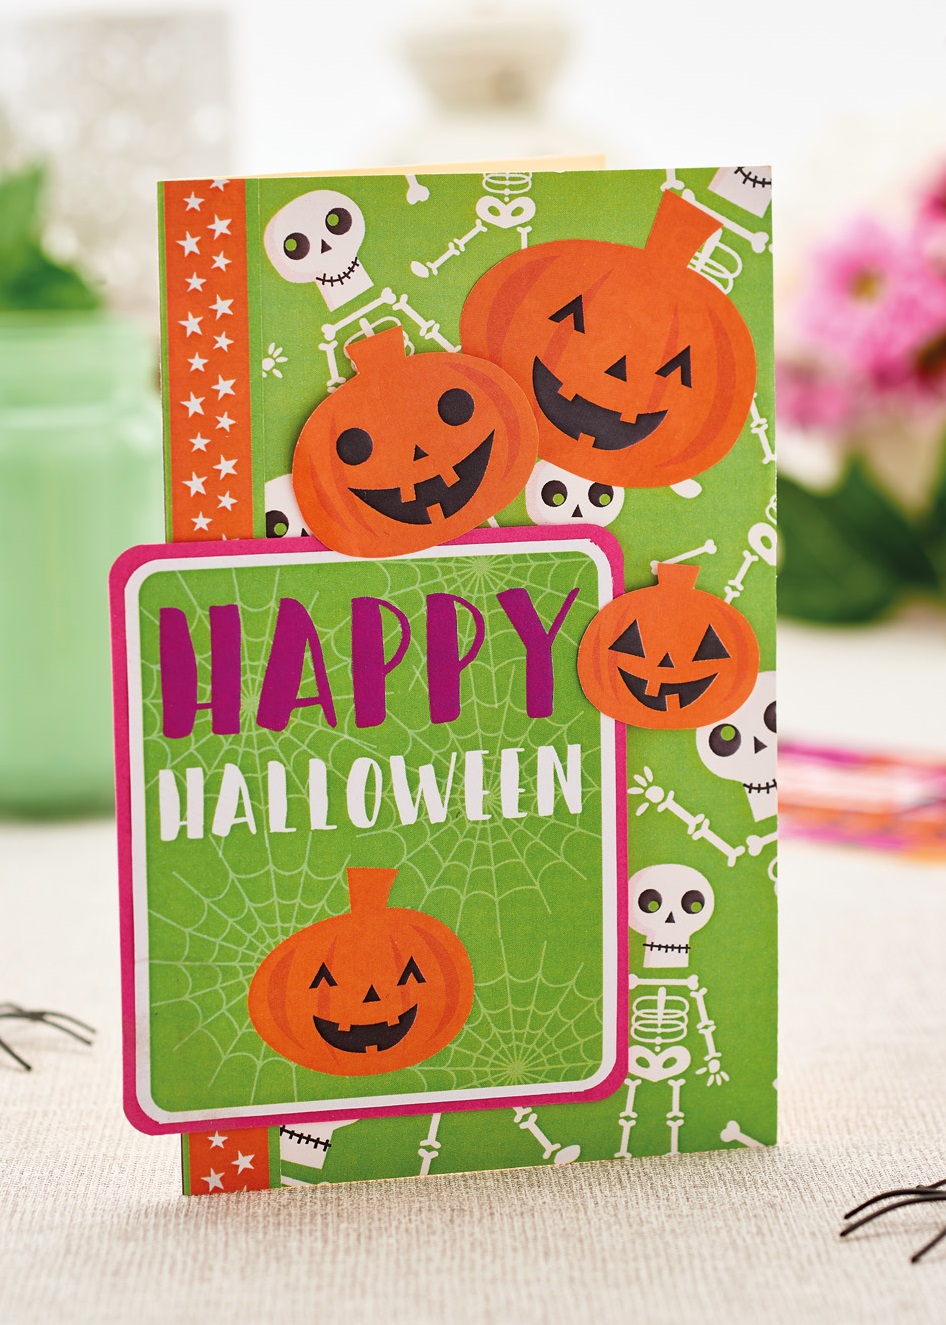
Halloween Pumpkin Card
1. Cover a 10.5cm x 15cm blank with our skeleton paper and fix a starry border strip down the left-hand side. Matt our ‘Happy Halloween’ sentiment onto bright pink card and trim to leave a narrow border. Place bottom-left on the card.
2. Cut out three pumpkin motifs and mount them onto thin card for extra stability – alternatively, print the motifs directly onto card. Fix the shapes in the top-right corner, using 3D foam pads for two of them.
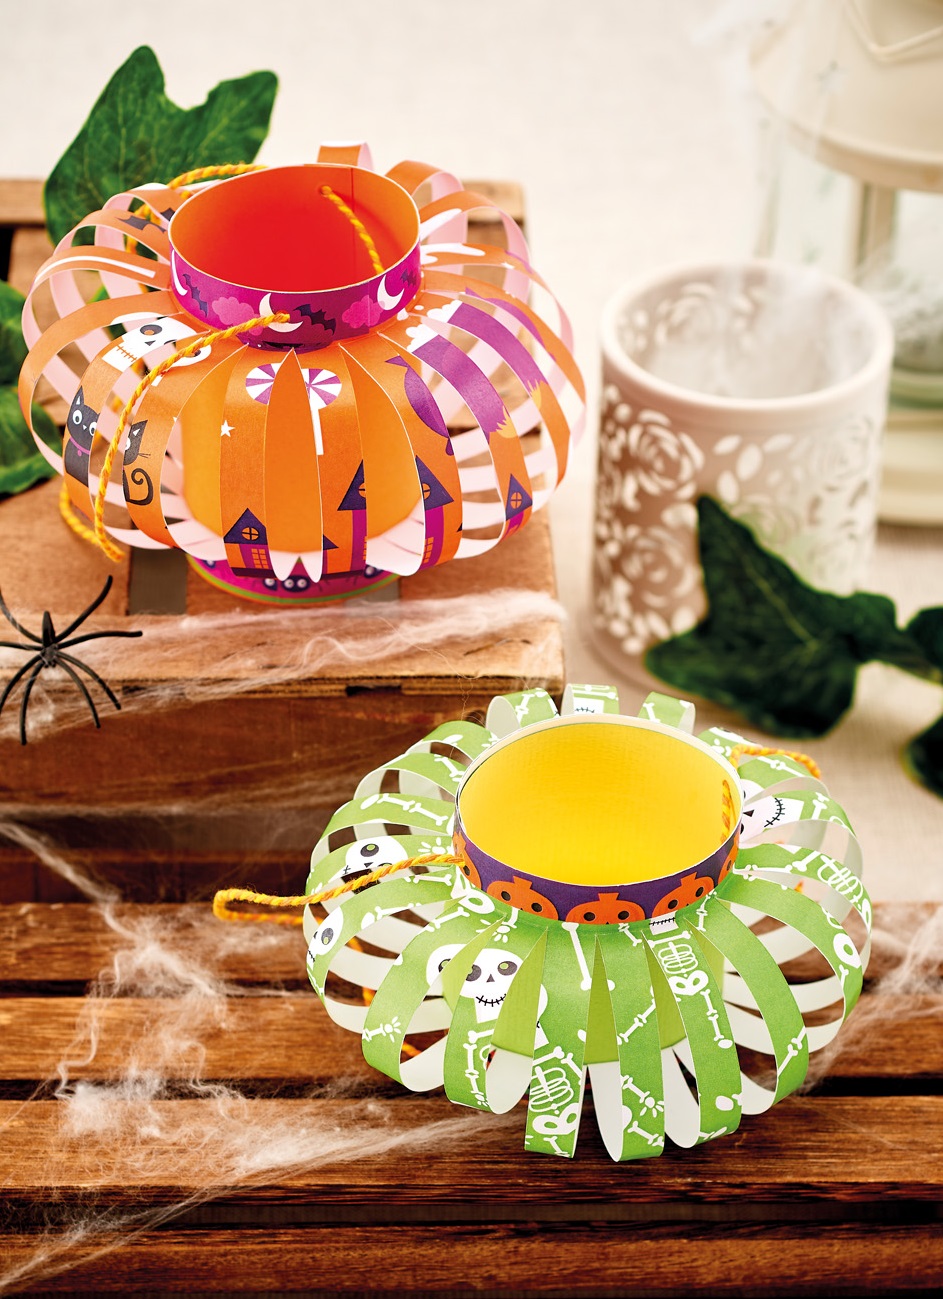
DIY Halloween Lanterns
1. Trim card to 9cm x 21cm and patterned paper to 14cm x 21cm. On the paper, snip a series of slits 1cm apart, leaving 1.5cm intact on the long sides.
2. Glue the long edges of the paper to the corresponding edges of the card, so the slotted sections curve. Bend the card into a tube and glue in place. Decorate the top and bottom sections with border strips and thread with baker’s twine for hanging.
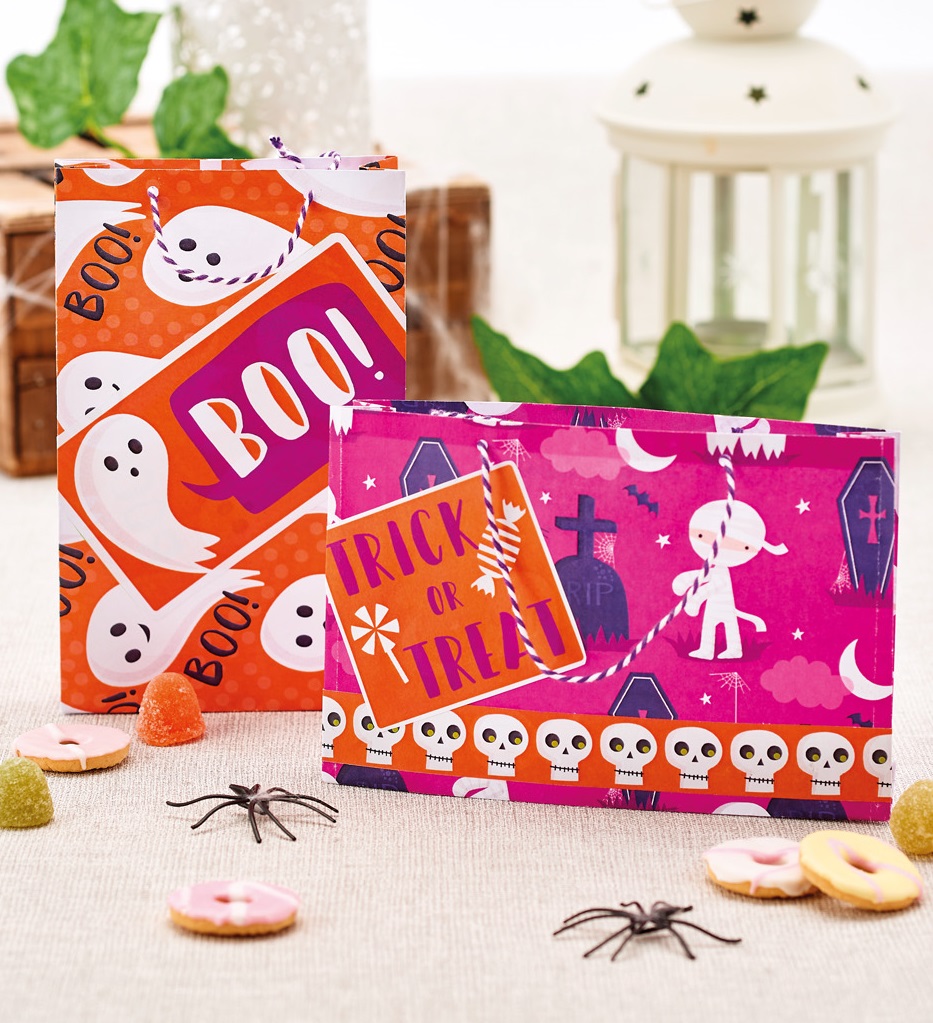
DIY Halloween Gift Bags
1. Place a sheet of our patterned paper face down and fold the sides to the middle, allowing them to overlap by at least 1cm. Glue the overlap to make a sleeve. Place your hand inside the sleeve and press down to refold the sides 4cm away from the first folds to make box sides.
2. Concertina crease the gusset between each pair of box folds, then unfold and flatten the bag. Crease the lower edge of the bag up, 4.5cm from the bottom. Unfold the top layer of the base and allow the sides to form triangles. Press these folds well before folding in 2.5cm of the top and bottom edges and glueing to make the base.
3. Place your hand inside the bag and push out the corners to make a flat bottom. Punch holes in the top edge of the bag and thread with baker’s twine to make handles. Decorate with sentiment panels and border strips.
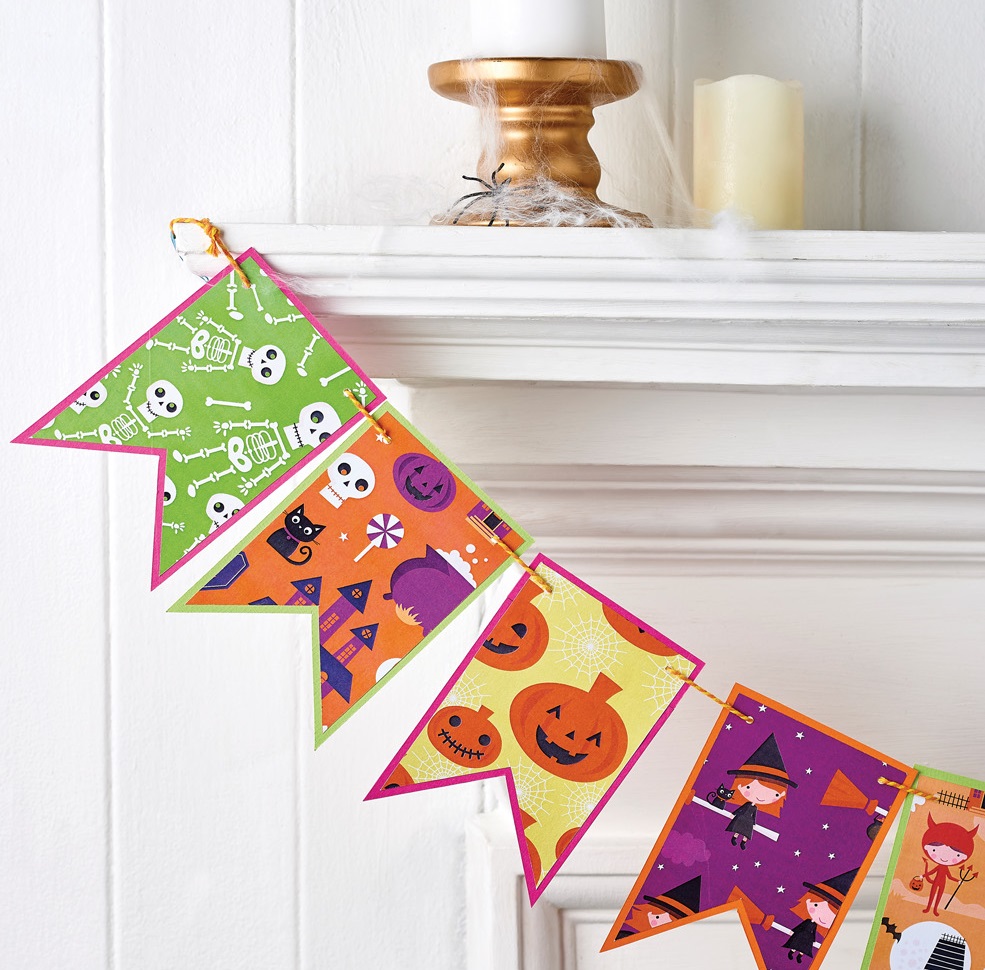
DIY Halloween Bunting
Cut several 8cm wide x 12cm deep pennant shapes from our patterned papers and mount onto 9cm x 13cm pennants cut from green, orange and pink card. Punch holes in the top corner of each and thread with coordinating baker’s twine to hang.
Loving our free papers? We’ve got lots more for you to enjoy.

To download our templates, simply click ‘Download Now!’ and it will open in your browser. Why not send us a picture of your project once you’re done? For your chance to be…
Home decor Home decorations Papercraft Papercrafter Party makes Templates

There’s nothing quite so relaxing, or quite so fun, as settling down with a good colouring page. It’s even better if that colouring page happens to include Wallace & Gromit. This duo…
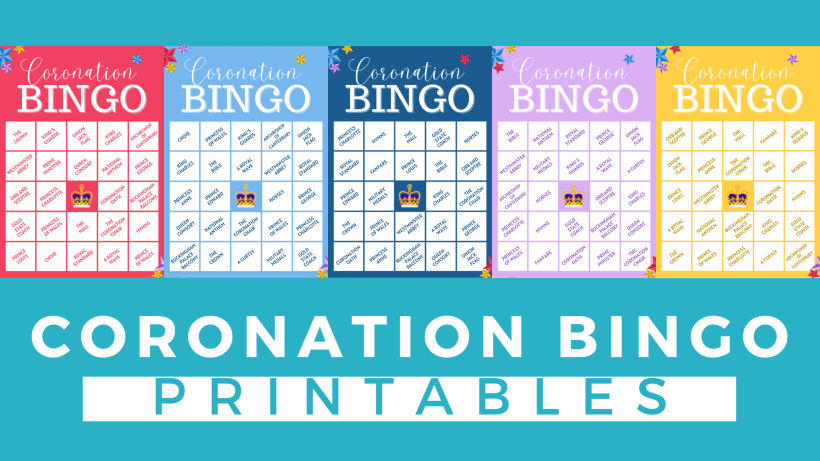
Gather your friends, get the TV on, bring a pen, and play Coronation Bingo! Extra points for prizes.
HOW TO PLAY
1. Each player will need one scorecard and a pile of…
.png)
Featuring motifs full of whimsy and joy, this Clearly Besotted digi stamp set is perfectly suited to wish someone a happy day. Use your nine-piece printable pack as many…
Birthday crafting Card making Papercraft Stamping Techniques


