

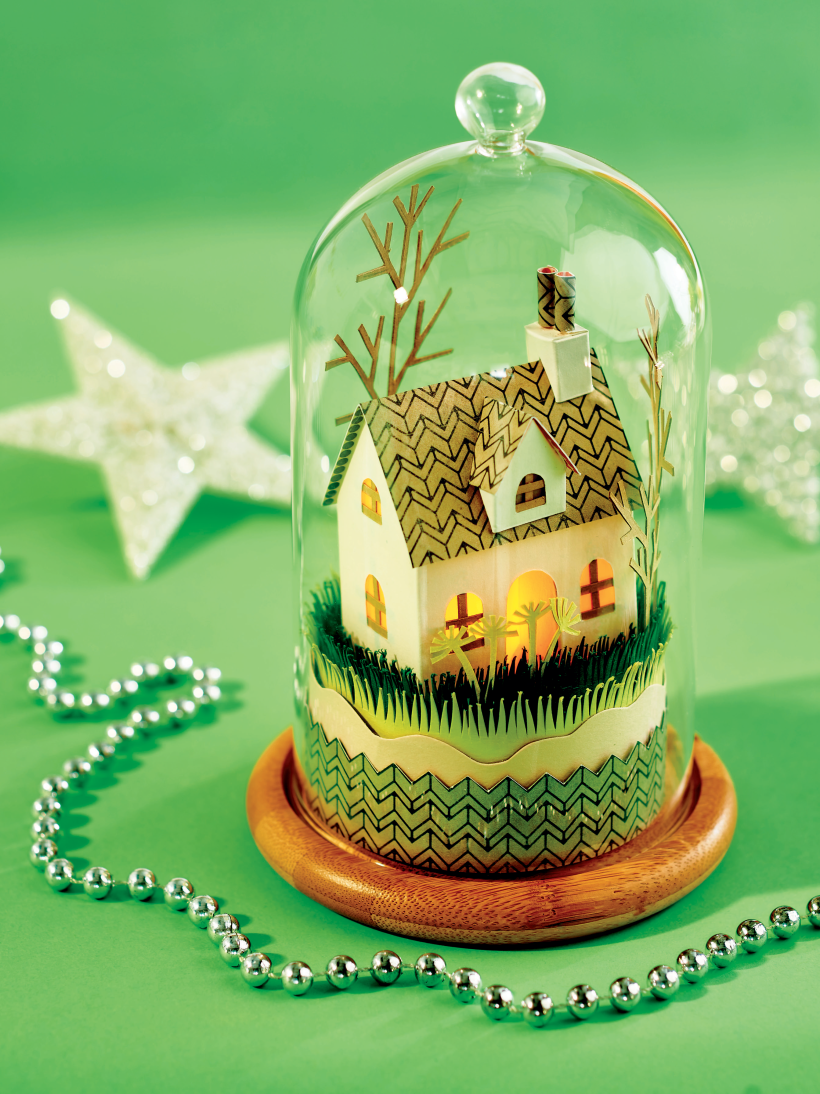


Create a home-in-a-dome that will become a talking point for all your guests. This adorable centrepiece by Corinne Bradd is a doddle to whip up and it’s sure to receive plenty of ‘oooh!’ and ‘ahhh’ noises from your friends – but you will know that it only took nine steps to make!
You Will Need:
Template
Cardstock
Kraft card
Patterned paper
Vellum
Scoring tool
Knitting needle
Glue
Battery tealight candle
Glass dome
• Download the templates here and print onto card. Cut out, score and fold to create a 3D house

• Cut out the windows and add thin strips of card behind the apertures to create frames. Back with vellum. Repeat for the dormer window

• Cut the roof from patterned card, then score and fold along the line. Glue the house to the underside the roof section and add the dormer to the front

• Fold up the chimney and stick on top, then roll small pieces of paper around a knitting needle and glue to make chimney pots

• Cut, fold and glue the cardboard platform base. Push a battery tealight candle through the top

• Lightly glue the platform stand to the wooden base to secure

• Clip a fringe along one long edge of three 3cm-wide strips of green card. Wrap around the lamp base, glue and trim excess

• Sketch thin trees onto kraft card and cut out with a craft knife. Glue the bases to the reverse of the concentric grass rings

• Trim edges into two final layers of card and wrap around the base. Encase the house inside a glass dome to finish


Busy lives often involve a lot of memos and reminders, and it can sometimes be hard to keep track. Luckily, we’ve got a sophisticated solution to keep your desk tidy and…

If you’re having a quiet Valentine’s with your beloved at home this year, make the place look a little more special with a speedy-to-make hearts frieze. Papercrafting doesn’t get much easier than…
Home decor Home decorations How to Papercraft Papercrafter Techniques Projects

1. Using a 3.5cm circle die, cut eight discs from chipboard and sixteen circles from patterned paper. Glue the patterned circles to either side of the discs and punch a…

Craft essentials
1. Cut a 5cm x 15cm strip of double-sided patterned paper and fold in half lengthways. Draw parallel pencil lines at 1.5cm and 2cm from the…


