

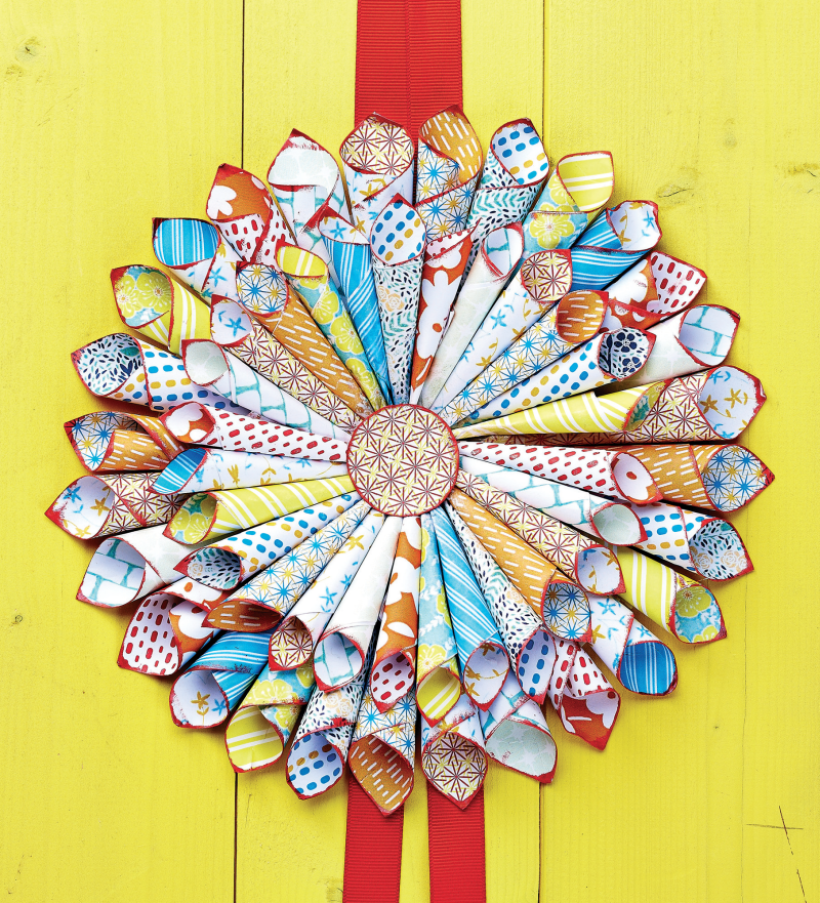


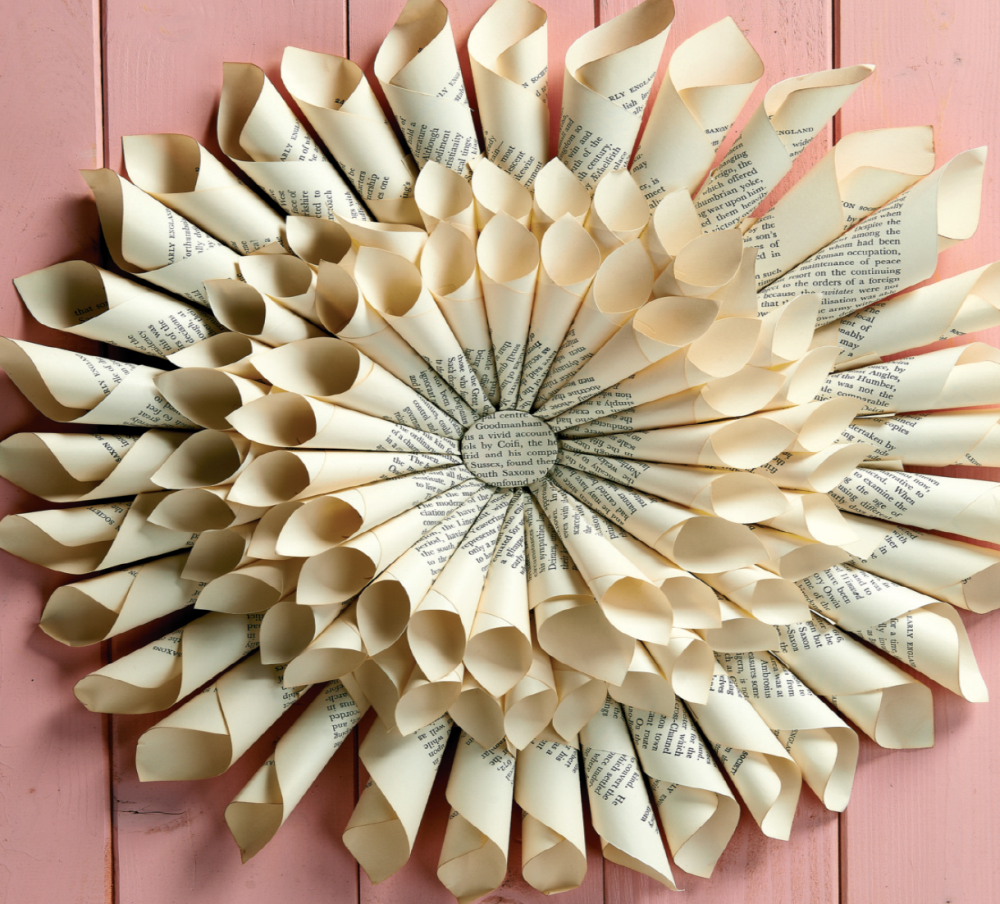
Turn vintage book papers or vibrant patterned papers into cones, then arrange them to make a stunning wreath
Give your home a stylish update with this beautiful project that really emphasises the fabulous, decorative qualities of the printed page. Once you’ve mastered how to create the cone shapes and seen the incredibly effective look that layering and grouping them achieves, you’ll be using this simple technique for a wealth of other projects. Elegant and arresting, our vintage book wreath would look delightful as a centrepiece in a simply dressed dining room or lounge and would be a rather finelooking playful reference in a study or above a desk. Plus, the wreath also works at almost any size and with any amount of ‘rings’ – one looks great, three look awesome. The fab thing about this project is that you can adapt it to suit your style.
YOU WILL NEED:
Old book, preferably printed on good quality smooth paper, at least A5 size OR patterned papers
Thick card
Double-sided tape
METHOD:
1. Make a base for the wreath by cutting a large circle from a sheet of thick A4 card.
2. Remove around 34 pages from the book. Neaten the spine side edge if necessary and trim each page down to a square, saving the leftover pieces.
3. Roll each square into a cone. Make this process easier by first rolling the paper around a narrow cylinder such as a pen.
4. Unroll and then ease into a tight cone with a top opening of about 3.5cm wide.
5. Secure the cone with a length of double-sided tape. Try and make all the cones the same size.
TRY IT WITH PATTERNED PAPERS
For a colourful alternative, cut 7cm and 5cm squares from six different double-sided prints. Roll each piece into a cone, flipping some pieces over to double the number of patterns shown on the outside of the cone. Arrange on a base circle of card as before and tape a loop of ribbon to the back to hang.

Busy lives often involve a lot of memos and reminders, and it can sometimes be hard to keep track. Luckily, we’ve got a sophisticated solution to keep your desk tidy and…

If you’re having a quiet Valentine’s with your beloved at home this year, make the place look a little more special with a speedy-to-make hearts frieze. Papercrafting doesn’t get much easier than…
Home decor Home decorations How to Papercraft Papercrafter Techniques Projects

1. Using a 3.5cm circle die, cut eight discs from chipboard and sixteen circles from patterned paper. Glue the patterned circles to either side of the discs and punch a…

Craft essentials
1. Cut a 5cm x 15cm strip of double-sided patterned paper and fold in half lengthways. Draw parallel pencil lines at 1.5cm and 2cm from the…


