


Easter crafts Home decor Home decorations How to Techniques Projects
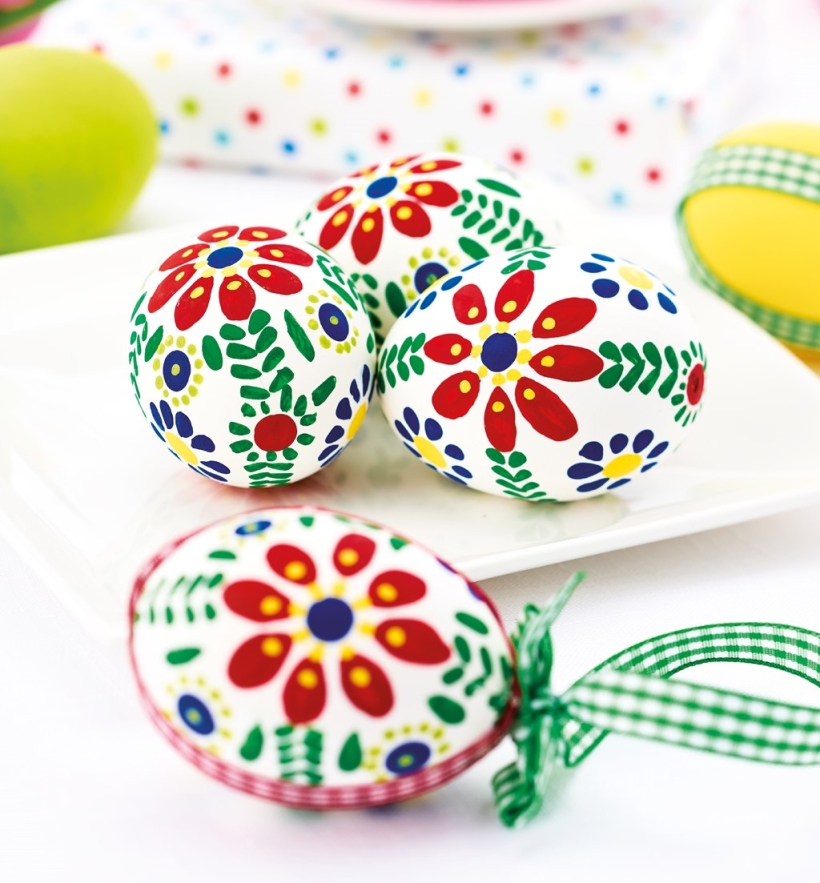
Forget chocolate and candy, hand-painted eggs are where it’s at! The art of decorating eggshells goes back centuries and remains a popular craft to do with children around Easter. Have a go at Amanda Walker’s set of folk-style decs and hang around them around your home for a showstopping display!
YOU WILL NEED:
White eggs, fresh or plastic
Acrylic paints
Paint brushes, assorted sizes
Ribbon, gingham
Adhesives: masking tape, spray
Glue gun
METHOD:
1. If using fresh eggs, clean any dirt from the shells first, using a solution of water with a sterilising tablet for babies’ bottles. Stick a piece of masking tape over the top and base of each egg – this helps to prevent the shell from cracking when pierced. Make a small hole at the top and a slightly larger one at the base with a needle or large pin. As you do this, push the needle into the egg and try to break up the yolk and white, making it slightly easier to remove.
2. Blow through the hole at the top of the egg to push the contents out through the base. Once some of the white has emerged, shake the egg vigorously to combine the yolk and white – the remains should then blow out with much less effort. Wash the inside of the egg out, again using a solution of sterilising fluid, and leave to dry thoroughly before decorating.
3. Coat each egg with white acrylic paint with a small sponge to create a flat, even colour. Hold the egg between the top and base, twisting it to cover the entire surface. Sponge the top and base to complete, then leave to dry. Using various sized paint brushes and coloured acrylics paints, add dots and dashes to mimic flowers and leaves, ensuring to dry the eggs inbetween each colour change.
4. Cut lengths of gingham ribbon long enough to wrap around the egg from top to bottom and up again. Spray the back of each piece with adhesive and stick them to the egg to create a segment effect. Snip another section of ribbon and tie a bow in one end, leaving a loop above. Using a hot glue gun, fix the bow to the top of the egg, neatly covering the ends of the wrapped ribbons.

Busy lives often involve a lot of memos and reminders, and it can sometimes be hard to keep track. Luckily, we’ve got a sophisticated solution to keep your desk tidy and…

If you’re having a quiet Valentine’s with your beloved at home this year, make the place look a little more special with a speedy-to-make hearts frieze. Papercrafting doesn’t get much easier than…
Home decor Home decorations How to Papercraft Papercrafter Techniques Projects

1. Using a 3.5cm circle die, cut eight discs from chipboard and sixteen circles from patterned paper. Glue the patterned circles to either side of the discs and punch a…

Craft essentials
1. Cut a 5cm x 15cm strip of double-sided patterned paper and fold in half lengthways. Draw parallel pencil lines at 1.5cm and 2cm from the…


