

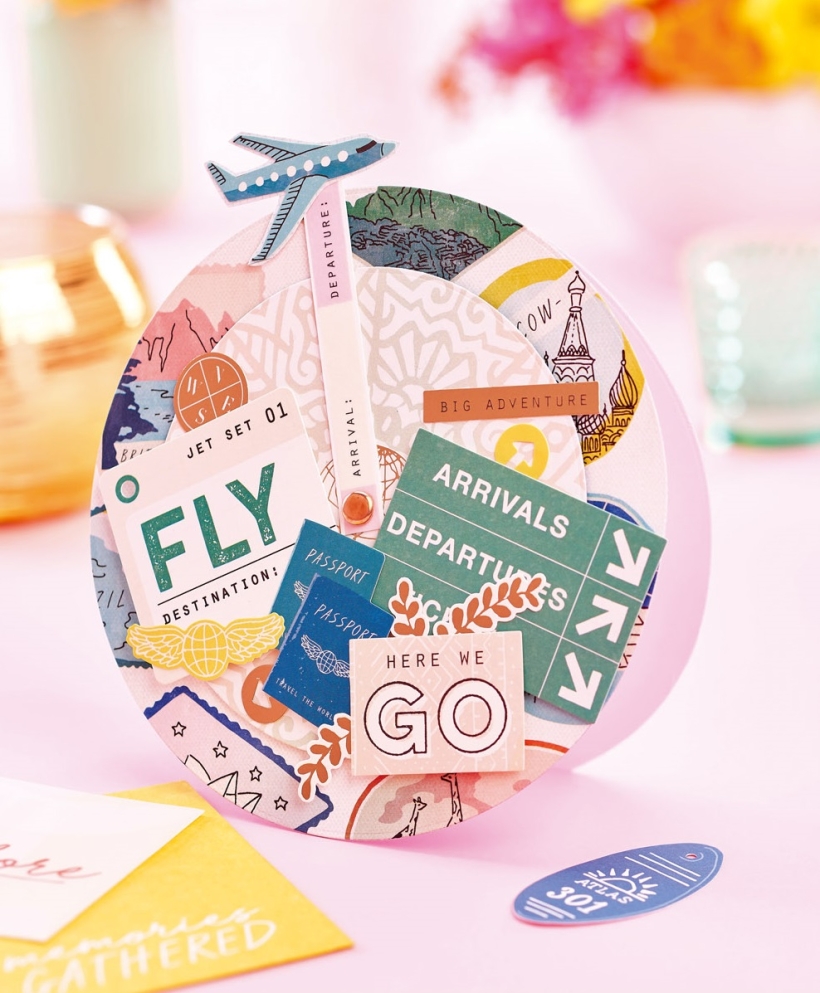


The plane flies back and forth on this travel-themed greeting thanks to a decorative brad – how clever!
YOU WILL NEED:
Patterned papers, travel-themed
Stickers and die-cuts, travel-themed
Washi tape, travel-themed
Card, white
Dies: 11.5cm circle, 15.5cm circle
Brad
Adhesives: glue, 3D foam pads
METHOD:
1. Score and fold 21cm x 29.7cm of white card in half, using a 15.5cm diameter circle die and keeping part of the top fold intact, die cut into a circular blank. Cover the card front with patterned city paper.
2. Trim the back of the greeting so that it has a flat edge and stands up. Die cut an 11.5cm circle from pink patterned paper, add a globe sticker to the centre, then fix to the card front.
3. Fix an aeroplane sticker to white card and cut out, leaving a narrow border. Adhere washi tape to an 8cm strip of white card, then fix one end behind the sticker. Stick the other end through the centre of the card front with a brad so that it moves.
4. Decorate the bottom of the greeting with stickers, die-cut shapes and a ‘Here we go’ sentiment. Adhere all of the elements to the greeting with 3D foam pads.

Busy lives often involve a lot of memos and reminders, and it can sometimes be hard to keep track. Luckily, we’ve got a sophisticated solution to keep your desk tidy and…

If you’re having a quiet Valentine’s with your beloved at home this year, make the place look a little more special with a speedy-to-make hearts frieze. Papercrafting doesn’t get much easier than…
Home decor Home decorations How to Papercraft Papercrafter Techniques Projects

1. Using a 3.5cm circle die, cut eight discs from chipboard and sixteen circles from patterned paper. Glue the patterned circles to either side of the discs and punch a…

Craft essentials
1. Cut a 5cm x 15cm strip of double-sided patterned paper and fold in half lengthways. Draw parallel pencil lines at 1.5cm and 2cm from the…


