


Card making Die cutting How to Stamping Techniques
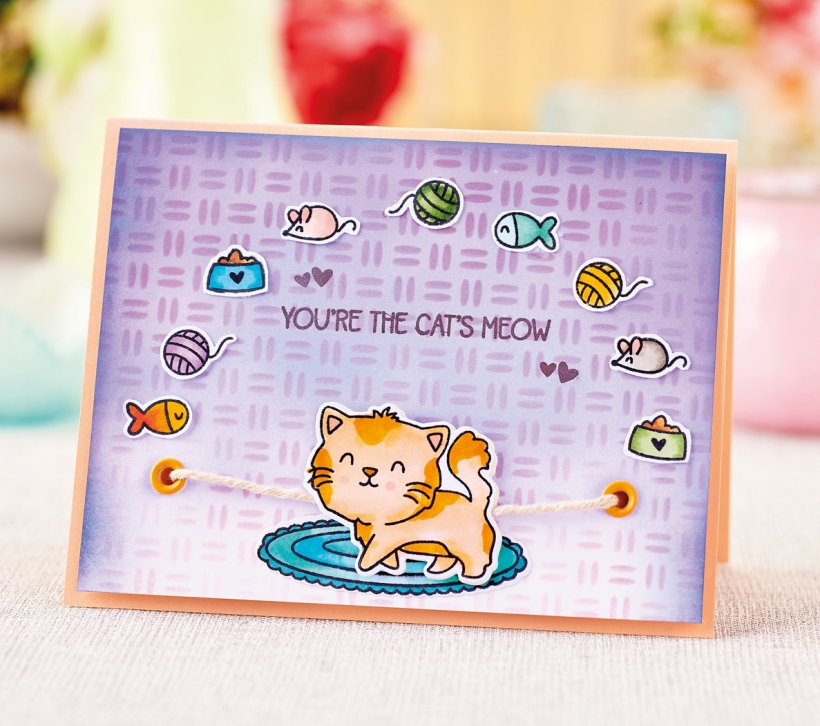
The cat on this uplifting card moves from side to side via a loop of string
YOU WILL NEED:
Stamps, Avery Elle Whiskers
Dies, Avery Elle Whiskers
Stencil, Heffy Doodle Wonderfully Woven
Punch, hole
Cardstock: peach, white
Ink pads: Ranger Distress Oxide Dusty Concord, Shaded Lilac; brown
Embellishments: string or yarn, orange eyelets
Ranger Glossy Accents
Eyelet setter
Alcohol markers
Adhesives: foam tape, 3D foam pads, wet glue
Die-cutting machine
METHOD:
1. Create an 11cm x 14cm peach landscape blank. Cut white card to 10cm x 13cm. Blend purple distress oxide inks from the top downwards. Apply darker distress oxide ink through a woven stencil. Stamp a sentiment and small hearts in brown ink near the centre of the card.
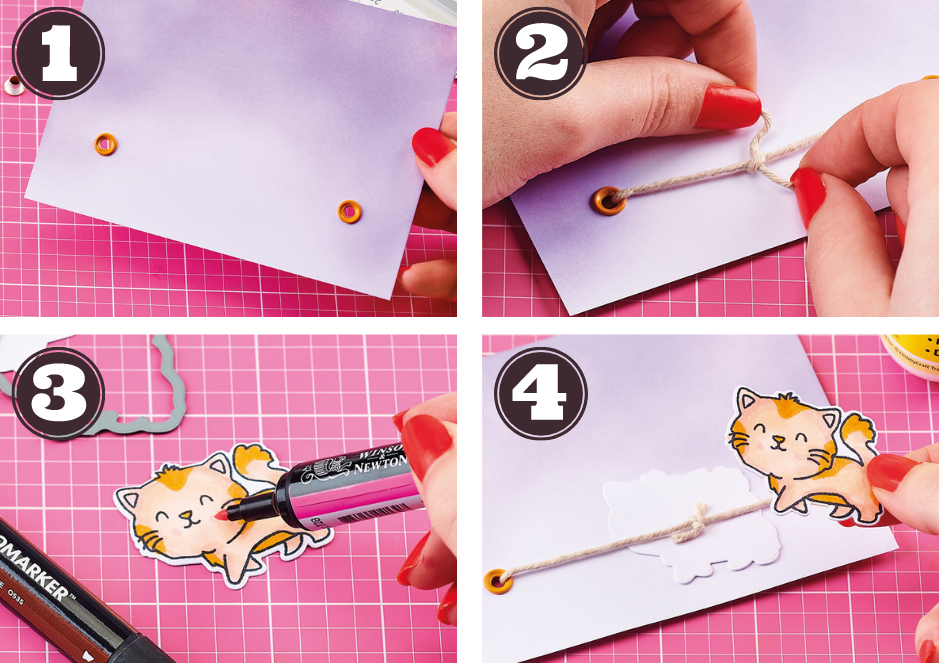
2. Follow the step-by-step below to make the kinetic element. Punch two holes in the inked panel, 1.5cm in from the sides and 2cm up from the bottom, then set with orange eyelets. Tie string between the eyelets, leaving the knot at the front – don’t make it too tight or the cat won’t move smoothly! Stamp a cat onto white and colour in, then die cut. Die cut an additional cat from white card. Sandwich the knot of the string between the two cats using wet glue, then hold firmly to dry.
3. Use a double layer of foam tape to adhere the panel to the greeting. Stamp a rug and assortment of smaller images, then colour with alcohol markers. Cut out using the coordinating dies. Arrange the smaller images in an arc around the sentiment, then add the rug so the cat sits on it. Apply Glossy Accents to the cat’s nose.

Busy lives often involve a lot of memos and reminders, and it can sometimes be hard to keep track. Luckily, we’ve got a sophisticated solution to keep your desk tidy and…

If you’re having a quiet Valentine’s with your beloved at home this year, make the place look a little more special with a speedy-to-make hearts frieze. Papercrafting doesn’t get much easier than…
Home decor Home decorations How to Papercraft Papercrafter Techniques Projects

1. Using a 3.5cm circle die, cut eight discs from chipboard and sixteen circles from patterned paper. Glue the patterned circles to either side of the discs and punch a…

Craft essentials
1. Cut a 5cm x 15cm strip of double-sided patterned paper and fold in half lengthways. Draw parallel pencil lines at 1.5cm and 2cm from the…


